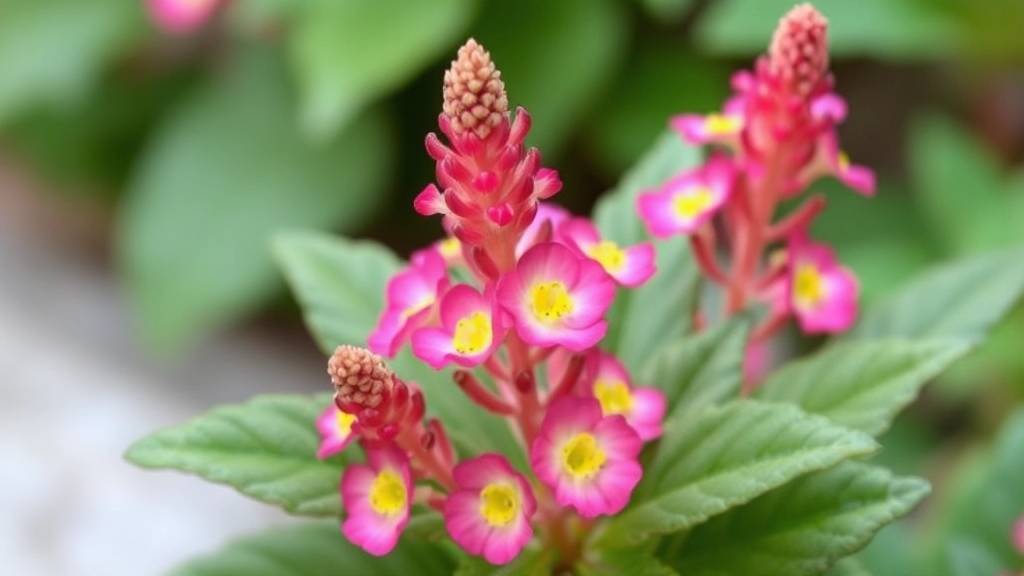
Understanding Kalanchoe Seeds
Ever wondered, “What do Kalanchoe seeds look like?” You’re not alone. These tiny seeds are a gardener’s delight but can be tricky to identify. Typically, Kalanchoe seeds are minuscule, almost dust-like, making them easy to overlook. Their colour ranges from light brown to almost black, and they often require a keen eye to spot.
Harvesting Kalanchoe Seeds
Harvesting Kalanchoe seeds involves patience and precision. Once the flowers have faded, you’ll find seed pods that need to be carefully collected. Proper storage is crucial for maintaining seed viability. Store them in a cool, dry place to ensure they last until you’re ready to sow.
Next Steps
Ready to dive deeper into the world of Kalanchoe? Let’s explore the steps for successful germination and more.
Characteristics of Kalanchoe Seeds
When embarking on the journey of growing Kalanchoe from seeds, understanding their characteristics is crucial.
Kalanchoe seeds are notably small and lightweight, which can make handling them a bit tricky.
Here are some key features to keep in mind:
- Size: Kalanchoe seeds are tiny, often measuring just 1-2 mm in length.
- Shape: They are typically flat and oval, resembling tiny specks of dust.
- Viability: Fresh seeds have a higher germination rate, so using seeds collected within the last year is advisable.
- Color: Most Kalanchoe seeds are dark brown or black, making them easier to spot against lighter soil.
These seeds are produced in small clusters within the plant’s flowers, which means you may find several seeds in one flower head. For more detailed tips on growing these beautiful plants, check out our expert tips for thriving Kalanchoe plants. Additionally, if you’re dealing with any issues, our guide on fixing etiolated Kalanchoe Blossfeldiana can be very helpful.
How to Harvest Kalanchoe Seeds

So, you’ve nurtured your Kalanchoe plant, and now you’re wondering how to get those precious seeds, right? Harvesting Kalanchoe seeds can be a rewarding experience, and it’s easier than you might think!
Timing is Everything
First off, timing is crucial. You want to wait until the flowers have fully bloomed and started to fade.
- Look for Seed Pods: After flowering, you’ll notice seed pods forming.
- Wait for Dryness: Allow the pods to dry out on the plant. They should turn brown and feel crispy to the touch.
The Harvesting Process
Once those pods are ready, it’s time to gather your seeds!
- Gather Your Tools: Grab a pair of scissors or pruning shears.
- Cut the Pods: Snip the dried seed pods carefully from the stem.
- Collect the Seeds: Open the pods gently over a clean, dry surface. You’ll see tiny seeds spilling out.
- Separate the Seeds: Remove any debris or chaff. You want just the seeds.
Store Your Seeds
After harvesting, it’s essential to store your seeds properly to ensure they stay viable.
- Use an Airtight Container: A small jar or envelope works well.
- Cool and Dark Place: Keep them in a cool, dark spot to prolong their lifespan.
And that’s it! You’ve successfully harvested Kalanchoe seeds.
Storing Kalanchoe Seeds for Longevity
After successfully harvesting Kalanchoe seeds, the next crucial step is ensuring their longevity through proper storage. Many gardeners worry about how to keep their seeds viable for future planting.
Key Considerations for Storing Kalanchoe Seeds:
- Drying: Ensure the seeds are completely dry before storage. Moisture can lead to mould and decay.
- Containers: Use airtight containers, such as glass jars or vacuum-sealed bags, to protect the seeds from air and humidity.
- Temperature: Store the seeds in a cool, dark place. Ideal temperatures range between 5°C to 10°C (41°F to 50°F).
- Labeling: Clearly label your containers with the seed type and date of storage. This helps in tracking their age and viability.
- Desiccants: Including silica gel packets can help absorb any residual moisture, further safeguarding your seeds.
By following these steps, you can significantly extend the shelf life of your Kalanchoe seeds, ensuring they remain viable for future planting. For more detailed guidance on Kalanchoe care, you might find our Mother of Thousands care guide and Flapjack care guide useful.
Ideal Conditions for Sowing Kalanchoe Seeds
When it comes to sowing Kalanchoe seeds, many gardeners wonder about the optimal conditions for successful germination.
Light Requirements
- Kalanchoe seeds thrive in bright, indirect sunlight.
- A south-facing window is ideal, as it provides ample light without overwhelming the delicate seeds.
Temperature
- Aim for a temperature range of 20-25°C (68-77°F).
- Too cold or too hot can hinder germination, so maintaining a stable environment is crucial.
Soil Type
- Use a light, well-draining potting mix.
- A cactus or succulent mix works wonderfully, as it prevents water retention that can lead to rot.
Moisture Levels
- Keep the soil slightly moist but not soggy.
- Watering from the bottom can help maintain the right moisture level without over-saturating the seeds.
Humidity
- Moderate humidity levels are best.
- A humidity dome can be beneficial, but ensure to ventilate to prevent mould growth.
Timing
- The best time to sow Kalanchoe seeds is in spring or early summer.
- This aligns with their natural growing season, enhancing the chances of successful germination.
Steps for Successful Kalanchoe Seed Germination
Are you excited about growing Kalanchoe from seeds but unsure how to get started with germination? You’re not alone. Many gardeners face challenges during this crucial stage.
To ensure successful Kalanchoe seed germination, follow these straightforward steps:
Transplanting Kalanchoe Seedlings
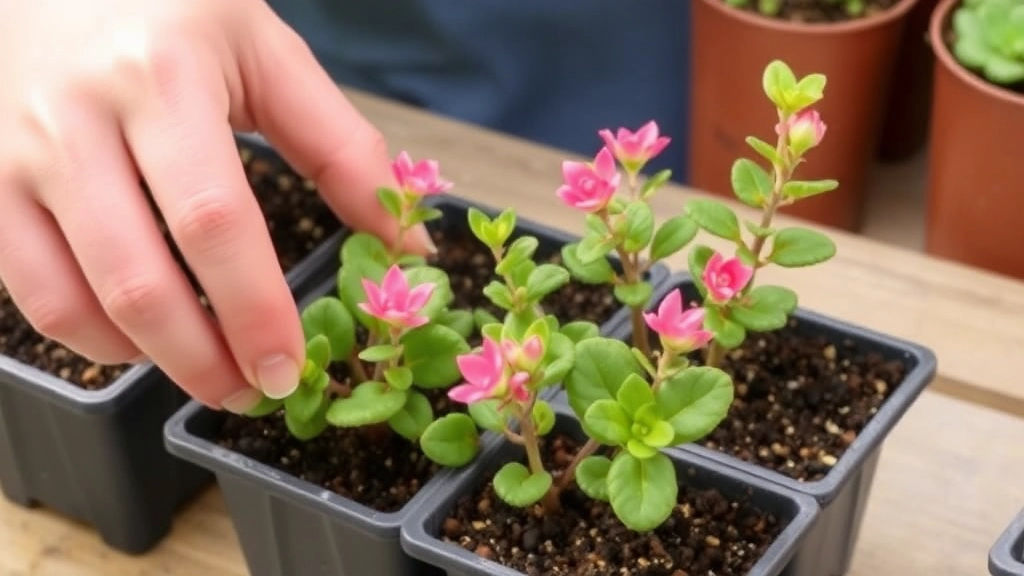
So, you’ve successfully germinated your Kalanchoe seeds, and those little green sprouts are ready for their next big adventure! Transplanting seedlings can feel a bit daunting, but it’s a crucial step to ensure your plants thrive. Let’s dive into how to do it right.
When to Transplant
Timing is everything!
- Wait for the right size: Your seedlings should have at least two sets of true leaves before moving them. This usually takes about 4-6 weeks after germination.
- Check the weather: Ideally, transplant on a cloudy day or in the evening to reduce stress on the plants.
Preparing for Transplanting
Before you dig in, here’s what you need to set up:
- Choose the right pots: Opt for small pots with drainage holes. Clay or plastic works well.
- Soil mix: Use a well-draining potting mix. A cactus mix or a blend of potting soil and perlite is perfect.
- Water the seedlings: Give them a gentle drink a few hours before transplanting. This helps them adjust.
The Transplanting Process
Here’s a step-by-step guide to make it easy:
- Gently remove seedlings: Carefully lift the seedlings from their tray. Use a small tool or your fingers to avoid damaging the roots.
- Make a hole in the new pot: Use your finger or a pencil to create a hole deep enough for the roots.
- Place the seedling: Position the seedling in the hole, ensuring the roots are straight and not cramped.
- Cover with soil: Gently pack the soil around the base of the seedling, but don’t bury the leaves!
- Water lightly: After transplanting, give them a light watering to settle the soil around the roots.
Aftercare
Now that your seedlings are in their new homes, here’s how to keep them happy:
- Light: Place them in a spot with bright, indirect sunlight. Too much direct sun can scorch them.
- Humidity: Keep the humidity level up by misting them occasionally or covering them with a clear plastic dome until they’re established.
- Monitor water: Check the soil moisture regularly. You want it to be slightly moist, not soggy.
Common Challenges in Growing Kalanchoe from Seeds
Growing Kalanchoe from seeds can be a rewarding experience, but it often comes with its own set of challenges. Understanding these hurdles can help you navigate the process more smoothly.
1. Low Germination Rates
One of the biggest concerns is the low germination rate of Kalanchoe seeds. Many gardeners find that not all seeds sprout, which can be disheartening.
- Ensure seeds are fresh and viable.
- Use a sterile seed-starting mix to boost germination.
- Maintain consistent moisture without overwatering.
2. Temperature Sensitivity
Kalanchoe seeds thrive in specific temperature ranges. If the environment is too cold or too hot, germination can be affected.
- Aim for temperatures between 20°C to 25°C (68°F to 77°F).
- Avoid placing seed trays near drafts or direct heat sources.
3. Light Requirements
These plants require adequate light for successful growth. Insufficient light can lead to leggy seedlings that struggle to thrive.
- Provide 12-16 hours of indirect sunlight daily.
- Consider using grow lights if natural light is limited.
4. Pests and Diseases
Like all plants, Kalanchoe seedlings can fall prey to pests and diseases. This can hinder their growth and health.
- Regularly inspect your seedlings for signs of pests like aphids or mealybugs.
- Use organic pest control methods to minimise damage.
5. Transplant Shock
Transplanting seedlings can be stressful for them. This shock can stunt their growth or even lead to failure.
- Handle seedlings gently during transplanting.
- Ensure the new pots have well-draining soil to facilitate recovery.
6. Nutrient Deficiency
Young Kalanchoe plants may struggle if they lack essential nutrients. This can result in poor growth and yellowing leaves.
Tips for Ensuring Healthy Kalanchoe Growth
So you’ve got your Kalanchoe seeds germinating and those little seedlings are starting to peek through the soil. Now what? Ensuring healthy Kalanchoe growth is crucial for vibrant, thriving plants.
Here are some straightforward tips to keep your Kalanchoe happy and healthy:
- Light it Up: Kalanchoes love bright, indirect sunlight. If they’re not getting enough light, they’ll stretch and become leggy. Consider placing them near a window, but avoid harsh direct sun.
- Water Wisely: Overwatering is a common killer. Let the soil dry out between waterings. A good rule of thumb is to water when the top inch of soil feels dry.
- Temperature Check: Keep your Kalanchoe in a warm spot, ideally between 18°C and 24°C. They don’t like the cold, so avoid drafts or chilly rooms.
- Feed Sparingly: Use a balanced, water-soluble fertiliser every few weeks during the growing season (spring and summer). Too much fertiliser can harm your plant.
- Prune for Growth: Don’t be shy about pruning. Snipping off dead or wilting leaves encourages new growth and keeps the plant looking tidy. For more detailed tips, check out our Florist Kalanchoe Pruning Guide.
- Pest Patrol: Keep an eye out for pests like mealybugs and aphids. If you spot any, a gentle wash with soapy water can usually do the trick.
- Repot When Needed: If your Kalanchoe starts to outgrow its pot, it’s time to repot. Choose a slightly larger pot with drainage holes to prevent waterlogging. If you’re unsure how to proceed, our Kalanchoe Leaf Propagation Guide can offer some insights.
Frequently Asked Questions about Kalanchoe Seeds
What do Kalanchoe seeds look like?
Kalanchoe seeds are quite tiny and can be challenging to see with the naked eye. They are usually small, brown, and resemble fine dust or sand particles.
When is the best time to harvest Kalanchoe seeds?
The best time to harvest Kalanchoe seeds is after the flowers have fully bloomed and started to fade. Wait until the seed pods have dried out on the plant and turned brown and crispy.
How do I know when the seed pods are ready to be harvested?
Seed pods are ready to be harvested when they have dried out, turned brown, and feel crispy to the touch. This usually happens after the flowering phase.
What tools do I need to harvest Kalanchoe seeds?
You will need a pair of scissors or pruning shears to snip the dried seed pods from the stem. It’s also helpful to have a clean, dry surface to collect the seeds.
How should I store harvested Kalanchoe seeds?
Store the harvested seeds in an airtight container, such as a small jar or envelope. Keep them in a cool, dark place to ensure they remain viable for future planting.
What are the ideal conditions for sowing Kalanchoe seeds?
Kalanchoe seeds thrive in bright, indirect sunlight with a temperature range of 20-25°C (68-77°F). Use a light, well-draining potting mix and keep the soil slightly moist but not soggy. Moderate humidity levels are also beneficial.
When is the best time to sow Kalanchoe seeds?
The best time to sow Kalanchoe seeds is in spring or early summer, aligning with their natural growing season to enhance the chances of successful germination.
When should I transplant Kalanchoe seedlings?
Transplant Kalanchoe seedlings when they have at least two sets of true leaves, usually about 4-6 weeks after germination. It’s best to do this on a cloudy day or in the evening to reduce stress on the plants.
What type of soil should I use for transplanting Kalanchoe seedlings?
Use a well-draining potting mix, such as a cactus mix or a blend of potting soil and perlite. This helps prevent water retention that can lead to root rot.
How should I care for Kalanchoe seedlings after transplanting?
Place the transplanted seedlings in a spot with bright, indirect sunlight. Maintain moderate humidity levels by misting occasionally or using a clear plastic dome. Keep the soil slightly moist but not soggy to ensure healthy growth.
References
-
How to Harvest Kalanchoe Seeds – Gardening Know How
-
Ideal Conditions for Sowing Kalanchoe Seeds – The Spruce
-
Transplanting Kalanchoe Seedlings – The Old Farmer’s Almanac