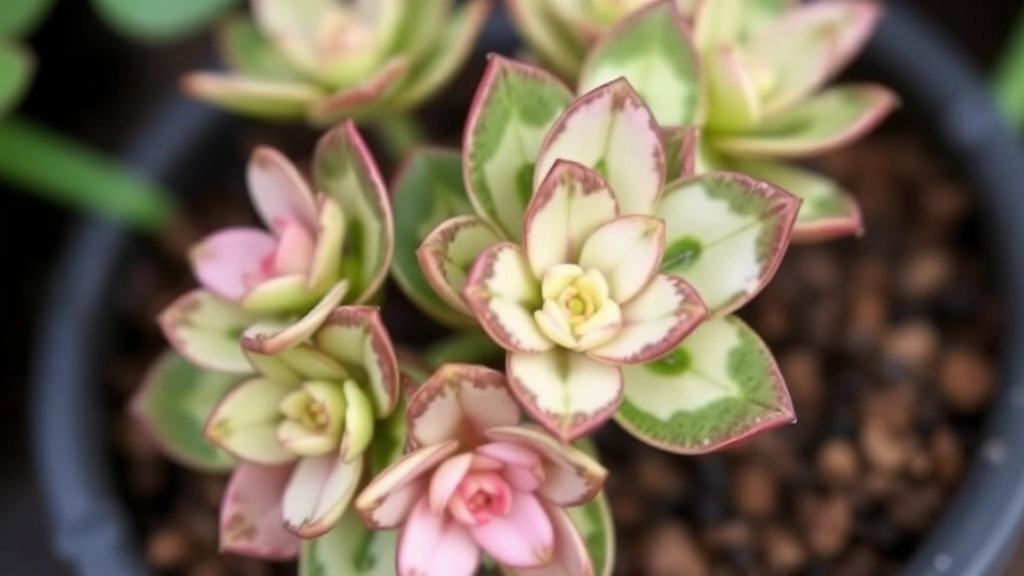
Variegated Kalanchoe Propagation
Variegated Kalanchoe propagation is a rewarding process that allows you to expand your plant collection effortlessly. Whether you’re a seasoned gardener or a curious beginner, mastering the art of propagating this vibrant succulent can be both fun and fulfilling. In this guide, I’ll walk you through the essential tools and materials you’ll need, as well as the best time to start your propagation journey.
We’ll dive into various techniques, from stem cuttings and leaf propagation to using offsets and ensuring proper callusing. By the end of this article, you’ll have all the knowledge you need to successfully propagate your Variegated Kalanchoe, ensuring healthy growth and vibrant foliage. Let’s get started on this green adventure!
Tools and Materials for Propagating Variegated Kalanchoe
Are you ready to dive into the world of propagating variegated Kalanchoe?
Having the right tools and materials makes a significant difference in your propagation journey.
Essential Tools and Materials
- Sharp, Clean Scissors or Pruning Shears
A clean cut is crucial for preventing disease. For more detailed methods, check out our Kalanchoe Synsepala Propagation Guide. - Small Pots or Seedling Trays
Choose pots with drainage holes to avoid waterlogging. - Cactus or Succulent Potting Mix
A well-draining mix is vital for healthy root development. - Plastic Bags or Cling Film
These can help maintain humidity for leaf cuttings. - Rooting Hormone (Optional)
While not necessary, it can encourage faster root growth. - Watering Can or Spray Bottle
For gentle watering without oversaturating the soil. Learn more about optimal watering tips for healthy Kalanchoe. - Labels or Markers
Keep track of different cuttings and their propagation dates.
Additional Considerations
- Gloves
Protect your hands, especially if you have sensitive skin. - Light Source
Ensure you have a spot with bright, indirect light.
Having these tools at your disposal will set you up for success.
Best Time for Propagation
So, when’s the right time to propagate your variegated Kalanchoe?
Timing can really make or break your propagation efforts.
Ideal Seasons:
- Spring: This is the golden window! As the days get longer and warmer, your Kalanchoe is waking up from its winter slumber. It’s ready to grow, making it the perfect time to take cuttings.
- Early Summer: If you miss spring, early summer is still a good option. The plant is in full swing, and the conditions are favourable for new growth.
What to Avoid:
- Winter: This is a no-go. Your plant is resting during these colder months, and trying to propagate now can lead to failure.
- Extreme Heat: Late summer can be tricky too. If it’s too hot, your cuttings might struggle to take root.
Why Timing Matters
- Temperature: Warmer weather encourages growth. Your cuttings will root faster and thrive better.
- Light Availability: Longer days provide ample light, which is crucial for young plants.
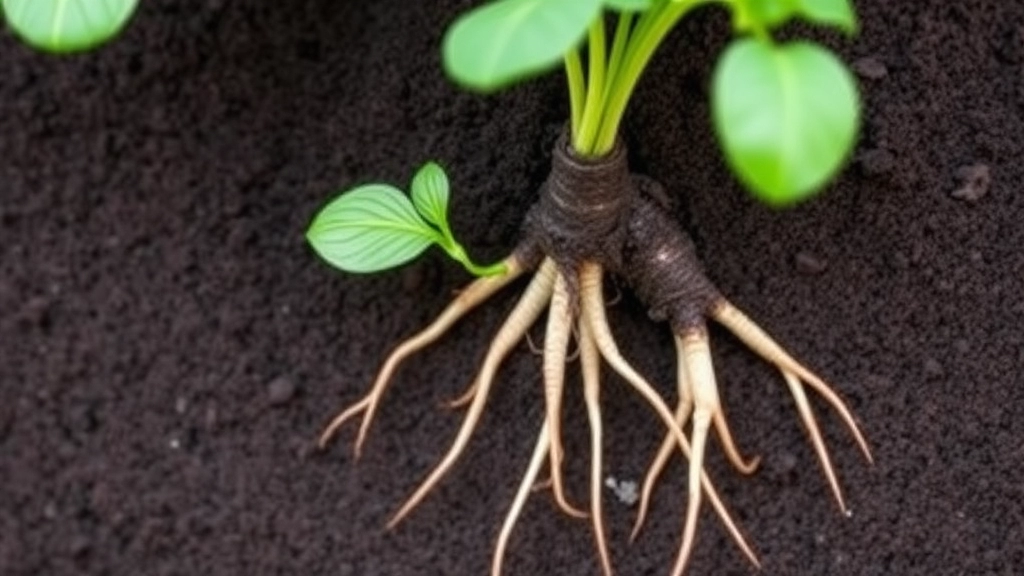
Propagating Kalanchoe from Stem Cuttings
Many plant enthusiasts wonder how to effectively propagate their beloved variegated Kalanchoe.
Stem cuttings are one of the most straightforward methods to multiply your Kalanchoe.
Here’s how to do it:
- Choose the Right Stem:
- Look for a healthy stem that is at least 3-4 inches long.
- Ensure it has a few leaves and is free from any disease.
- Make the Cut:
- Use clean, sharp scissors or pruning shears.
- Cut just below a leaf node to encourage new growth.
- Prepare the Cutting:
- Remove the lower leaves, leaving a few at the top.
- This helps the cutting focus its energy on root development.
- Let it Callus:
- Place the cutting in a dry, warm area for a few hours or overnight.
- This step is crucial as it prevents rot when planted.
- Planting the Cutting:
- Fill a small pot with well-draining soil.
- Make a hole in the soil and insert the cutting, ensuring the cut end is buried.
- Water Sparingly:
- After planting, water lightly to settle the soil.
- Avoid overwatering, as this can lead to rot.
- Create a Humid Environment:
- Cover the pot with a plastic bag or a clear plastic dome.
- This helps maintain moisture while the cutting establishes roots.
By following these steps, you can successfully propagate Kalanchoe from stem cuttings, ensuring that your collection continues to flourish. For more in-depth information, check out our Kalanchoe Mother of Thousands Propagation Guide and our guide on propagating Kalanchoe Beharensis Fang.
Leaf Propagation Techniques
When considering propagation methods for variegated Kalanchoe, many enthusiasts often overlook the potential of leaf propagation. This technique can be both rewarding and straightforward, allowing you to multiply your plants with minimal effort.
Why Choose Leaf Propagation?
Leaf propagation is an excellent option if you want to create new plants from healthy leaves. It’s particularly appealing because:
- Simplicity: This method requires fewer tools and materials.
- Space-saving: You can propagate multiple plants in a small area.
- Cost-effective: You won’t need to purchase new plants.
Steps to Successfully Propagate Kalanchoe from Leaves
- Select Healthy Leaves:
- Choose firm, plump leaves that show no signs of disease or damage.
- Ideally, select leaves from the lower part of the plant for better results.
- Cut the Leaves:
- Use a clean, sharp knife or scissors to cut leaves at the base.
- Ensure the cut is clean to prevent infection.
- Callus Formation:
- Allow the cut leaves to dry for a few days in a shaded area.
- This callusing process helps prevent rot when planted.
- Planting the Leaves:
- Place the dried leaves on top of well-draining soil.
- Lightly press them into the soil without burying them completely.
- Watering:
- Mist the soil lightly to keep it moist but not soggy.
- Avoid overwatering, as this can lead to rot.
- Monitoring Growth:
- After a few weeks, you should notice small plantlets emerging from the base of the leaves.
- Continue to care for the leaves until the new plants are well-established.
Tips for Success
- Patience is Key: Leaf propagation can take time, so be prepared to wait several weeks.
- Avoid Direct Sunlight: Place your setup in bright, indirect light to prevent leaf scorch.
- Humidity Matters: A humid environment can encourage faster growth. Consider using a plastic cover to maintain moisture.
When considering propagation methods for variegated Kalanchoe, offsets stand out as a straightforward and effective choice. Many plant enthusiasts often wonder how to successfully propagate their Kalanchoe without the fuss of complex techniques.
Offsets, or “pups,” are small plantlets that grow at the base of the parent plant. They are essentially clones and can be easily separated to grow into new plants.
### Why Choose Offsets?
– **Simplicity**: The process is straightforward and requires minimal tools.
– **Higher Success Rate**: Offsets typically establish roots more easily than cuttings or leaves.
– **Faster Growth**: Since they are already part of the parent plant, they often grow quicker.
### Steps to Propagate Offsets:
1. **Identify Healthy Offsets**: Look for offsets that are at least a few inches tall and have their own roots.
2. **Remove Offsets Carefully**: Gently twist or cut the offset from the parent plant, ensuring you don’t damage the roots.
3. **Prepare for Planting**: Allow the offset to dry for a few hours to a day. This helps prevent rot when planted.
### Planting Offsets:
– Use a well-draining soil mix to prevent waterlogging.
– Plant the offset at the same depth it was growing in the parent plant.
– Water lightly to settle the soil around the roots.
Offsets provide a reliable propagation method that many find rewarding. For more detailed steps on propagation, you can refer to the [Kalanchoe Panamensis Propagation Guide](https://planthq.org/kalanchoe-panamensis-propagation-guide-tips-and-methods/). This technique not only enhances your collection but also cultivates a deeper bond with your plants. If you’re interested in exploring more varieties, check out the [Top Kalanchoe Succulent Varieties and Care Tips](https://planthq.org/top-kalanchoe-succulent-varieties-and-care-tips/).
Callusing and Drying Steps Before Planting
So, you’ve got your stem cuttings or leaves ready for propagation. But wait—before you dive into planting, there’s a crucial step that can make or break your Kalanchoe’s success: callusing and drying.
Why Callusing?
Callusing is like giving your cuttings a protective shield. It helps prevent rot and encourages healthy root growth. Here’s how to do it right:
- Let Them Breathe: Place your cuttings in a dry, warm spot away from direct sunlight. A windowsill works wonders.
- Time is Key: Leave them to callus for about 3 to 7 days. This allows the cut ends to dry out and form a protective layer.
How to Dry Your Cuttings:
Getting the drying process right is vital. Here’s a simple guide:
- Choose the Right Spot: Find a shaded area with good air circulation.
- Avoid Overcrowding: Spread your cuttings out. No one likes a cramped space!
- Check Regularly: Keep an eye on them. You want them to dry, not shrivel up.
Pro Tip: If you notice any moisture, give them a bit more time. Better safe than sorry!
When propagating variegated Kalanchoe, the right soil preparation is crucial for successful rooting. You might be wondering, “What type of soil is best for my Kalanchoe cuttings?”
To ensure your cuttings thrive, consider the following soil characteristics:
– **Well-draining**: Kalanchoe prefers soil that allows excess water to escape. This prevents root rot, a common issue in overly saturated soil.
– **Lightweight**: A mix that is not too dense helps air circulate around the roots, promoting healthy growth.
– **Nutrient-rich**: While Kalanchoe is not overly fussy about nutrients, a bit of organic matter can provide a good start.
A simple, effective soil mix for propagating Kalanchoe includes:
– **2 parts potting soil**: Use a high-quality, lightweight potting mix.
– **1 part perlite**: This improves aeration and drainage.
– **1 part sand**: Coarse sand helps with drainage and adds texture.
Steps for Soil Preparation:
1. **Combine Ingredients**: Mix the potting soil, perlite, and sand in a container until well blended.
2. **Moisten the Mix**: Lightly dampen the soil before planting. It should be moist but not soggy.
3. **Fill Containers**: Use small pots or containers with drainage holes for your cuttings.
4. **Level the Surface**: Ensure the soil surface is even and ready for planting.
For more detailed guidance on propagating Kalanchoe, you might find the [step-by-step guide to florist Kalanchoe propagation](https://planthq.org/stepbystep-guide-to-florist-kalanchoe-propagation/) very useful. Additionally, if you’re looking to maximize the longevity of your plants, check out these [care tips for Kalanchoe plant lifespan](https://planthq.org/kalanchoe-plant-lifespan-care-tips-for-maximizing-longevity/).
Rooting Hormones: When and Why to Use Them
Ever wondered if rooting hormones are worth the hype?
When you’re propagating variegated Kalanchoe, these little wonders can make a big difference.
Why Use Rooting Hormones?
- Boost Root Growth: They speed up the rooting process, helping your cuttings establish themselves quicker.
- Improved Success Rates: Using rooting hormones can increase the likelihood of your cuttings developing healthy roots.
- Stress Reduction: They help your plants cope with the stress of being cut and replanted.
When to Use Rooting Hormones?
- Stem Cuttings: If you’re taking stem cuttings, applying rooting hormone can be a game-changer. Dip the cut end into the powder or gel before planting.
- Leaf Cuttings: While not always necessary, it can give your leaf cuttings a little extra push.
- Offsets: If you’re separating offsets, using rooting hormones can also help them settle in more smoothly.
How to Apply Rooting Hormones?
- Choose Your Hormone: There are powders, gels, and liquids. Powders are the most common and easiest to use.
- Prep Your Cuttings: Make sure your cuttings are clean and dry before application.
- Dip and Tap: Dip the cut end into the hormone, then tap off any excess.
- Plant: Place your cutting into the soil, and you’re good to go!
Using rooting hormones isn’t a must, but it can give your Kalanchoe a solid start.
Watering and Moisture Management Post-Propagation
After successfully propagating your variegated Kalanchoe, the next crucial step is managing its watering and moisture levels.
Why is Proper Watering Important?
Overwatering or underwatering can lead to root rot or dehydration, jeopardising your hard work.
Key Considerations for Watering:
- Initial Watering: Water lightly after planting to settle the soil around the roots.
- Soil Check: Always check the top inch of soil. If it feels dry, it’s time to water. If it’s still moist, hold off for a few more days.
- Watering Technique: Use a spray bottle or a watering can with a narrow spout to avoid disturbing the cuttings.
- Frequency: Water every 1-2 weeks, depending on humidity and temperature. In warmer months, you might need to water more frequently.
Humidity Levels:
- Creating a Humid Environment: If you live in a dry climate, consider placing a humidity dome or plastic bag over the cuttings to maintain moisture.
- Ventilation: Ensure there is some airflow to prevent mould growth.
Signs of Watering Issues:
- Yellowing Leaves: This can indicate overwatering. Adjust your watering schedule accordingly.
- Shrivelling Leaves: This often means your Kalanchoe is thirsty. Increase watering frequency.
For more detailed care tips, check out our guide on Kalanchoe leaves curling and our ultimate guide to growing Kalanchoe pink flowers. By keeping a close eye on these factors, you can ensure your new Kalanchoe thrives.
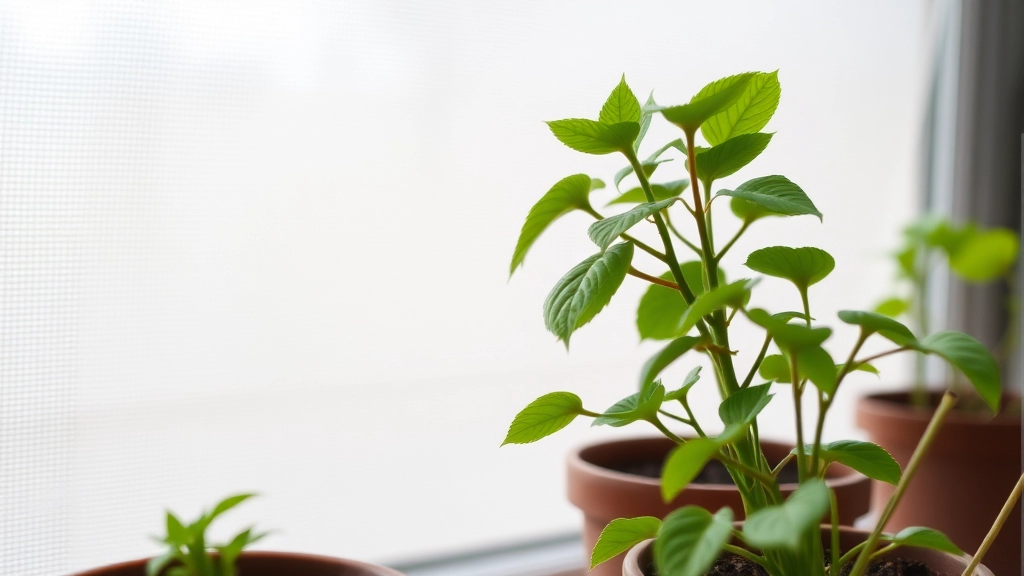
Lighting Conditions for Newly Propagated Kalanchoe
So, you’ve just taken the plunge and propagated your variegated Kalanchoe. Now, what’s next? Let’s talk about lighting—an essential factor in ensuring your new cuttings thrive.
Why Lighting Matters
Newly propagated Kalanchoe plants need the right amount of light to establish strong roots and grow healthy leaves. Too much direct sunlight can scorch them, while too little can stunt their growth.
Ideal Lighting Conditions:
- Bright Indirect Light: Aim for a spot that gets plenty of bright, indirect sunlight. A south or east-facing window is usually a winner.
- Avoid Direct Sunlight: Direct sun can be harsh, especially for young plants. If you notice leaves turning brown or crispy, it’s a sign to move them to a shadier spot.
- Duration: About 12-14 hours of light a day is ideal. If natural light is lacking, consider using a grow light to supplement.
Signs Your Kalanchoe Needs Adjustments:
- Leggy Growth: If your plant is stretching towards the light, it might be craving more brightness.
- Yellowing Leaves: This can indicate too much direct sun or not enough light.
- Slow Growth: If your Kalanchoe isn’t growing much, it could be a lighting issue.
By keeping an eye on these signs, you can adjust the lighting conditions to suit your newly propagated Kalanchoe perfectly.
Common Problems and Solutions During Propagation
As you embark on the journey of propagating your variegated Kalanchoe, it’s essential to be aware of potential issues that may arise. Understanding these common problems can help you take proactive steps to ensure a successful propagation process.
1. Rotting Cuttings
One of the most frequent challenges is rotting cuttings. This often occurs due to excessive moisture or poor drainage.
- Solution:
- Ensure your cuttings are callused before planting.
- Use well-draining soil and pots with drainage holes.
- Water sparingly, allowing the soil to dry out between watering.
2. Insufficient Light
Newly propagated Kalanchoe require adequate light to thrive. Without it, you may notice leggy growth or slow development.
- Solution:
- Place your cuttings in a bright, indirect light location.
- Avoid direct sunlight, as it can scorch the leaves.
3. Pests and Diseases
Pests like aphids or mealybugs can pose a threat to young plants, while diseases may arise from poor air circulation.
- Solution:
- Regularly inspect your plants for signs of pests.
- Use insecticidal soap if pests are detected.
- Ensure good airflow around your plants to prevent fungal infections.
4. Poor Root Development
Sometimes, cuttings may fail to root properly, leading to frustration.
- Solution:
- Ensure your soil is suitable for propagation.
- Consider using rooting hormones to encourage root growth.
- Be patient; some cuttings may take longer to establish roots.
5. Environmental Stress
Temperature fluctuations or drafts can stress your newly propagated Kalanchoe, affecting their growth.
- Solution:
- Maintain a stable temperature between 20-25°C (68-77°F).
- Keep plants away from drafts or heating vents.
For more detailed guidance on propagating different Kalanchoe varieties, you can check out our comprehensive guide on how to propagate Kalanchoe Mother of Thousands easily. Additionally, if you are dealing with specific varieties like the Pink Butterflies, our step-by-step guide on propagating Kalanchoe Pink Butterflies can be very helpful.
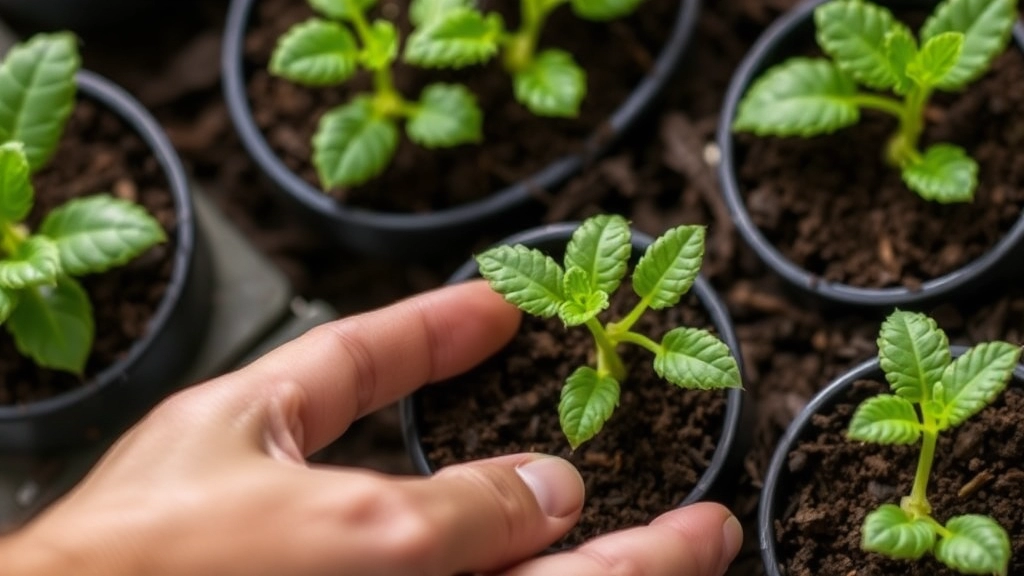
Care and Maintenance After Root Establishment
So, you’ve successfully propagated your variegated Kalanchoe, and those little beauties are starting to put down roots. What comes next?
Watering Wisely
First off, let’s talk about watering.
- Frequency: Water your Kalanchoe only when the top inch of soil feels dry.
- Technique: Make sure to water thoroughly, allowing excess to drain out.
- Signs of Overwatering: Yellowing leaves or mushy stems? Time to ease up on the water.
Lighting Love
Next up, lighting.
- Bright, Indirect Light: Kalanchoe loves it bright but not direct.
- Rotation: Rotate your plant every couple of weeks for even growth.
Temperature and Humidity
Temperature plays a big role too.
- Ideal Range: Keep your Kalanchoe in a warm spot, ideally between 18-24°C.
- Humidity: They prefer a bit of humidity but can tolerate drier air.
Fertilizing Tips
You might be wondering about feeding your new plant.
- Type of Fertilizer: Use a balanced, water-soluble fertilizer.
- Frequency: Feed every 4-6 weeks during the growing season, but skip it in winter.
Pest Patrol
Keep an eye out for pests.
- Common Culprits: Watch for mealybugs and aphids.
- Solution: A gentle spray of insecticidal soap can do wonders.
Pruning for Growth
Don’t forget about pruning!
- When to Prune: Trim back any leggy growth or dead leaves.
- Benefits: This encourages bushier growth and keeps your plant looking tidy.
For more specific care tips, check out our Kalanchoe beharensis care guide or learn how to propagate Kalanchoe Mother of Thousands effectively.
FAQs on Variegated Kalanchoe Propagation
When is the best time to propagate variegated Kalanchoe?
The ideal time for propagating variegated Kalanchoe is during the spring and early summer. These seasons offer the best conditions for growth as the weather is warm and days are longer. Avoid propagating in winter and during extreme heat in late summer.
Why is timing important for propagation?
Timing affects the success of propagation due to factors like temperature and light availability. Warmer weather encourages faster rooting, and longer days provide ample light, which is crucial for young plants.
What are the steps for propagating Kalanchoe from leaves?
To propagate Kalanchoe from leaves, follow these steps:
- Select healthy, plump leaves.
- Cut the leaves with a clean, sharp knife.
- Allow the leaves to callus for a few days.
- Place the dried leaves on well-draining soil.
- Mist the soil lightly to keep it moist.
- Monitor growth and care for emerging plantlets.
Why is callusing important before planting cuttings?
Callusing helps prevent rot and encourages healthy root growth. It involves letting the cuttings dry in a warm, shaded area for about 3 to 7 days to form a protective layer.
Should I use rooting hormones for propagating Kalanchoe?
While not mandatory, rooting hormones can boost root growth, improve success rates, and help cuttings cope with stress. They are especially beneficial for stem cuttings and can be applied to leaf cuttings and offsets as well.
What are the ideal lighting conditions for newly propagated Kalanchoe?
Newly propagated Kalanchoe thrives in bright, indirect light. Avoid direct sunlight as it can scorch the leaves. Aim for about 12-14 hours of light a day, and consider using a grow light if natural light is insufficient.
How can I tell if my Kalanchoe needs lighting adjustments?
Signs that your Kalanchoe may need lighting adjustments include:
- Leggy Growth: Indicates a need for more light.
- Yellowing Leaves: Could mean too much direct sun or insufficient light.
- Slow Growth: Often a sign of inadequate lighting.
References
-
Kalanchoe Propagation: How To Propagate Kalanchoe Plants
-
How to Grow and Care for Kalanchoe
-
How to Propagate Kalanchoe