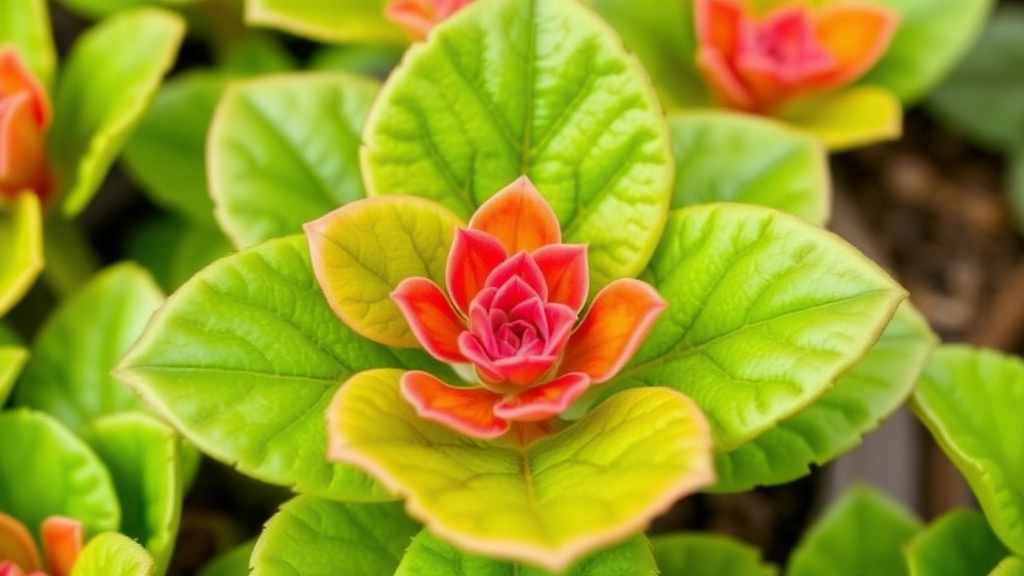
Growing Kalanchoe from a Leaf
Looking to grow Kalanchoe from a leaf? You’re in the right place! This step-by-step guide will walk you through the entire process, from choosing the right leaf to ensuring optimal conditions for growth. Propagating Kalanchoe succulents using leaf cuttings is not only easy but also a fun DIY project you can do at home.
Steps to Propagate Kalanchoe
-
Select a Healthy Leaf:
First, start by selecting a healthy, mature leaf from your Kalanchoe plant. Carefully snip it off and let it dry for a day or two to prevent rot.
-
Prepare the Soil:
Next, prepare a well-draining soil mix and place the leaf on top.
-
Water Sparingly:
Water sparingly and ensure it gets plenty of indirect sunlight.
With a bit of patience and care, you’ll soon see roots forming and new growth emerging. Let’s dive into the details to get your Kalanchoe thriving!
When embarking on the journey of propagating Kalanchoe, one of the most critical steps is selecting the right leaf. Many enthusiasts often wonder, “Which leaves are best for propagation?” This choice can significantly influence the success of your new plants.
Here are some key considerations to keep in mind:
– **Healthy Leaves**: Always opt for mature, healthy leaves. Look for leaves that are vibrant in colour and free from blemishes or pests. A good leaf will provide the best chance for successful rooting.
– **Size Matters**: Larger leaves tend to have more stored energy, which can aid in the rooting process. However, avoid overly large leaves that may struggle to support new growth.
– **Stem Attachment**: Choose leaves that are still attached to the stem, as this can help in nutrient transfer during the initial rooting phase.
– **Age of the Leaf**: Ideally, select leaves that are not too old. Fresh leaves generally root better than those that have been on the plant for an extended period.
– **Variety Considerations**: Different Kalanchoe varieties may have unique traits. Research your specific type to understand which leaves are most conducive to propagation.
By carefully selecting the right leaf, you set the stage for a thriving new plant. For more detailed guidance, you might find the [Florist Kalanchoe Propagation Guide](https://planthq.org/florist-kalanchoe-propagation-guide-stepbystep-methods/) helpful. Additionally, understanding the [Optimal Light for Kalanchoe](https://planthq.org/optimal-light-for-kalanchoe-full-sun-or-shade/) can further enhance your propagation success.
Preparing the Leaf for Propagation
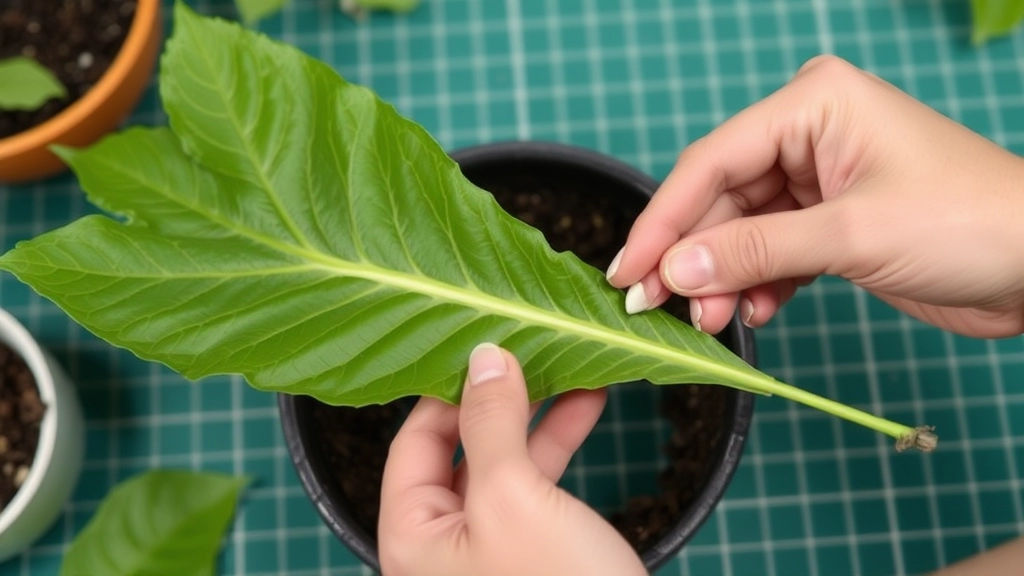
So, you’ve decided to propagate Kalanchoe leaves. Great choice! But before we dive in, let’s talk about how to properly prepare those leaves for the best chance of success.
First things first, you want to select healthy leaves. Look for:
- Vibrant Colour: A rich green hue is a good sign.
- No Spots or Discolouration: Avoid any leaves that look sickly or damaged.
- Firm Texture: Soft or mushy leaves are a no-go.
Once you’ve picked your leaves, it’s time to prepare them. Here’s a simple step-by-step guide:
- Clean the Leaves: Gently wash them to remove any dust or pests.
- Let Them Dry: Place them on a paper towel for a few hours. This helps prevent rot when you plant them.
- Cutting Technique: If you’re using larger leaves, consider cutting them into sections. Each section should be at least a few inches long, with a clean cut at the base.
Now, why is this preparation so crucial? Well, healthy leaves boost your chances of successful rooting.
Soil and Potting Requirements for Kalanchoe Leaf Cuttings
When propagating Kalanchoe leaf cuttings, the right soil and potting setup are crucial for successful growth.
Many people wonder what type of soil is best for Kalanchoe.
Soil Type
- Well-Draining Soil: Kalanchoe thrives in a well-draining mix. Look for a soil that allows excess water to escape quickly, preventing root rot.
- Cactus or Succulent Mix: A pre-made cactus mix is ideal, as it typically contains sand or perlite, which enhances drainage.
- DIY Mix: You can also create your own by combining equal parts potting soil, sand, and perlite.
Potting Requirements
- Pot Material: Choose pots made from terracotta or clay. These materials help wick away excess moisture.
- Drainage Holes: Ensure your pot has drainage holes at the bottom. This is essential for preventing water accumulation.
- Size Matters: A small pot is sufficient for a single leaf cutting. Aim for a pot that is about 4-6 inches in diameter.
When potting, gently place the leaf cutting on top of the soil and lightly press it down, ensuring good contact without burying it too deep.
For more detailed information on the best soil for Kalanchoe, check out our Best Soil for Kalanchoe Blossfeldiana Care Tips. Additionally, if you are interested in learning how to propagate Kalanchoe in water, our Step-by-Step Guide on How to Propagate Kalanchoe in Water provides comprehensive instructions.
Proper Watering Techniques for Root Development
When propagating Kalanchoe leaf cuttings, one of the most pressing concerns is how to ensure proper watering for optimal root development. Overwatering can spell disaster, while underwatering can stall growth. Finding the right balance is crucial.
Key Considerations for Watering:
- Soil Moisture Check: Always check the soil moisture before watering. Insert your finger about an inch into the soil. If it feels dry, it’s time to water.
- Watering Method: Use a spray bottle or a watering can with a narrow spout to deliver water directly to the soil. This prevents excess moisture on the leaves, which can lead to rot.
- Frequency: Watering frequency can vary based on environmental conditions. Generally, every 7-10 days is a good rule of thumb, but adjust as needed.
- Water Quality: Use room temperature, filtered, or rainwater for the best results. Tap water can contain chemicals that may hinder root development.
- Drainage: Ensure that your pots have drainage holes. This prevents water from accumulating at the bottom, reducing the risk of root rot.
Signs of Overwatering:
- Yellowing leaves
- Wilting despite wet soil
- Foul smell from the soil
By carefully monitoring your watering techniques, you can encourage robust root growth in your Kalanchoe cuttings.
When propagating Kalanchoe leaf cuttings, one of the most common concerns is ensuring the right light and temperature conditions.
### Light Requirements
Kalanchoe thrives in bright, indirect sunlight. Here are some key points to consider:
– **Direct Sunlight:** Avoid placing your cuttings in harsh, direct sunlight, as this can scorch the leaves.
– **Filtered Light:** A south-facing window with filtered light is ideal.
– **Duration:** Aim for around 12 hours of light daily. If natural light is limited, consider using grow lights.
### Temperature Preferences
Temperature plays a crucial role in the growth of your Kalanchoe cuttings.
– **Optimal Range:** Aim for temperatures between 20°C to 25°C (68°F to 77°F).
– **Nighttime Drop:** A slight drop to around 15°C (59°F) at night can be beneficial.
– **Avoid Extremes:** Keep your cuttings away from cold drafts or heat sources, as drastic temperature changes can hinder root development.
For more detailed guidance, you might find this [step-by-step guide on Kalanchoe leaf propagation](https://planthq.org/kalanchoe-leaf-propagation-stepbystep-guide-for-success/) helpful. Additionally, understanding the [causes and fixes for drying Kalanchoe leaves](https://planthq.org/why-are-my-kalanchoe-leaves-drying-out-causes-and-fixes/) can also be beneficial in maintaining healthy cuttings.
Monitoring for Common Issues: Overwatering and Root Rot
So, you’ve got your Kalanchoe leaf cuttings set up, and you’re feeling pretty good about it. But wait—what if things don’t go as planned?
Overwatering is a sneaky culprit that can ruin all your hard work. It’s easy to think that more water means happier plants, but that’s not the case here.
Here’s what to look out for:
- Yellowing Leaves: If your leaves are turning yellow, it’s a sign they’re drowning.
- Mushy Stems: A squishy stem is a big red flag—roots are likely rotting away.
- Foul Odour: A musty smell coming from the soil? That’s not a good sign.
To avoid overwatering:
- Check the Soil: Stick your finger in about an inch deep. If it’s wet, hold off on watering.
- Use Well-Draining Soil: A mix designed for succulents helps keep things airy.
- Choose the Right Pot: Make sure your pot has drainage holes.
Root rot often goes hand-in-hand with overwatering. It’s when roots start to decay due to excess moisture. If you suspect root rot, here’s what to do:
- Remove the Plant: Carefully take it out of the pot.
- Inspect the Roots: Trim away any black or mushy roots.
- Repot in Fresh Soil: Use a clean pot and new soil to give it a fresh start.
Keeping an eye on these issues will set you up for success.
How to Promote Faster Rooting with Hormones
As we delve deeper into the propagation process, one effective method to enhance root development is the use of rooting hormones. Many gardeners wonder if these products really work and how they can speed up the rooting process for Kalanchoe leaf cuttings.
Understanding Rooting Hormones
Rooting hormones are plant growth regulators that can significantly boost your cuttings’ chances of successful rooting. They contain auxins, which are natural or synthetic substances that promote root formation. Here’s how you can effectively use them:
- Select the Right Type: Choose a rooting hormone powder or gel that suits your needs. Powders are often easier to apply and provide a good coating.
- Preparation: Before applying, ensure your Kalanchoe leaf cuttings are healthy and clean. A fresh cut at the base of the leaf can help improve hormone absorption.
- Application: Dip the cut end of the leaf cutting into the rooting hormone. Make sure to cover the cut area thoroughly.
- Shake Off Excess: Gently shake off any excess powder or gel to prevent clumping and ensure even distribution.
Benefits of Using Rooting Hormones
Utilising rooting hormones can lead to:
- Faster Root Development: Hormones stimulate quicker root growth, allowing your cuttings to establish themselves sooner.
- Higher Success Rate: Cuttings treated with hormones tend to have a better survival rate compared to those without.
- Stronger Roots: Hormones can promote the growth of a more robust root system, which is essential for the health of your Kalanchoe.
Using rooting hormones can be an excellent strategy to enhance your propagation efforts. For more detailed steps, you can refer to our guide on propagating Kalanchoe from leaves. Additionally, understanding Kalanchoe plant care will further ensure the success and health of your propagated plants.
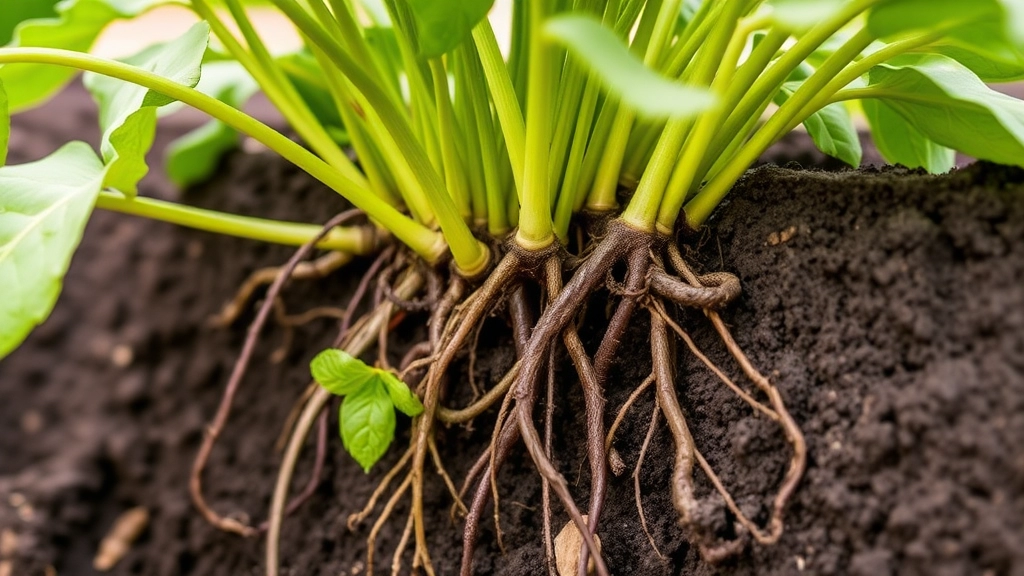
Post-Propagation Care and Transplanting New Growth
So, you’ve successfully propagated your Kalanchoe leaves and now you’re staring at those little green wonders. What’s next?
This stage is crucial for ensuring your new plants thrive.
Care After Propagation
Once your cuttings have rooted, it’s time to give them some TLC. Here’s how to keep them happy:
- Gradual Acclimatization:
- Start by introducing them to normal conditions slowly.
- Keep them in indirect light for a week or so before moving them to brighter spots.
- Watering:
- Be gentle! Only water when the top inch of soil feels dry.
- Overwatering can lead to root rot, which we definitely want to avoid.
- Fertilizing:
- Wait about a month before adding any fertiliser.
- When you do, use a diluted liquid fertiliser to give them a gentle boost.
Transplanting New Growth
When your Kalanchoe has grown a few sets of leaves and feels sturdy, it’s time to think about transplanting.
- Choosing the Right Pot:
- Go for a pot with good drainage holes.
- A slightly bigger pot than the current one is ideal to give those roots room to grow.
- Soil Mix:
- Use a well-draining cactus mix or a blend of potting soil and perlite.
- This helps prevent water from pooling, keeping your roots healthy.
- Transplanting Steps:
- Water the cutting a day before transplanting.
- Gently remove it from its current pot, being careful with the roots.
- Place it in the new pot and fill in with soil, ensuring it’s stable.
- Water lightly to settle the soil around the roots.
Now that your Kalanchoe is comfortably settled in its new home, it’s all about patience and observation.
Keeping an Eye Out
Keep an eye on your new plant for signs of stress or pests. For more detailed information on keeping your Kalanchoe healthy, you might want to check out this comprehensive Kalanchoe plant care guide. Additionally, if you notice any issues with flowering, this guide on why your florist Kalanchoe is not flowering can offer helpful solutions and tips.
FAQs on Growing Kalanchoe from a Leaf
How do I select the best leaves for propagating Kalanchoe?
When choosing leaves for propagation, look for leaves with vibrant color, no spots or discoloration, and a firm texture. Healthy leaves increase the chances of successful rooting.
What steps should I follow to prepare Kalanchoe leaves for propagation?
First, gently clean the leaves to remove dust and pests. Let them dry on a paper towel for a few hours to prevent rot. If using larger leaves, consider cutting them into sections with a clean cut at the base.
How should I water Kalanchoe leaf cuttings to promote root development?
Check soil moisture before watering by inserting your finger about an inch into the soil. Use a spray bottle or watering can with a narrow spout to water directly to the soil. Water every 7-10 days, adjusting based on environmental conditions, and use room temperature, filtered, or rainwater for best results.
What are the signs of overwatering Kalanchoe cuttings?
Signs of overwatering include yellowing leaves, wilting despite wet soil, and a foul smell from the soil. Overwatering can lead to root rot, which can damage the plant.
How can I avoid overwatering my Kalanchoe cuttings?
To avoid overwatering, check the soil moisture before watering, use well-draining soil, and ensure your pot has drainage holes. These steps help prevent excess moisture that can lead to root rot.
What should I do if I suspect root rot in my Kalanchoe cuttings?
If you suspect root rot, carefully remove the plant from the pot, inspect the roots, and trim away any black or mushy roots. Repot the plant in fresh soil and a clean pot to give it a fresh start.
Why is it important to let Kalanchoe leaves dry before planting?
Letting the leaves dry before planting helps prevent rot when they are placed in the soil. This drying period is crucial for the leaves to heal and form a callus over the cut edges.
What type of soil is best for propagating Kalanchoe leaves?
Using well-draining soil, such as a mix designed for succulents, is ideal for propagating Kalanchoe leaves. This type of soil helps keep the environment airy and reduces the risk of overwatering.
How often should I water Kalanchoe leaf cuttings?
Generally, watering every 7-10 days is a good rule of thumb. However, you should adjust the frequency based on your specific environmental conditions and always check soil moisture before watering.
Can I use tap water for watering Kalanchoe cuttings?
It’s best to use room temperature, filtered, or rainwater for watering. Tap water can contain chemicals that may hinder root development and affect the health of your cuttings.
References
-
Propagating Kalanchoe: Step-by-Step Guide
-
How to Grow Kalanchoe Plants
-
Kalanchoe: Plant Care and Growing Guide