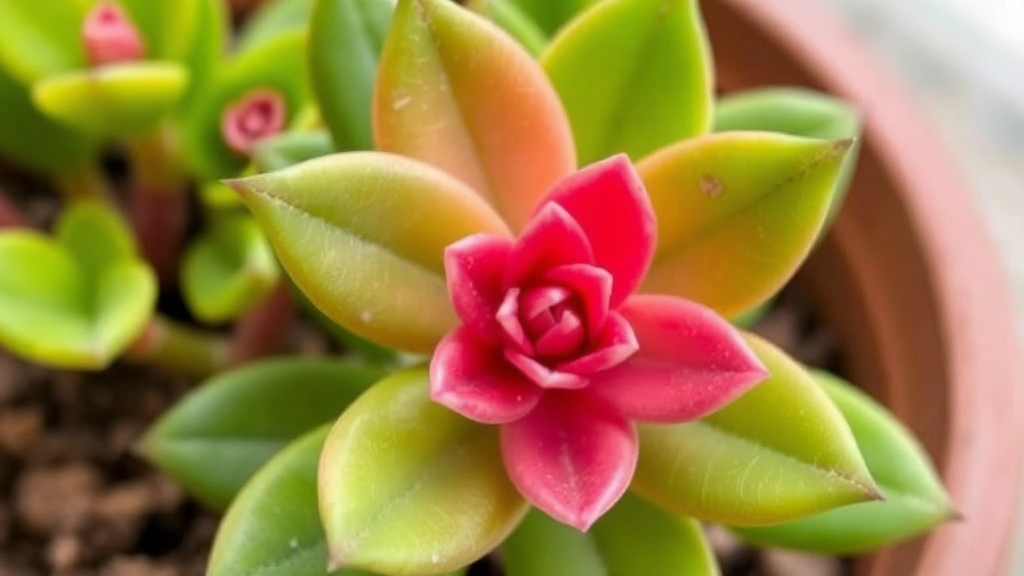
Kalanchoe Propagation from Leaf
When it comes to Kalanchoe propagation from leaf, choosing the right leaf is crucial. Look for a healthy, mature leaf without any signs of damage or disease. Carefully remove it from the plant, ensuring you get a clean cut to avoid any potential issues down the line.
Once you’ve got your leaf, preparation is key. Allow the leaf to dry and callous over for a few days before planting. This step helps prevent rot and increases the chances of successful rooting. Next, prepare a well-draining soil mix and plant the leaf in a suitable environment with proper light and humidity. Keep an eye on the watering needs to avoid overwatering, which can lead to rot.
When embarking on the journey of propagating Kalanchoe, one of the first questions that arises is, “Which leaf should I choose?” Selecting the right leaf is crucial for successful propagation.
Key Considerations:
– **Health of the Leaf:** Look for healthy, vibrant leaves without any signs of disease or damage. A robust leaf is more likely to root successfully.
– **Maturity:** Choose mature leaves that are fully developed. Younger leaves may not have enough stored energy for successful propagation.
– **Size:** Opt for medium to large leaves. Smaller leaves may struggle to produce roots.
– **Variety:** Different Kalanchoe varieties may have varying propagation success rates. Research the specific type you have for optimal results.
By keeping these factors in mind, you can significantly increase your chances of successful propagation. For instance, if you are working with the [Mother of Thousands](https://planthq.org/mother-of-thousands-kalanchoe-complete-care-and-propagation-guide/), understanding its specific needs can be highly beneficial. Additionally, exploring [how to propagate Kalanchoe Beharensis Fang](https://planthq.org/how-to-propagate-kalanchoe-beharensis-fang-successfully/) can provide more targeted insights for that variety.
Preparing the Leaf Cutting for Optimal Rooting
So, you’ve picked the perfect Kalanchoe leaf for propagation. What’s next?
Getting your leaf cutting ready is crucial for successful rooting. You want to ensure it’s in the best shape possible before it hits the soil. Here’s how to do just that:
Choose the Right Leaf
- Healthy and Plump: Look for a leaf that’s thick and firm. Avoid any that are yellowing, damaged, or shrivelled.
- Mature Leaves: Older leaves often have more stored energy, which can help kickstart the rooting process.
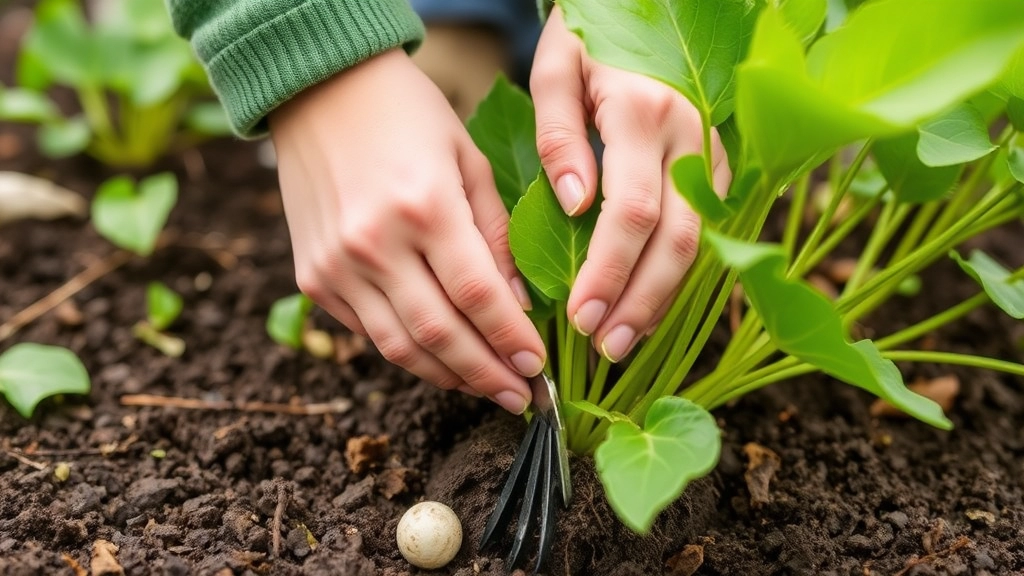
Cut the Leaf Properly
- Use Clean Tools: Grab a sharp knife or scissors. Clean cuts help prevent disease.
- Angle Your Cut: Aim for a diagonal cut. This increases the surface area for rooting.
Allow for Sap to Dry
- Let it Rest: After cutting, place your leaf in a dry area for a day or two. This allows the sap to callous over, reducing the risk of rot when planted.
By following these steps, you’re setting your Kalanchoe leaf up for success.
Drying and Callousing: Essential Steps Before Planting
After selecting the right Kalanchoe leaf for propagation, the next crucial step is drying and callousing. This process is vital in ensuring that your cutting has the best chance of developing strong roots.
Why Drying and Callousing Matter
Many plant enthusiasts worry about their cuttings rotting before they can take root. This is a common concern, especially with Kalanchoe, which can be particularly susceptible to fungal infections if planted too soon. Drying and callousing help mitigate these risks.
Steps to Dry and Callous Your Kalanchoe Leaf:
- Allow the Cutting to Rest:
- Place the leaf cutting in a dry, shaded area.
- Let it sit for 2 to 4 days.
- This resting period allows the cut end to form a protective callous.
- Check for Callousing:
- Examine the cut end; it should feel firm and dry.
- A well-calloused cutting will reduce moisture loss when planted.
- Avoid Direct Sunlight:
- While drying, keep the cutting away from direct sunlight.
- Excessive heat can dry it out too quickly, leading to shrivelling.
- Use a Clean Surface:
- Lay the cutting on a clean, dry surface to prevent contamination.
- A paper towel or a clean plate works well.
- Monitor Humidity:
- If your environment is too humid, consider using a fan to improve airflow.
- This will help in achieving the right dryness without causing rot.
For more detailed care tips, check out our guide on flowering Kalanchoe care and learn how to ensure your plants thrive. Additionally, if you are dealing with specific issues like black spots on leaves, our article on causes and solutions for black spots on Kalanchoe leaves can provide valuable insights.
Creating the Ideal Soil Mix for Leaf Propagation
Choosing the right soil mix is crucial for successful Kalanchoe leaf propagation. A well-balanced medium can significantly enhance rooting and growth.
Key Components of an Ideal Soil Mix
When preparing your soil mix, consider the following elements:
- Well-Draining Soil: Kalanchoe plants thrive in conditions that prevent waterlogging. A mix that drains well is essential.
- Cactus or Succulent Soil: These pre-made soils are designed for plants like Kalanchoe. They typically contain a blend of sand, perlite, and peat that promotes drainage.
- Perlite or Pumice: Adding these materials increases aeration and drainage, essential for healthy root development.
- Organic Matter: A small amount of compost can provide necessary nutrients without overwhelming the plant.
Recommended Soil Mix Recipe
You can easily create your own soil mix by combining:
- 50% Cactus or Succulent Soil
- 25% Perlite or Pumice
- 25% Organic Compost
Mix these components thoroughly to ensure an even distribution.
Testing Your Soil Mix
Before planting, it’s wise to test your soil mix:
- Moisture Retention: Wet the mix and see how quickly it drains. It should not hold water for long.
- pH Level: Kalanchoe prefers a slightly acidic to neutral pH (around 6.0 to 7.0). You can use a simple pH test kit to check.
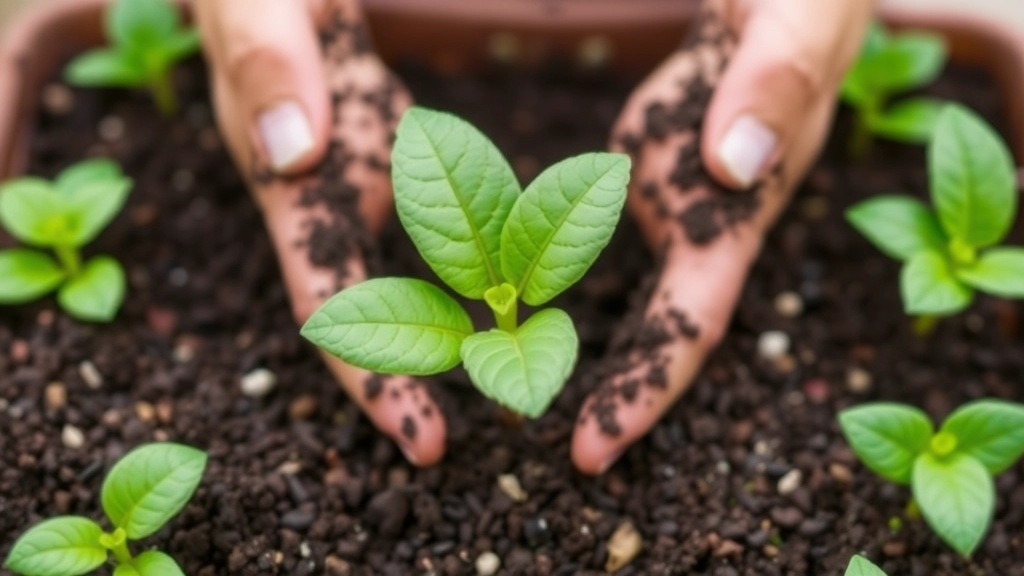
Planting the Leaf Cutting in the Right Environment
After ensuring your Kalanchoe leaf cutting is prepared and calloused, the next step is to plant it in an environment conducive to growth. This is crucial for successful propagation.
Watering and Humidity Needs During Rooting
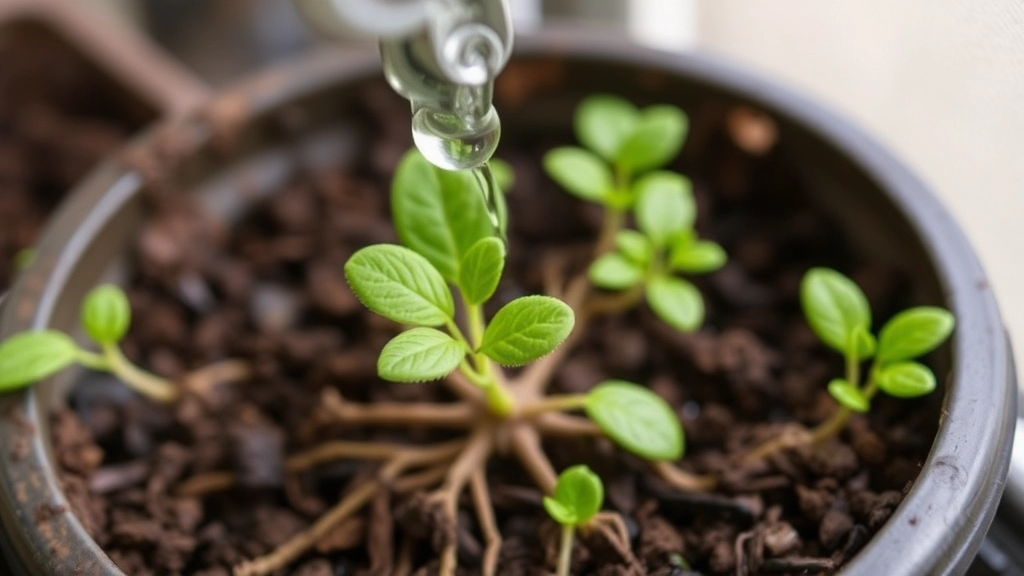
So, you’ve prepped your Kalanchoe leaf cutting, and now you’re wondering how to keep it happy while it roots.
Watering Tips:
- Light Touch: When it comes to watering, less is more. Overwatering can lead to rot, which is a big no-no for your cutting.
- Mist, Don’t Drench: Instead of soaking the soil, give it a light misting. This keeps moisture levels just right without drowning your plant.
- Check the Soil: Stick your finger about an inch into the soil. If it feels dry, it’s time for a little sprinkle. If it’s still moist, hold off for a bit.
Humidity Considerations:
- Keep It Cozy: Kalanchoe loves a humid environment. Aim for around 50-70% humidity.
- Humidity Trays: If your home is on the dry side, consider using a humidity tray with water and pebbles beneath the pot. This helps raise humidity levels without making the soil soggy.
- Plastic Bag Trick: For an extra boost, you can cover the cutting with a clear plastic bag. Just make sure to poke a few holes for airflow. This creates a mini greenhouse effect, perfect for rooting.
Remember, balance is key. You want your cutting to be moist but not waterlogged.
Monitoring Light and Temperature for Healthy Growth
As we delve deeper into the propagation process, understanding the light and temperature requirements for Kalanchoe leaf cuttings is crucial for their successful growth.
Light Requirements
Kalanchoe plants thrive in bright, indirect sunlight. Here’s how to ensure your cuttings receive the right amount of light:
- Location: Place your cuttings near a window that gets filtered sunlight. Avoid direct sunlight, which can scorch the leaves.
- Duration: Aim for about 12-14 hours of light daily. If natural light is insufficient, consider using grow lights to supplement.
- Rotation: Rotate the cuttings every few days to ensure even light exposure on all sides.
Temperature Considerations
Temperature plays a vital role in the rooting process. Kalanchoe prefers a warm environment:
- Ideal Range: Maintain a temperature between 20-25°C (68-77°F) during the day. At night, temperatures can drop slightly but should not fall below 15°C (59°F).
- Avoid Drafts: Keep cuttings away from cold drafts or sudden temperature changes, as this can hinder their growth.
Signs of Stress
Monitoring your cuttings is essential. Look out for:
- Wilting Leaves: This may indicate insufficient light or too much heat.
- Discolouration: Yellowing leaves can signal overexposure to direct sunlight or temperature stress.
By keeping a close eye on light and temperature, you set the stage for healthy root development and robust growth. For more detailed guidance, check out our Kalanchoe Flapjack Paddle Plant Care Guide and Kalanchoe Panda Plant Care Tips.
Troubleshooting Common Issues in Kalanchoe Leaf Propagation
So, you’ve taken the plunge into Kalanchoe leaf propagation, but things aren’t going quite as planned. Don’t worry; you’re not alone in this journey!
Common Problems and Quick Fixes
Here are some of the most common issues you might face, along with simple solutions:
- Leaf Rot
This is often due to overwatering or poor drainage.
Solution:- Ensure your pot has drainage holes.
- Let the soil dry out between waterings.
- No Rooting After Weeks
Frustrating, right? Sometimes leaves just don’t want to root.
Solution:- Check if your leaf cutting was healthy and not damaged.
- Ensure it was calloused properly before planting.
- Wilting Leaves
This can happen if the environment is too dry or too humid.
Solution:- Adjust humidity levels.
- Mist the leaves lightly or cover with a plastic bag for a mini greenhouse effect.
- Pests
Tiny invaders can wreak havoc on your new plant babies.
Solution:- Inspect your cuttings regularly.
- Use neem oil or insecticidal soap to tackle any pests.
Keeping an Eye on Your Cuttings
Regular monitoring is key.
- Check Soil Moisture
Stick your finger in the soil. If it feels dry an inch down, it’s time to water. - Adjust Light Conditions
If your cuttings are stretching or turning yellow, they might need more light. For more detailed advice, check out these lighting and care tips.
For a comprehensive guide on how to properly care for your Kalanchoe plants, you can refer to our complete care guide.
FAQs About Kalanchoe Propagation From Leaf
How do I choose the right leaf for Kalanchoe propagation?
Look for a leaf that is healthy and plump. It should be thick and firm, not yellowing, damaged, or shrivelled. Mature leaves are preferable as they often have more stored energy to help kickstart the rooting process.
What tools should I use to cut the leaf?
Use clean, sharp tools like a knife or scissors to make the cut. Clean cuts help prevent disease, and a diagonal cut is recommended to increase the surface area for rooting.
Why should I let the leaf cutting dry before planting?
Allowing the leaf cutting to rest in a dry area for a day or two helps the sap to callous over. This reduces the risk of rot when the leaf is planted.
What type of soil mix is best for Kalanchoe leaf propagation?
A well-draining soil mix is crucial. Cactus or succulent soil, which typically contains a blend of sand, perlite, and peat, is ideal. Adding perlite or pumice can further improve aeration and drainage. A small amount of organic compost can also provide necessary nutrients.
Can I make my own soil mix for Kalanchoe propagation?
Yes, you can create your own soil mix by combining 50% cactus or succulent soil, 25% perlite or pumice, and 25% organic compost. Mix these components thoroughly to ensure an even distribution.
How should I test my soil mix before planting?
Test the soil mix for moisture retention by wetting it and observing how quickly it drains. It should not hold water for long. Also, check the pH level; Kalanchoe prefers a slightly acidic to neutral pH (around 6.0 to 7.0).
How often should I water the Kalanchoe leaf cutting?
Water sparingly. Overwatering can lead to rot. Instead of soaking the soil, give it a light misting. Check the soil moisture by sticking your finger about an inch into it; water only if it feels dry.
What humidity levels are ideal for Kalanchoe leaf propagation?
Kalanchoe prefers a humid environment with around 50-70% humidity. If your home is dry, consider using a humidity tray with water and pebbles beneath the pot or covering the cutting with a clear plastic bag with holes for airflow to create a mini greenhouse effect.
References
-
Gardening Know How: Kalanchoe Leaf Propagation
-
The Spruce: How to Grow Kalanchoe
-
The Old Farmer’s Almanac: Kalanchoe