Kalanchoe Flapjack Care
When it comes to Kalanchoe Flapjack care, getting the light conditions right is crucial. These succulents thrive in bright, indirect sunlight, making them perfect for a sunny windowsill. Too much direct sun can scorch the leaves, while too little light can make them leggy and weak.
Soil Requirements
Choosing the right soil is another essential step. Kalanchoe Flapjacks prefer well-draining soil, typically a cactus or succulent mix. Overwatering is a common issue, so make sure your pot has good drainage to prevent root rot. Water sparingly, allowing the soil to dry out completely between waterings.
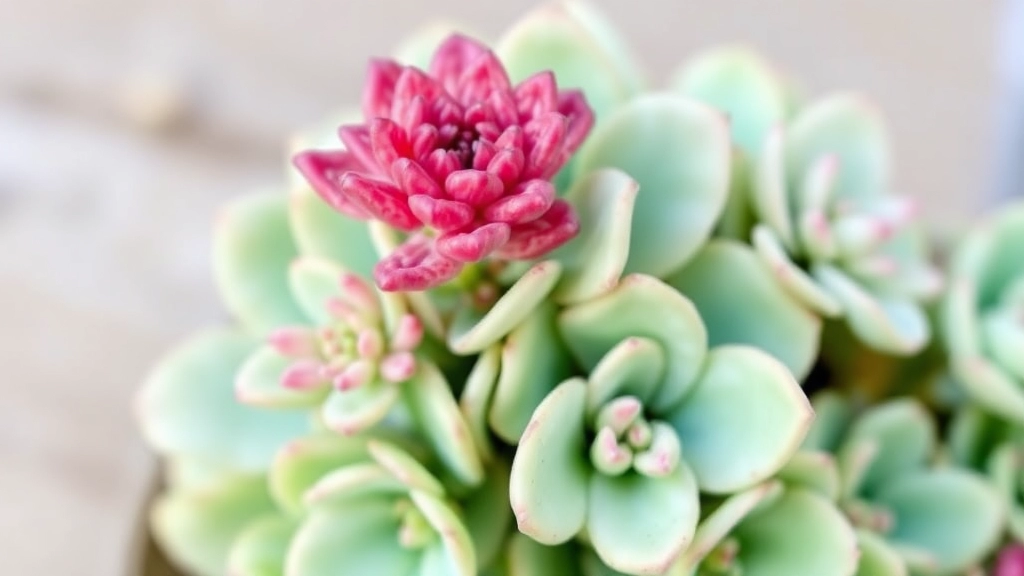
Best Light Conditions for Kalanchoe Flapjack
When it comes to growing Kalanchoe Flapjack, one of the most common questions is about the best light conditions.
These vibrant succulents thrive in bright, indirect sunlight.
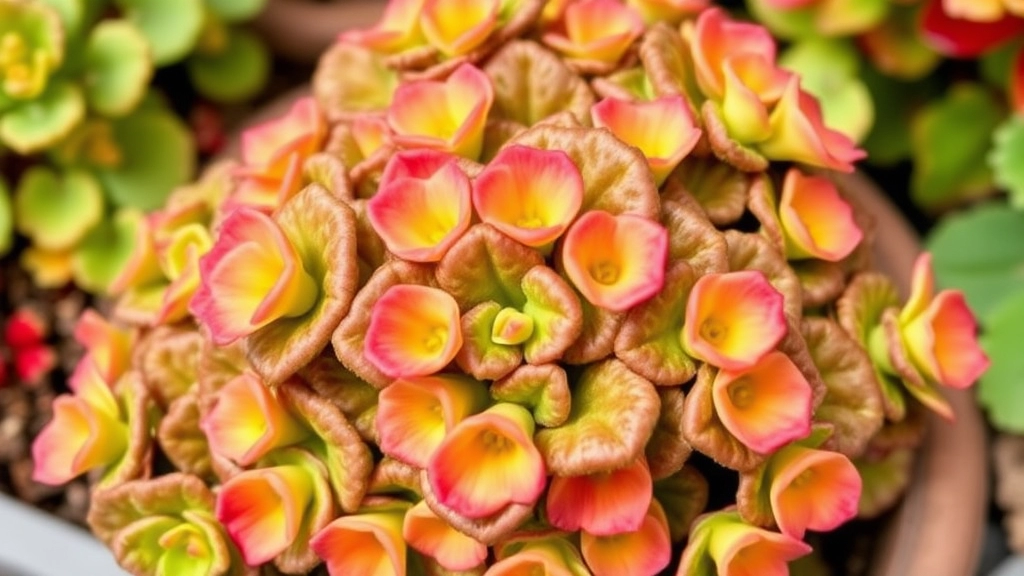
Optimal Soil Types and Drainage for Flapjack Plants

So, you’re ready to give your Kalanchoe Flapjack the best home possible?
One of the biggest worries for plant parents is getting the soil just right.
You want your Flapjack to thrive, and that starts with the perfect soil mix.
What Soil Does Your Flapjack Need?
- Well-Draining Soil:
- Your Flapjack loves to have its roots dry out between waterings.
- A cactus or succulent potting mix is a great choice.
- If you’re feeling adventurous, mix regular potting soil with sand or perlite for extra drainage.
- pH Level:
- Aim for a slightly acidic to neutral pH, around 6.0 to 7.0.
- This helps your plant absorb nutrients effectively.
- Organic Matter:
- Adding a bit of organic matter can give your Flapjack a nutrient boost.
- Just don’t overdo it—too much can hold onto moisture, which isn’t ideal.
Drainage is Key
- Pot with Drainage Holes:
- Always choose a pot that has drainage holes.
- This helps excess water escape, preventing root rot.
- Layering:
- Consider adding a layer of gravel or small stones at the bottom of the pot.
- This provides extra drainage and keeps the soil from clogging.
Quick Tips for Soil and Drainage
- Use a cactus mix or create your own with potting soil, sand, and perlite.
- Ensure your pot has drainage holes.
- Add a layer of gravel for improved drainage.
Proper Watering Techniques for Healthy Growth
When it comes to ensuring your Kalanchoe Flapjack thrives, proper watering techniques are crucial. Many plant enthusiasts often wonder, “How much water does my Flapjack really need?” or “Am I watering too often?” These concerns are common, and addressing them can lead to a flourishing plant.
Understanding Water Needs
Kalanchoe Flapjacks, being succulent plants, have specific watering requirements due to their ability to store water in their leaves. Here are some key points to consider:
- Soil Moisture Check: Always check the soil moisture before watering. Stick your finger about an inch into the soil; if it feels dry, it’s time to water.
- Watering Frequency: Typically, watering every two to three weeks is sufficient. However, this can vary based on your climate and the season.
- Watering Technique: When you do water, do so thoroughly. Ensure that water drains out of the bottom of the pot. This prevents root rot, a common issue for Flapjacks.
- Seasonal Adjustments: In the growing season (spring and summer), your plant may need more frequent watering. Conversely, reduce watering in the dormant months (autumn and winter).
Signs of Under or Overwatering
Keeping an eye on your plant can help you gauge its watering needs:
- Underwatering: Leaves may appear shriveled or wrinkled.
- Overwatering: Leaves can become mushy or develop brown spots.
Water Quality Matters
Using distilled or rainwater is ideal, as tap water can contain chemicals that may harm your plant over time.
Temperature Ranges and Climate Considerations for Kalanchoe Flapjack
When caring for your Kalanchoe Flapjack, understanding the ideal temperature ranges is crucial for promoting healthy growth.
Ideal Temperature Range
Kalanchoe Flapjacks thrive best in temperatures between 20°C to 30°C (68°F to 86°F).
- Daytime Temperatures: Aim for the higher end of this range during the day.
- Nighttime Temperatures: A drop to around 10°C to 15°C (50°F to 59°F) at night is acceptable.
Climate Considerations
Kalanchoe Flapjacks are native to arid regions, which means they prefer a dry climate.
- Humidity Levels: Low humidity is ideal. High humidity can lead to issues like rot.
- Sunlight Exposure: They enjoy bright, indirect light. Direct sunlight can scorch their leaves.
Seasonal Variations
- Summer: Ensure they are shielded from intense afternoon sun.
- Winter: They can tolerate cooler temperatures but should be kept away from frost.
Tips for Maintaining Ideal Conditions
- Indoor Care: Place them near a sunny window, but avoid direct exposure during peak hours.
- Outdoor Care: If grown outside, consider a location that receives morning sun and afternoon shade.
V. Fertilizing the Flapjack: When and How
As we delve deeper into the care of your Kalanchoe Flapjack, understanding the right fertilization techniques is crucial for promoting healthy growth.
When to Fertilize
- Growing Season: The best time to fertilize your Flapjack is during its active growing season, typically from spring to early autumn.
- Frequency: Aim to fertilize every 4-6 weeks during this period. This ensures your plant receives the necessary nutrients without overwhelming it.
How to Fertilize
- Type of Fertilizer:
- Use a balanced, water-soluble fertilizer with an N-P-K ratio of 10-10-10 or 20-20-20.
- Alternatively, you can opt for a cactus or succulent-specific fertilizer, which is often lower in nitrogen.
- Dilution: Always dilute the fertilizer to half the recommended strength. This prevents root burn and promotes healthier growth.
- Application Method:
- Water your Flapjack thoroughly before applying the fertilizer. This helps the roots absorb the nutrients more effectively.
- Apply the diluted fertilizer directly to the soil, avoiding the leaves to prevent burning.
Additional Tips
- Signs of Nutrient Deficiency: Yellowing leaves or stunted growth may indicate a lack of nutrients. Adjust your fertilization schedule accordingly.
- Post-Fertilization Care: After fertilizing, ensure your plant has adequate light and water to support its growth. For more detailed care instructions, you can refer to the Kalanchoe Flapjack Paddle Plant Care Guide.
Understanding the specific needs of your plant can also help in addressing issues such as why your Kalanchoe leaves might be drying out. Proper fertilization and care can prevent many common problems.
Repotting and Pot Selection for Indoor and Outdoor Growth

So, you’re wondering when and how to repot your Kalanchoe Flapjack? You’re not alone! Many plant lovers face the challenge of choosing the right pot and timing for repotting.
When to Repot
- Growth Spurts: If you notice your Flapjack is outgrowing its pot or roots are poking out of the drainage holes, it’s time to repot.
- Soil Degradation: If the soil looks compacted or the nutrients seem depleted, fresh soil can do wonders.
- Pest Issues: If you suspect pests in the soil, repotting can help eliminate the problem.
Pot Selection Tips
- Size Matters: Choose a pot that’s one size larger than the current one. Too big can lead to overwatering issues.
- Drainage is Key: Always opt for pots with drainage holes. Flapjacks hate sitting in water!
- Material Choices: Terracotta pots are great for airflow, while plastic pots retain moisture. Pick what suits your environment.
Soil Considerations
- Cactus Mix: A well-draining cactus mix is ideal. You can also mix regular potting soil with sand or perlite.
- pH Level: Aim for a slightly acidic to neutral pH (around 6.0 to 7.0).
Repotting Steps
- Prepare Your Tools: Gather a new pot, fresh soil, and a trowel.
- Remove the Plant: Gently take your Flapjack out of its old pot. Be careful with those delicate leaves!
- Inspect the Roots: Trim any dead or mushy roots. Healthy roots should be white and firm.
- Add Soil: Place some fresh soil at the bottom of the new pot.
- Position the Plant: Set your Flapjack in the centre and fill around it with more soil.
- Water Lightly: After repotting, give it a gentle drink, but don’t soak it.
By following these simple steps, you’ll ensure your Kalanchoe Flapjack has the best environment to thrive.
Propagation Methods: Using Offsets and Leaf Cuttings
As we delve deeper into caring for your Kalanchoe Flapjack, understanding propagation methods can be a game changer. Whether you want to expand your collection or share with friends, mastering offsets and leaf cuttings is essential.
Offsets: A Simple Way to Propagate
Offsets are small plants that grow at the base of the Kalanchoe Flapjack. Here’s how to propagate using offsets:
- Identify Offsets: Look for small, healthy offsets at the base of the parent plant.
- Remove Offsets: Gently twist or cut the offset from the parent plant using clean scissors.
- Let it Dry: Allow the offset to dry for a few hours to form a callus over the cut area.
- Planting: Place the offset in well-draining soil, ensuring it is upright.
- Water Sparingly: Water lightly until roots establish, usually within a few weeks.
Leaf Cuttings: A Reliable Alternative
If your plant doesn’t have offsets, leaf cuttings can also be effective. Here’s a straightforward process:
- Select a Healthy Leaf: Choose a plump, healthy leaf from the parent plant.
- Cut the Leaf: Use clean scissors to cut the leaf from the stem.
- Dry the Leaf: Allow the leaf to dry for a couple of days until a callus forms.
- Planting: Place the leaf on top of well-draining soil, pressing it down slightly.
- Watering: Mist the soil lightly, keeping it moist but not soggy.
Key Tips for Successful Propagation:
- Use Sharp Tools: Always use clean and sharp tools to avoid damaging the plant.
- Optimal Conditions: Keep the cuttings in a warm, bright location but out of direct sunlight.
- Patience is Key: Rooting can take several weeks, so be patient and avoid overwatering.
By using these propagation methods, you can easily expand your Kalanchoe Flapjack collection. For more detailed care instructions, check out our complete guide to Kalanchoe succulent care and learn about different Kalanchoe varieties and their care tips.
Seasonal Care: Adjusting Watering and Light in Winter
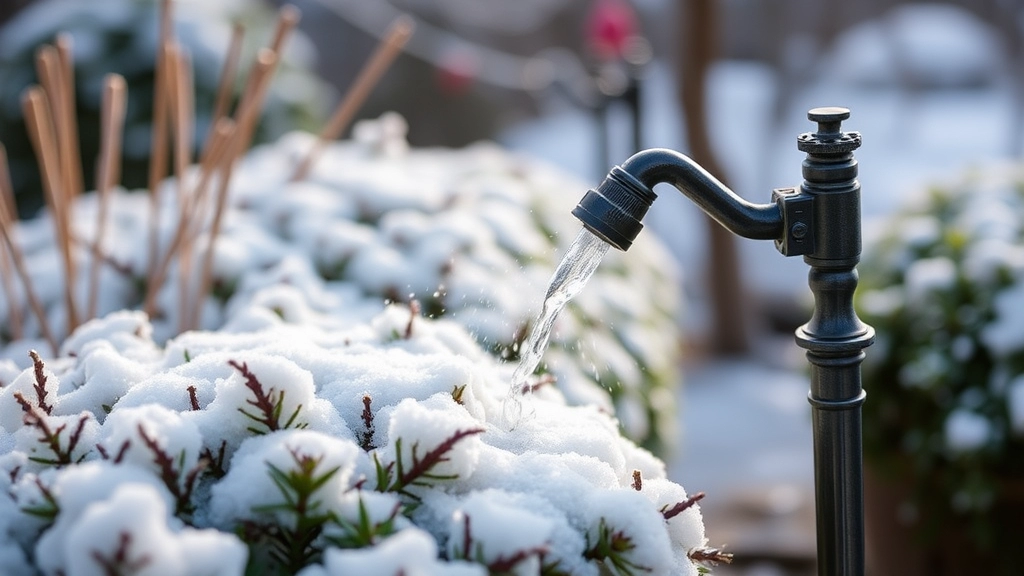
As we transition into the colder months, it’s essential to rethink how we care for our Kalanchoe Flapjack.
You might be wondering, “How do I keep my plant thriving when the days are shorter and temperatures drop?”
Watering Adjustments:
- Reduce Frequency: During winter, your Flapjack will need less water. Aim to water every 2-3 weeks, depending on how quickly the soil dries out.
- Check Soil Moisture: Stick your finger an inch into the soil. If it’s still moist, hold off on watering.
Light Considerations:
- Maximize Sunlight: Position your Flapjack near a south-facing window to soak up as much natural light as possible.
- Supplemental Light: If your home is particularly dark, consider using a grow light for a few hours each day.
Temperature Awareness:
- Keep It Cozy: Kalanchoe Flapjacks prefer temperatures between 15-24°C (60-75°F). Avoid placing them near drafty windows or heating vents.
Signs to Watch For:
- Leggy Growth: If your plant starts stretching towards the light, it might not be getting enough. Adjust its position for more sun.
- Leaf Drop: If leaves start to fall, it could be a sign of overwatering or insufficient light.
How to Prevent Common Pests and Diseases
As we delve deeper into the care of your Kalanchoe Flapjack, it’s essential to address a crucial concern: pest and disease prevention. Keeping your plant healthy not only enhances its beauty but also ensures it thrives for years to come.
Pruning Tips for a Compact and Healthy Kalanchoe Flapjack

So, you’ve got your Kalanchoe Flapjack thriving, but now you’re wondering how to keep it looking its best. Pruning is a game-changer for maintaining a neat and compact plant.
Why Prune?
Pruning helps manage growth, encourages bushiness, and removes any dead or unhealthy leaves. Plus, it opens up the plant to better light, which is essential for those vibrant colours.
When to Prune:
- Spring: This is the ideal time as the plant is waking up from dormancy.
- After Flowering: If your Flapjack blooms, give it a trim post-flower.
How to Prune:
- Use Clean Tools: Always use sterilised scissors or pruning shears to prevent disease.
- Trim Dead Leaves: Snip off any brown or shrivelled leaves right at the base.
- Shape It Up: If it’s getting leggy, cut back the longer stems to encourage new growth.
- Focus on Offsets: If you notice offsets (baby plants), you can prune these away for propagation.
Tips to Remember:
- Don’t Overdo It: A little goes a long way. You want to encourage growth, not shock the plant.
- Observe Growth Patterns: Each plant is unique. Pay attention to how yours responds to pruning.
Signs of Overwatering and How to Correct It
As we delve deeper into caring for your Kalanchoe Flapjack, it’s crucial to address one of the most common concerns for plant enthusiasts: overwatering.
Identifying Overwatering
Overwatering can be detrimental to your Flapjack’s health. Here are some signs to look out for:
- Yellowing Leaves: If the leaves start turning yellow, this is often a red flag.
- Soft, Mushy Leaves: Healthy leaves should be firm. If they feel soft or mushy, it’s a sign of excess moisture.
- Wilting: Ironically, overwatered plants can also appear wilted, as their roots struggle to absorb nutrients.
- Root Rot: If you notice a foul smell when inspecting the roots, it’s likely they are rotting due to excessive water.
Correcting Overwatering
If you suspect your Flapjack is suffering from overwatering, here’s how to remedy the situation:
- Stop Watering: Allow the soil to dry out completely before watering again.
- Improve Drainage: Ensure your pot has adequate drainage holes. Consider adding perlite or sand to the soil mix to enhance drainage.
- Repotting: If root rot is evident, carefully remove the plant from its pot. Trim away any rotten roots and repot in fresh, dry soil.
- Adjust Watering Schedule: Water less frequently. A good rule of thumb is to check the soil moisture before watering. Stick your finger about an inch deep into the soil; if it feels dry, it’s time to water.
- Use a Moisture Meter: For added assurance, consider using a moisture meter to gauge when your plant truly needs water.
By paying close attention to these signs and taking corrective measures, you can help your Kalanchoe Flapjack thrive. For more detailed care tips, you might find our Kalanchoe Paddle Plant Care Guide helpful. Additionally, understanding the lifespan and care tips for Kalanchoe plants can further enhance your plant care routine.
FAQs on Kalanchoe Flapjack Care
What type of soil is best for Kalanchoe Flapjack?
Kalanchoe Flapjacks thrive in well-draining soil. A cactus or succulent potting mix is ideal. You can also mix regular potting soil with sand or perlite to improve drainage.
What pH level should the soil be for Kalanchoe Flapjack?
A slightly acidic to neutral pH, around 6.0 to 7.0, is optimal for Kalanchoe Flapjacks. This helps the plant absorb nutrients effectively.
Why is drainage important for Kalanchoe Flapjack?
Proper drainage prevents root rot by allowing excess water to escape. Always use a pot with drainage holes and consider adding a layer of gravel at the bottom for extra drainage.
What temperature range is ideal for Kalanchoe Flapjack?
Kalanchoe Flapjacks thrive in temperatures between 20°C to 30°C (68°F to 86°F) during the day and can tolerate nighttime temperatures around 10°C to 15°C (50°F to 59°F).
How much sunlight does a Kalanchoe Flapjack need?
Kalanchoe Flapjacks prefer bright, indirect light. Direct sunlight can scorch their leaves, so it’s best to provide filtered light or partial shade.
When should I repot my Kalanchoe Flapjack?
Repotting is necessary if your plant shows signs of outgrowing its pot, the soil is degraded, or you suspect pest issues. Generally, repotting every 1-2 years is a good practice.
What type of pot should I use for Kalanchoe Flapjack?
Choose a pot that is one size larger than the current one and has drainage holes. Terracotta pots are great for airflow, while plastic pots retain moisture.
How often should I water my Kalanchoe Flapjack in winter?
In winter, reduce watering to every 2-3 weeks. Check soil moisture by sticking your finger an inch into the soil; if it’s still moist, hold off on watering.
How do I maximize light for my Kalanchoe Flapjack in winter?
Place your Flapjack near a south-facing window to maximize natural light. If your home is dark, consider using a grow light for a few hours each day.
When and how should I prune my Kalanchoe Flapjack?
Prune in spring or after flowering. Use sterilized scissors to trim dead leaves and shape the plant. Focus on removing brown or shriveled leaves and cut back longer stems to encourage new growth.
References
-
How to Grow and Care for Kalanchoe Flapjacks
-
Kalanchoe Flapjack Plant Care â How To Grow A Flapjack Kalanchoe
-
Kalanchoe: How to Grow and Care for Kalanchoe Plants