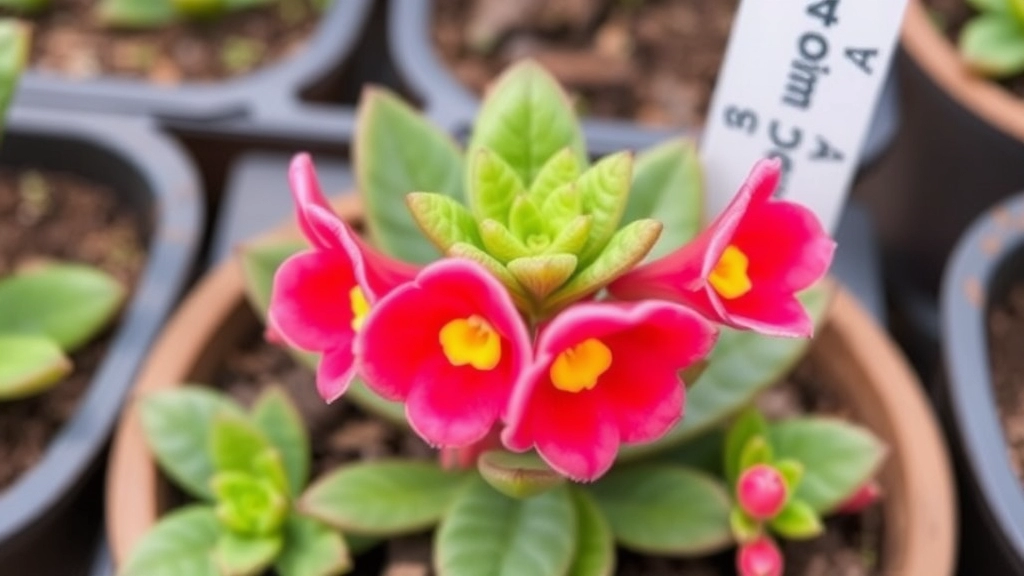
Propagating Leggy Kalanchoe
Propagating leggy kalanchoe is a straightforward process that can breathe new life into your succulent collection. If your kalanchoe has grown tall and spindly due to lack of light, don’t worry—this is the perfect opportunity to create new plants. I’ll guide you through selecting the right leggy stems and preparing them for propagation.
Steps for Propagation
- Prune the Leggy Growths: Start by pruning the leggy growths carefully. Make clean cuts just below a node.
- Let Cuttings Callous: Allow the cuttings to callous over for a few days.
- Plant the Cuttings: Once calloused, plant them in a well-draining potting mix.
With the right care, your new kalanchoe plants will thrive, giving you a fuller and healthier display.
When dealing with a leggy Kalanchoe, it’s important to understand the reasons behind the spindly growth. If you’re encountering this issue, you might find it helpful to explore some **[care tips for Kalanchoe after blooming](https://planthq.org/care-tips-for-kalanchoe-after-blooming/)** to ensure your plant remains healthy and vibrant.
Once you’ve identified the leggy sections of your plant, it’s time to prepare for propagation. For those new to this process, a **[step-by-step guide on how to propagate Kalanchoe flapjack](https://planthq.org/how-to-propagate-kalanchoe-flapjack-stepbystep-guide/)** can offer detailed instructions and tips to help you succeed. By following these guidelines, you’ll be well on your way to rejuvenating your Kalanchoe.
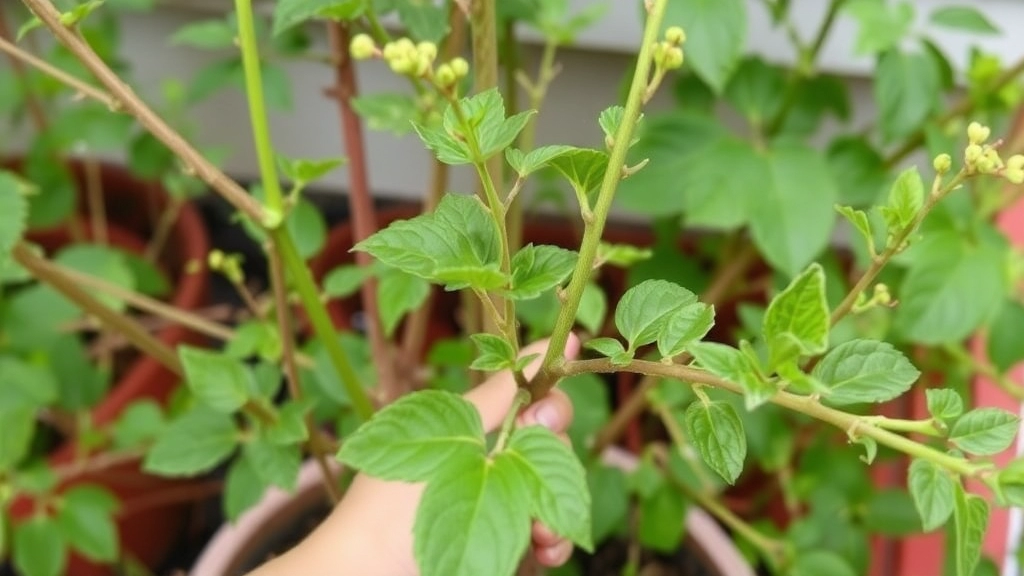
Pruning and Taking Cuttings from Leggy Growth
So, your Kalanchoe is looking a bit stretched out and leggy, huh?
No worries, we’ve all been there.
Pruning is your best friend when it comes to rejuvenating your plant and preparing it for propagation.
Why Prune?
- Encourages New Growth: Snipping off those long, spindly stems will prompt your Kalanchoe to bush out.
- Healthier Plant: Removing leggy growth can help prevent diseases and pests from taking hold.
- Better Aesthetics: A well-pruned plant just looks nicer, doesn’t it?
How to Prune
- Gather Your Tools: You’ll need sharp scissors or pruning shears. Clean them with rubbing alcohol to avoid any unwanted germs.
- Identify Leggy Stems: Look for stems that are thin and elongated. These are your targets.
- Cut at the Right Spot: Make your cut just above a leaf node. This encourages new growth from that point.
- Remove Dead or Yellow Leaves: Snip away any unhealthy leaves to keep your plant vibrant.
Taking Cuttings
Now that you’ve pruned, it’s time to take those cuttings for propagation.
- Choose Healthy Stems: Look for firm, green stems that are at least a few inches long.
- Make the Cut: Use your clean scissors to cut just below a leaf node.
- Remove Lower Leaves: Strip the leaves from the bottom half of the cutting. This helps prevent rot when you plant them.
- Let Them Breathe: Place your cuttings on a paper towel for a few hours. This helps them callous over, which is essential for preventing rot.
After pruning and taking cuttings from your leggy Kalanchoe, the next crucial step is allowing those cuttings to callous. You might be wondering, why is this necessary?
Letting your Kalanchoe cuttings callous helps to prevent rot when they are eventually planted. Here’s how to do it effectively:
– **Placement**: Lay the cuttings on a clean, dry surface in a shaded area. Avoid direct sunlight, as this can dry them out too quickly.
– **Duration**: Allow the cuttings to sit for 24 to 48 hours. This time frame helps the cut ends to form a protective layer.
– **Check for Moisture**: Ensure the cuttings are not exposed to excessive moisture during this period, as this can lead to fungal issues.
– **Temperature**: A warm room temperature is ideal for callousing. Aim for around 20-25°C (68-77°F) to facilitate the process.
By following these steps, you can ensure that your cuttings are well-prepared for the next phase of propagation. For more detailed instructions, you can refer to this [step-by-step guide to Kalanchoe propagation](https://planthq.org/how-to-grow-kalanchoe-from-cuttings-stepbystep-guide/).
Additionally, if you’re dealing with leggy Kalanchoe plants, you might find these [pruning and care tips](https://planthq.org/fix-overgrown-leggy-kalanchoe-pruning-and-care-tips/) particularly useful.
Choosing the Right Potting Mix and Planting the Cuttings
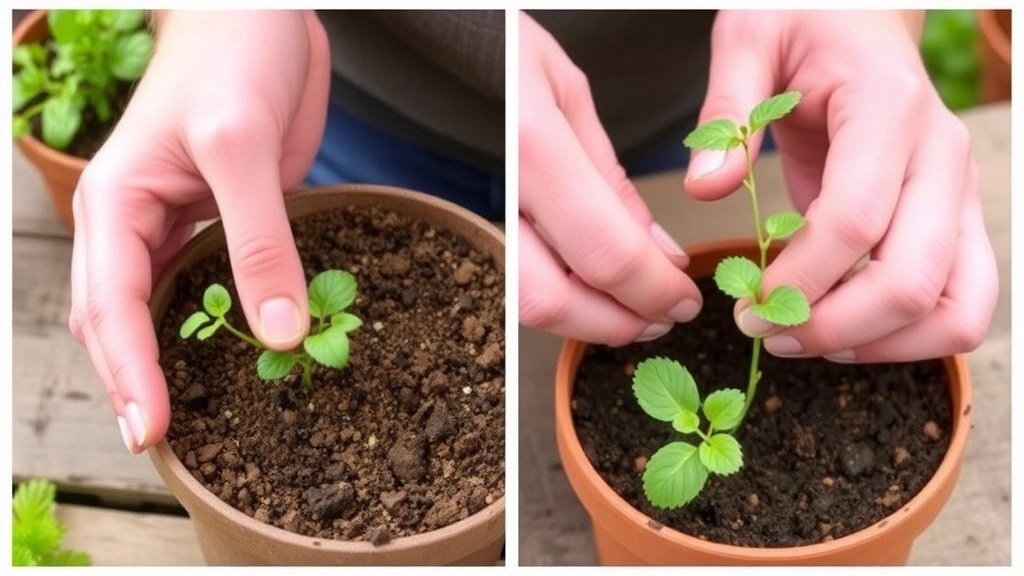
After allowing your Kalanchoe cuttings to callous, the next essential step is selecting the right potting mix and planting them effectively.
Why Potting Mix Matters
Using the right potting mix is crucial for the success of your Kalanchoe propagation. A well-draining mix prevents water retention, which can lead to root rot—a common issue for succulent plants.
Ideal Potting Mix Components:
- Cactus Mix: Specifically formulated for succulents and cacti, offering excellent drainage.
- Perlite or Pumice: These materials improve aeration and drainage. Mixing them with regular potting soil can enhance its properties.
- Coarse Sand: Adding sand provides further drainage and mimics the natural habitat of Kalanchoe.
Steps for Planting Your Cuttings:
- Prepare the Pot: Choose a pot with drainage holes to prevent water accumulation.
- Fill with Potting Mix: Fill the pot with your chosen mix, leaving enough space for the cuttings.
- Plant the Cuttings: Gently insert the cuttings into the soil, ensuring they’re upright and secure.
- Water Sparingly: After planting, water lightly to settle the soil around the cuttings.
Tips for Success:
- Avoid Overwatering: Too much moisture can hinder root development.
- Temperature Matters: Keep your cuttings in a warm, bright location but out of direct sunlight initially.
After successfully taking cuttings and preparing them for growth, the next crucial step is ensuring they thrive in their new environment.
### Common Concerns for New Kalanchoe Cuttings
You might be wondering: How do I care for my newly propagated Kalanchoe? What conditions do they need to flourish?
Here are some essential care tips to keep your cuttings healthy and thriving:
– **Light Requirements:**
– Place your cuttings in a bright location with indirect sunlight.
– Avoid direct sunlight initially, as it can scorch the delicate leaves.
– **Watering:**
– Water sparingly during the first few weeks.
– Allow the soil to dry out completely between waterings to prevent rot.
– **Humidity and Temperature:**
– Aim for a warm environment, ideally between 20°C to 25°C (68°F to 77°F).
– Maintain moderate humidity; too much moisture can lead to fungal issues.
– **Fertilisation:**
– Wait at least a month before fertilising.
– Use a diluted succulent or cactus fertiliser to encourage healthy growth.
– **Monitoring Growth:**
– Keep an eye on the cuttings for signs of new growth, which indicates successful rooting.
– Look for healthy green leaves and avoid any yellowing or wilting.
By following these care tips, you can ensure that your newly propagated Kalanchoe cuttings establish strong roots and grow into vibrant plants. For more detailed guidance, check out this [step-by-step guide to Kalanchoe stem propagation](https://planthq.org/kalanchoe-stem-propagation-stepbystep-guide/) and learn about the [ideal temperature for Kalanchoe growth](https://planthq.org/ideal-temperature-for-kalanchoe-blossfeldiana-growth/).
Common Problems in Kalanchoe Propagation and How to Solve Them
So, you’ve taken the plunge into propagating your leggy Kalanchoe, but things aren’t going quite as smoothly as you’d hoped.
Don’t sweat it!
Here are some common hiccups you might run into and how to tackle them like a pro.
1. Cuttings Rotting
What’s Happening: You notice your cuttings turning mushy and black.
Why: Too much moisture can lead to rot.
Solution:
- Use well-draining soil.
- Let cuttings callous properly before planting.
- Water sparingly until roots develop.
2. Wilting Cuttings
What’s Happening: Your cuttings look droopy and sad.
Why: This could be due to underwatering or shock from pruning.
Solution:
- Ensure the soil is slightly moist but not soggy.
- Mist the cuttings lightly to create humidity.
- Give them a little time to adjust.
3. Slow Root Development
What’s Happening: You’re waiting ages for roots to sprout.
Why: Cuttings might need a warmer environment or more light.
Solution:
- Place them in a warm spot, ideally around 20-24°C.
- Provide bright, indirect sunlight.
- Consider using a heat mat if you’re in a cooler area.
4. Pests and Diseases
What’s Happening: You spot tiny bugs or discolouration on your cuttings.
Why: Pests like mealybugs or fungal infections can be a pain.
Solution:
- Inspect your cuttings regularly.
- If you see pests, wipe them off with a cotton swab dipped in alcohol.
- Use a fungicide if you suspect a fungal issue.
5. Leggy Growth in New Plants
What’s Happening: Your new plants are stretching towards the light.
Why: They’re not getting enough light.
Solution:
- Move them to a brighter location.
- Rotate them occasionally to ensure even growth.
- If they’re getting too tall, pinch back the tips to encourage bushiness.
For more detailed advice, check out our step-by-step guide on propagating Kalanchoe in water. Additionally, if you’re dealing with specific varieties, our Mother of Thousands care and propagation guide might be particularly useful.
FAQs on Propagating Leggy Kalanchoe
What is a leggy Kalanchoe?
A leggy Kalanchoe is a plant that has elongated, thin stems due to insufficient light or other growth conditions. This can make the plant look stretched out and less aesthetically pleasing.
Why should I prune my leggy Kalanchoe?
Pruning encourages new growth, helps maintain a healthier plant by removing potential disease sites, and improves the overall appearance of your Kalanchoe.
How do I prune a leggy Kalanchoe?
Use sharp, clean scissors or pruning shears to cut just above a leaf node on thin, elongated stems. Also, remove any dead or yellow leaves to keep the plant vibrant.
What should I do with the cuttings after pruning?
Healthy cuttings can be used for propagation. Make sure to let them callous over by placing them on a paper towel for a few hours to prevent rot before planting.
What kind of potting mix should I use for Kalanchoe cuttings?
A well-draining mix is crucial. Ideal components include cactus mix, perlite or pumice for aeration, and coarse sand to mimic the natural habitat of Kalanchoe.
How do I plant Kalanchoe cuttings?
Prepare a pot with drainage holes, fill it with your chosen potting mix, and gently insert the cuttings into the soil. Water sparingly to settle the soil around the cuttings.
What are some tips for successful Kalanchoe propagation?
Avoid overwatering, as too much moisture can hinder root development. Keep the cuttings in a warm, bright location but out of direct sunlight initially for optimal growth.
References
-
How to Prune a Kalanchoe Plant
-
Propagating Kalanchoe Cuttings
-
The Best Soil for Succulents