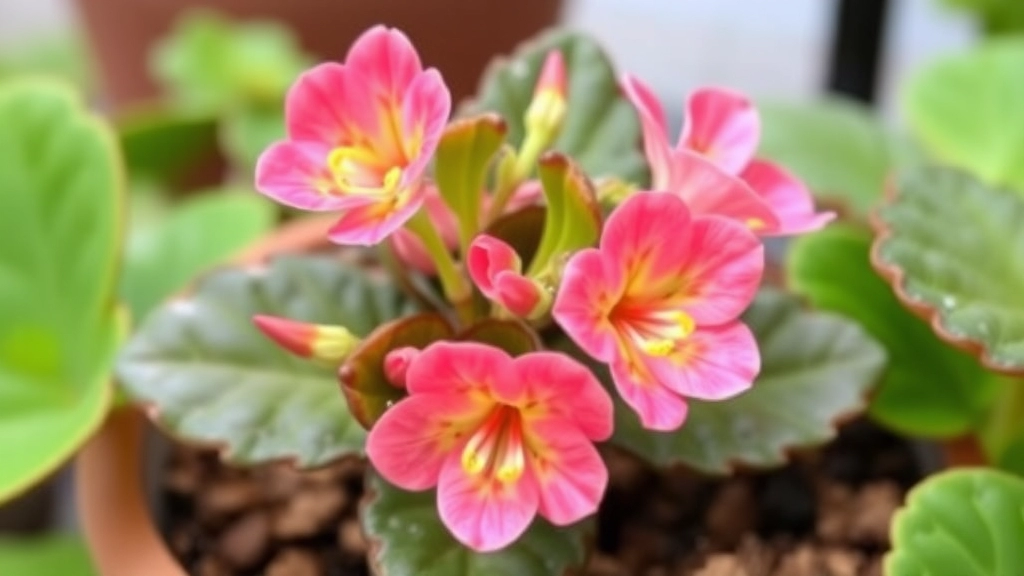
How to Propagate Kalanchoe Pink Butterflies
Ever wondered how to propagate Kalanchoe Pink Butterflies? You’re in the right place! This guide will walk you through each step of the process, ensuring you have all the information you need to successfully propagate these stunning plants. From choosing the best time to take cuttings to providing optimal light and watering conditions, we’ve got you covered.
Timing for Propagation
First, let’s talk about timing. The best time to propagate Kalanchoe Pink Butterflies is during their growing season, typically in spring or early summer. Gather your tools and materials, including a sharp knife, rooting hormone, and a suitable soil mix.
Selecting and Taking Cuttings
Next, you’ll learn how to select and take healthy cuttings, whether you opt for leaf or stem cuttings. Once you’ve got your cuttings, allow them to callous before planting them in soil. With the right care, you’ll soon see signs of successful propagation.
Choosing the Best Time for Propagation
Are you wondering when the best time to propagate your plants is? Timing can significantly influence your success in plant propagation.
Preparing the Necessary Tools and Materials

So, you’re ready to dive into propagation? Awesome! But before we get our hands dirty, let’s talk about the tools and materials you’ll need.
You might be wondering: “What do I actually need to get started?”
- Clean, Sharp Scissors or Pruners: This is crucial. A clean cut helps prevent damage and disease.
- Containers: Think pots, trays, or even recycled containers. Just make sure they have drainage holes.
- Potting Soil: A well-draining mix is key. You can buy a pre-made mix or create your own with peat moss, perlite, and vermiculite.
- Watering Can or Spray Bottle: Gentle watering is important, especially for new cuttings.
- Labeling Supplies: Whether it’s plant tags or simple tape, keeping track of your cuttings is a smart move.
- Plastic Bag or Humidity Dome: This helps maintain moisture while your cuttings are rooting.
- Light Source: Natural light is great, but if you’re propagating indoors, consider grow lights.
Now that we’ve got our toolkit sorted, it’s time to focus on selecting and taking healthy cuttings.
When it comes to propagation, the success of your efforts largely hinges on the quality of the cuttings you select.
Healthy cuttings are the backbone of successful propagation. Choosing the right cuttings ensures that your new plants will thrive. Here are some key considerations:
– **Age of the Plant**: Aim for cuttings from a mature plant. Younger plants may not have the strength needed for successful rooting.
– **Time of Year**: Early spring or late summer is often ideal for taking cuttings, as plants are in active growth phases.
– **Plant Health**: Always select cuttings from healthy, disease-free plants. Look for vibrant leaves and strong stems.
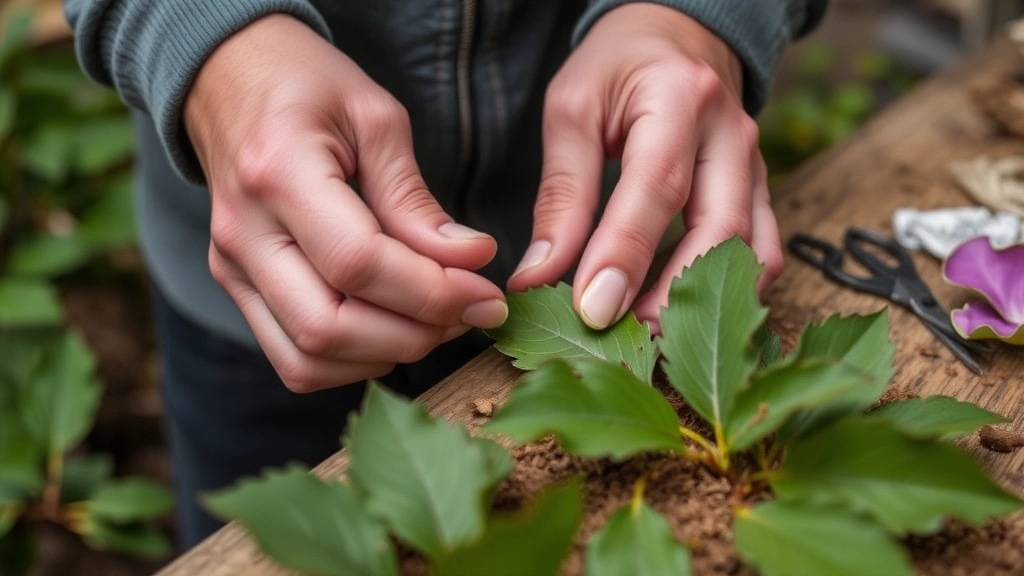
Once you’ve identified a suitable plant, follow these steps to take your cuttings:
1. **Use Clean Tools**: Ensure your scissors or knife are sterilised to prevent any disease transmission.
2. **Choose the Right Part**: For most plants, the best cuttings come from the tips or softwood sections of stems.
3. **Length Matters**: Cuttings should generally be about 4-6 inches long, with at least two nodes (the bumps on the stem where leaves grow).
4. **Make a Clean Cut**: Cut just below a node at a 45-degree angle. This increases the surface area for rooting.
5. **Remove Lower Leaves**: Trim off any leaves from the bottom half of the cutting to prevent rot when planted.
By following these guidelines, you can ensure that your cuttings are primed for successful rooting. For more detailed information on specific plants, you might find our guide on how to propagate Kalanchoe Blossfeldiana cuttings useful. Additionally, if you’re interested in the care of other Kalanchoe varieties, check out our complete guide to caring for Kalanchoe Mother of Millions plant.
Propagation by Leaf Cuttings
Have you ever wondered if you could grow a new plant from just a single leaf?
Propagation by leaf cuttings is a straightforward and rewarding method for expanding your plant collection.
Why Choose Leaf Cuttings?
- Simplicity: Leaf cuttings are often easier to manage than stem cuttings.
- Space-saving: Ideal for those with limited growing space.
- Cost-effective: You can multiply your plants without spending money.
Steps for Successful Leaf Cutting Propagation
- Choose the Right Plant:
- Not all plants propagate well from leaves.
- Popular choices include succulents, African violets, and some herbs.
- Select Healthy Leaves:
- Look for mature, disease-free leaves.
- Avoid any that show signs of damage or discoloration.
- Prepare the Cuttings:
- Use a sharp, sterile knife or scissors to take your cuttings.
- Cut the leaf cleanly, leaving a small stem if possible.
- Allow to Callous:
- Place the cuttings in a dry location for a few hours to a day.
- This helps prevent rot when planted.
- Planting:
- Use a well-draining soil mix.
- Insert the cut end of the leaf into the soil, ensuring it’s secure.
- Watering:
- Lightly mist the soil, ensuring it’s moist but not soggy.
- Overwatering can lead to rot.
By following these steps, you set the stage for successful propagation.
Next Steps: Propagation by Stem Cuttings
In the next section, we will explore the art of propagation through stem cuttings, a method that offers unique advantages for certain plant types.
Propagation by Stem Cuttings
When considering propagation methods, stem cutings stand out as an effective and straightforward approach.
Many of us worry about the success rate of our cuttings or the best techniques to ensure healthy growth.
Here’s how to propagate your plants using stem cuttings effectively:
- Choose the Right Stem:
- Select a healthy stem from the parent plant.
- Look for a stem that is firm, green, and free from disease.
- Cutting Length:
- Aim for cuttings that are 4 to 6 inches long.
- Ensure each cutting has at least two nodes, as these are where roots will emerge.
- Angle of Cut:
- Make a clean cut just below a node, at a 45-degree angle.
- This increases the surface area for root development.
- Remove Lower Leaves:
- Trim off any leaves from the bottom half of the cutting.
- This prevents rot when planted in soil.
- Optional Hormone Treatment:
- Dip the cut end in rooting hormone to encourage faster root growth.
- This step is not mandatory but can enhance success rates.
- Planting the Cutting:
- Insert the cutting into a prepared soil mix, ensuring the node is buried.
- Water lightly to settle the soil around the cutting.
By following these steps, you’ll set your stem cuttings on the path to successful propagation. For more detailed tips, you can check out our step-by-step guide on propagating Kalanchoe Tomentosa. Additionally, if you’re interested in learning about different Kalanchoe varieties, visit our guide on top Kalanchoe succulent varieties and care tips.
Allowing Cuttings to Callous
So, you’ve got your cuttings ready, but what’s the next step?
Allowing your cuttings to callous is a crucial part of the propagation process.
Why? Well, it helps prevent rot when you plant them.
Here’s how to do it:
- Find a Dry Spot: Place your cuttings in a warm, dry area. A windowsill works great, as long as it’s not too sunny.
- Leave Them Be: Let them sit for a few hours to a couple of days. The goal is to let the cut ends dry out and form a protective layer.
- Check for Moisture: If your cuttings are still wet after a day or so, it’s best to let them dry longer.
- Avoid Humidity: Keep them away from high humidity areas. This isn’t the time for a steamy environment!
- Use a Paper Towel: If you’re worried about moisture, you can place the cut ends on a paper towel to absorb excess moisture.
I remember the first time I propagated cuttings. I was so eager to plant them that I skipped this step. Let’s just say, it didn’t end well.
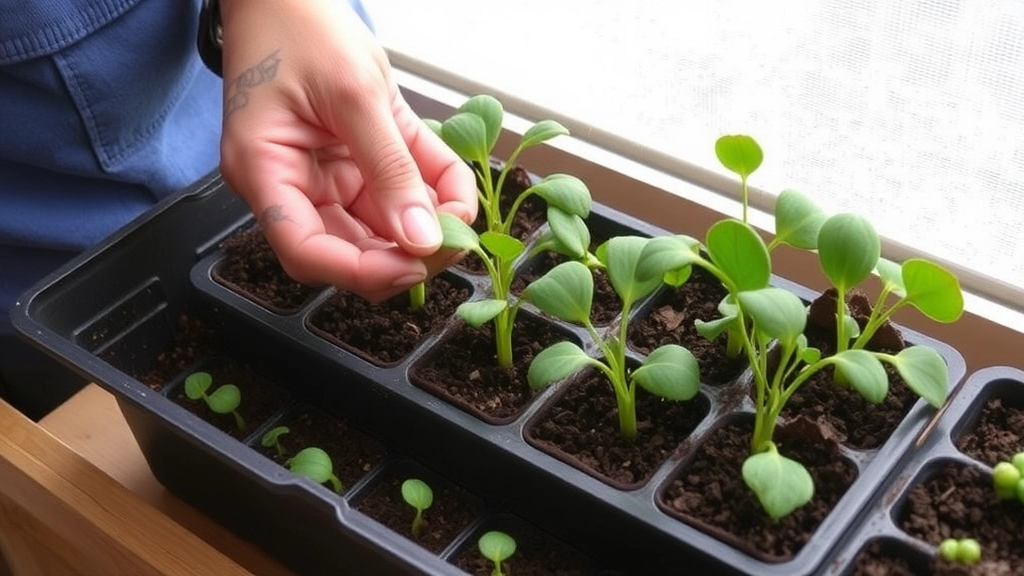
Planting Cuttings in a Suitable Soil Mix
Once you have allowed your cuttings to callous, the next crucial step is planting them in a suitable soil mix. This stage is vital for ensuring that your cuttings have the best chance to thrive and develop strong roots.
Why is Soil Mix Important?
Choosing the right soil mix can make all the difference in the success of your propagation efforts. A well-draining, nutrient-rich soil mix will provide the necessary support for root development while preventing issues like rot.
Ideal Soil Mix Components:
- Perlite or Vermiculite: These materials improve aeration and drainage.
- Peat Moss: Retains moisture without becoming waterlogged.
- Coconut Coir: An eco-friendly option that offers good water retention and drainage.
- Compost: Adds essential nutrients to support growth.
Steps to Prepare the Soil Mix:
- Combine Ingredients: Mix equal parts of peat moss, perlite, and compost.
- Moisten the Mix: Lightly dampen the mixture before planting. This ensures that the cuttings have immediate access to moisture.
- Fill Containers: Use small pots or seed trays, ensuring they have drainage holes.
Planting Your Cuttings:
- Make Holes: Use a pencil or your finger to create small holes in the soil mix.
- Insert Cuttings: Carefully place each cutting into the hole, ensuring that the cut end is buried.
- Firm the Soil: Gently press the soil around the cutting to provide stability.
By following these steps, you create an optimal environment for your cuttings to establish roots and grow. For more detailed guidance, check out our step-by-step guide on planting Kalanchoe. Additionally, if you’re working with specific varieties like the Kalanchoe Beharensis, our care and propagation tips can be very helpful.
Providing Optimal Light and Watering Conditions
So, you’ve got your cuttings ready and are eager to see them thrive. But how do you ensure they get the right light and water?
Light Conditions
First off, let’s talk about light.
- Indirect sunlight is your best friend. Direct sun can scorch those delicate cuttings.
- Aim for a spot that gets bright, indirect light for about 12-16 hours a day.
- If you notice your cuttings stretching towards the light, they might need a little more brightness.
Watering Tips
Now, onto watering. This can be a bit tricky, but here’s the scoop:
- Keep the soil moist, but not soggy. Overwatering can lead to rot.
- A good rule of thumb? Stick your finger about an inch into the soil. If it feels dry, give it a drink.
- Use a spray bottle to mist the cuttings gently if you’re worried about them drying out too quickly.
Humidity Matters
Humidity plays a crucial role too.
- If your home is dry, consider using a humidity dome or placing a tray of water near the cuttings to boost moisture.
- Misting the cuttings can also help, just don’t overdo it!
By keeping a close eye on light and water, you’re setting your cuttings up for success.
Encouraging Root Growth with Humidity
As we delve deeper into the propagation process, it’s essential to create an environment that fosters healthy root development. One of the most effective ways to achieve this is by maintaining optimal humidity levels.
Why Humidity Matters
High humidity can significantly enhance root growth in cuttings. When the air is moist, it reduces water loss from the cuttings, allowing them to focus their energy on developing roots rather than struggling to stay hydrated.
Tips for Maintaining Humidity
To create the perfect humid environment, consider the following strategies:
- Use a Humidity Dome: Cover your cuttings with a clear plastic dome or bag. This traps moisture and creates a mini-greenhouse effect.
- Mist Regularly: Lightly mist the cuttings with water several times a day. This keeps the air around them moist without over-saturating the soil.
- Group Cuttings Together: Placing multiple cuttings close to each other can help retain humidity as they release moisture into the air.
- Choose the Right Location: Keep your cuttings in a warm, shaded area away from direct sunlight, which can dry out the air too quickly.
Monitoring Humidity Levels
Investing in a hygrometer can help you keep track of humidity levels. Aim for around 70-80% humidity for optimal root development.
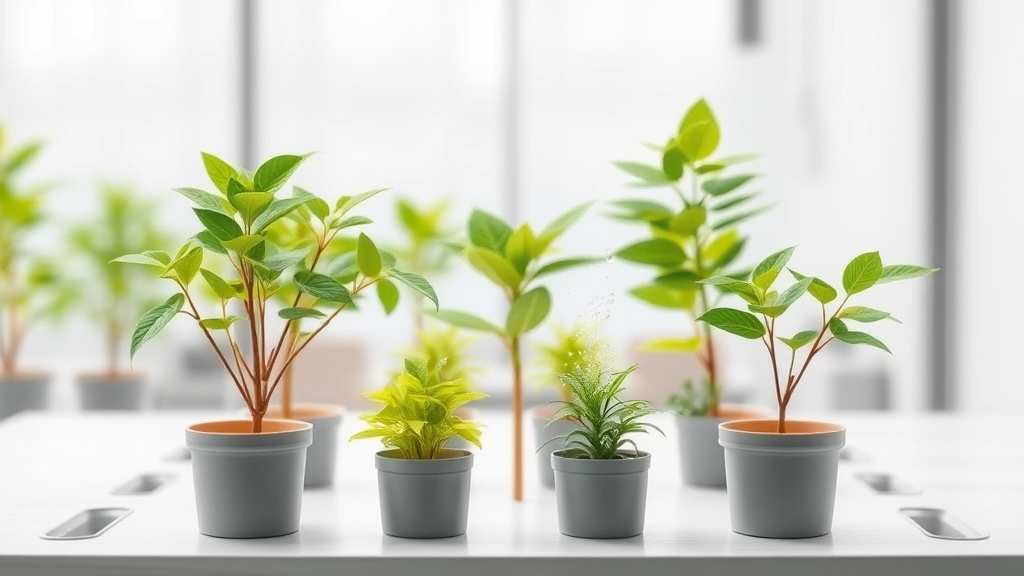
Signs of Successful Propagation and Potting Up
So, you’ve put in the effort, and now you’re itching to know if your cuttings have taken root.
What are the signs that your propagation has been a success?
Root Development
- Check for Roots: Gently tug on the cutting. If you feel resistance, that’s a good sign roots are forming.
- Visible Roots: If you can see roots through the drainage holes or if they’re poking out of the soil, it’s time to pot up!
New Growth
- Fresh Leaves: Look for new leaves sprouting. This indicates that your cutting is not just surviving but thriving.
- Healthy Colour: Leaves should be vibrant and green. Yellowing or wilting can be a red flag.
Firmness
- Sturdy Stem: The stem should feel firm and not floppy. A strong stem is a sign of a healthy plant.
Timing for Potting Up
Once you see these signs, it’s time to pot up!
Here’s how to do it:
- Choose the Right Pot: Make sure it’s slightly larger than your cutting’s current home.
- Use Fresh Soil: Opt for a well-draining mix to ensure good root health.
- Water Gently: After potting, give it a light watering to settle the soil.
For more detailed steps on how to plant Kalanchoe, check out our step-by-step guide. If you’re interested in propagating Kalanchoe Blossfeldiana, our cuttings guide provides comprehensive instructions.
Frequently Asked Questions (FAQs)
What tools and materials do I need to propagate Kalanchoe Pink Butterflies?
You’ll need clean, sharp scissors or pruners, containers with drainage holes, well-draining potting soil, a watering can or spray bottle, labeling supplies, a plastic bag or humidity dome, and a light source.
Why should I use leaf cuttings for propagation?
Leaf cuttings are simple, space-saving, and cost-effective. They are often easier to manage than stem cuttings and are ideal for those with limited growing space.
How do I select and prepare leaves for propagation?
Choose mature, healthy leaves that are free from disease and damage. Use a sharp, sterile knife or scissors to take the cuttings, and allow them to callous by placing them in a dry location for a few hours to a day.
What is the importance of allowing cuttings to callous?
Allowing cuttings to callous helps prevent rot when they are planted. This step involves letting the cut ends dry out and form a protective layer, which is crucial for successful propagation.
What are the optimal light conditions for Kalanchoe Pink Butterflies cuttings?
Place the cuttings in a spot that gets bright, indirect light for about 12-16 hours a day. Avoid direct sunlight as it can scorch the delicate cuttings.
How should I water my Kalanchoe Pink Butterflies cuttings?
Keep the soil moist but not soggy. Overwatering can lead to rot. A good rule of thumb is to stick your finger about an inch into the soil; if it feels dry, it’s time to water. Use a spray bottle for gentle misting if needed.
How can I maintain the right humidity for my cuttings?
If your home is dry, use a humidity dome or place a tray of water near the cuttings to boost moisture. Misting the cuttings can also help, but avoid overdoing it to prevent excess moisture.
What should I do if my cuttings are not rooting?
Ensure that you are providing the right light, moisture, and humidity conditions. Check that the cuttings were allowed to callous properly and that the soil is well-draining. Sometimes, adjusting these factors can improve rooting success.
References
-
Propagating Plants: How To Propagate Plants
-
How to Propagate Plants by Using Cuttings
-
How to Propagate Plants