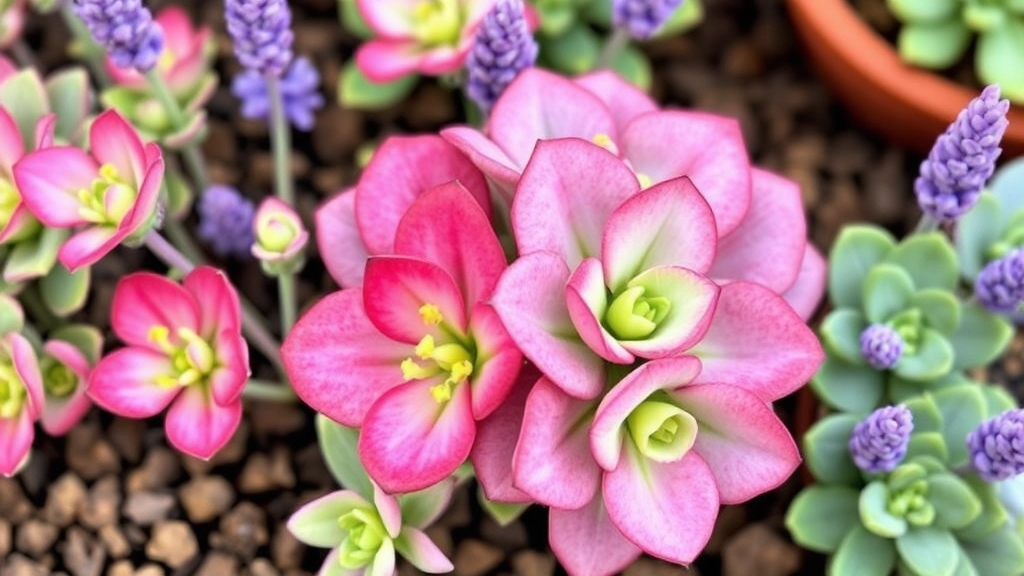
Kalanchoe Lavender Scallops Propagation
When it comes to Kalanchoe Lavender Scallops propagation, choosing the right method is crucial. Whether you’re using leaf cuttings, stem cuttings, plantlets, or seeds, each technique has its unique steps and requirements. Let’s dive into how you can successfully propagate this beautiful succulent and ensure healthy growth.
Propagation Methods
-
Leaf Cuttings
Starting with leaf cuttings, you’ll want to select a healthy leaf and let it dry for a day or two before placing it on well-draining soil.
-
Stem Cuttings
For stem cuttings, cut a healthy stem and let it callous over before planting.
-
Plantlets
Plantlets, which are tiny offshoots from the main plant, can be gently removed and placed in soil.
-
Seeds
Seeds, although less common, can also be sown in a suitable mix.
Ensuring proper soil mix, watering schedule, and lighting conditions will set you on the path to successful propagation.
Choosing the Right Propagation Method
When it comes to propagating plants, selecting the right method can make all the difference.
Are you unsure whether to use cuttings, seeds, or plantlets?
Choosing the right propagation method for your lavender scallops is crucial for success.
Here are some key factors to consider:
– **Type of Plant:** Different plants respond better to specific methods. Lavender scallops thrive with both leaf cuttings and seeds.
– **Time Commitment:** Some methods, like seeds, may take longer to yield results. If you’re looking for quicker growth, consider using cuttings.
– **Resources Available:** Do you have the right soil, pots, and environment for each method? Ensure you have what you need before diving in.
– **Personal Preference:** Sometimes, it simply comes down to what you enjoy doing. If you find joy in nurturing cuttings, go for it!
By evaluating these factors, you can choose the most suitable propagation method for your lavender scallops. For a detailed guide on propagating Kalanchoe plants, check out the [step-by-step guide on Kalanchoe leaf propagation](https://planthq.org/how-to-propagate-kalanchoe-leaves-a-stepbystep-guide/). Additionally, if you’re interested in stem propagation, this [Kalanchoe stem propagation guide](https://planthq.org/kalanchoe-stem-propagation-stepbystep-guide/) can be very helpful.
How to Propagate Lavender Scallops from Leaf Cuttings
So, you’re keen on propagating Lavender Scallops from leaf cuttings? Great choice! This method is not only straightforward but also super rewarding.
Why Leaf Cuttings?
Using leaf cuttings is a fantastic way to expand your collection without breaking the bank. Plus, it’s a fun project that lets you connect with your plants.
Step-by-Step Guide
Here’s how to get started:
- Select Healthy Leaves
– Look for plump, vibrant leaves.
– Avoid any that are damaged or discolored. - Prepare Your Tools
– Grab a sharp, clean knife or scissors.
– Make sure you have a clean container for your cuttings. - Cut the Leaves
– Snip the leaves off, leaving a short stem if possible.
– Aim for a few cuttings to increase your chances of success. - Let Them Callous
– Place the cuttings on a paper towel for a day or two.
– This allows the cut ends to dry out and callous over, reducing the risk of rot. - Planting
– Fill a small pot with a well-draining soil mix.
– Insert the cut ends of the leaves into the soil, ensuring they’re secure. - Watering
– Mist the soil lightly.
– Avoid soaking it; you want it damp, not soggy.
After planting, keep an eye on your cuttings.
Propagating Kalanchoe via Stem Cuttings
When it comes to propagating Kalanchoe, many enthusiasts often wonder about the best methods to ensure success. Stem cuttings are a popular choice, and for good reason. This method is straightforward and can yield vibrant new plants with minimal effort.
Why Choose Stem Cuttings?
Stem cuttings are an efficient way to propagate Kalanchoe, as they allow you to create new plants from existing ones without needing seeds. This method is especially beneficial for those looking to expand their collection quickly.
Steps to Successfully Propagate Kalanchoe via Stem Cuttings:
- Select Healthy Stems:
- Choose stems that are firm and healthy, ideally around 4-6 inches long.
- Avoid any stems that show signs of disease or damage.
- Prepare the Cuttings:
- Use a clean, sharp knife or scissors to make a clean cut.
- Remove any leaves from the lower part of the stem to prevent rot when placed in soil.
- Allow to Callous:
- Place the cuttings in a dry, warm area for a few hours or overnight.
- This helps form a protective callous over the cut, reducing the risk of rot.
- Plant in Soil:
- Use a well-draining soil mix, ideally a cactus or succulent mix.
- Create a small hole in the soil and gently insert the cutting, ensuring it stands upright.
- Water Sparingly:
- Lightly water the soil after planting, but avoid soaking.
- Overwatering can lead to rot, so it’s best to keep the soil slightly moist.
- Provide the Right Environment:
- Place the cuttings in a warm spot with indirect sunlight.
- Direct sunlight can be too intense, especially for young cuttings.
Monitoring Growth
Keep an eye on your cuttings over the next few weeks. You should start to see new growth, which is a sure sign that your propagation efforts are successful.
For more detailed propagation methods, you might find our Florist Kalanchoe Propagation Guide useful. Additionally, if you are facing issues with your Kalanchoe, such as leggy growth, our expert tips on fixing a leggy Kalanchoe can provide valuable insights.
Steps to Propagate Using Plantlets
When considering propagation methods, using plantlets can be a straightforward and rewarding approach.
What Are Plantlets?
Plantlets are small, young plants that can be easily separated from the parent plant. They often develop at the base of the main plant or along the stems. This method is particularly effective for plants like lavender scallops, as it allows you to grow new plants with minimal effort.
Steps to Propagate Using Plantlets
- Identify Healthy Plantlets
Look for robust plantlets that have developed roots and are at least a few inches tall. Ensure they are free from pests and diseases. - Prepare Your Tools
Gather clean, sharp scissors or pruning shears. Having a small pot filled with your ideal soil mix ready will make the process smoother. - Separate the Plantlets
Gently twist or cut the plantlet from the parent plant. Aim to include some roots with the plantlet to ensure successful growth. - Plant the Cuttings
Place the plantlet into the prepared pot. Ensure the roots are covered with soil, and gently firm the soil around the base to provide stability. - Water Lightly
Give the newly potted plantlet a light watering. This helps settle the soil and provides moisture for the initial root development. - Provide Suitable Conditions
Place the pot in a location with indirect sunlight. Avoid direct sunlight initially, as the young plantlet can become stressed.
How to Use Seeds for Propagating Lavender Scallops
Are you wondering how to grow Lavender Scallops from seeds? This method can be incredibly rewarding, but it does come with its own set of challenges.
Understanding Seed Propagation
Using seeds to propagate Lavender Scallops is a fantastic way to produce new plants. However, it requires patience and attention to detail. Here’s a straightforward guide to help you navigate this process.
Steps for Seed Propagation
- Select the Right Seeds
– Choose high-quality seeds from a reputable source.
– Look for seeds that are fresh and viable. - Prepare the Soil
– Use a well-draining seed-starting mix.
– Consider adding perlite or vermiculite to enhance drainage. - Sow the Seeds
– Scatter the seeds evenly on the surface of the soil.
– Lightly press them down but do not cover them, as Lavender Scallops require light for germination. - Watering
– Mist the soil gently to avoid displacing the seeds.
– Keep the soil consistently moist but not soggy. - Provide the Right Conditions
– Place the tray in a warm, well-lit area.
– A temperature of around 20-25°C (68-77°F) is ideal for germination.
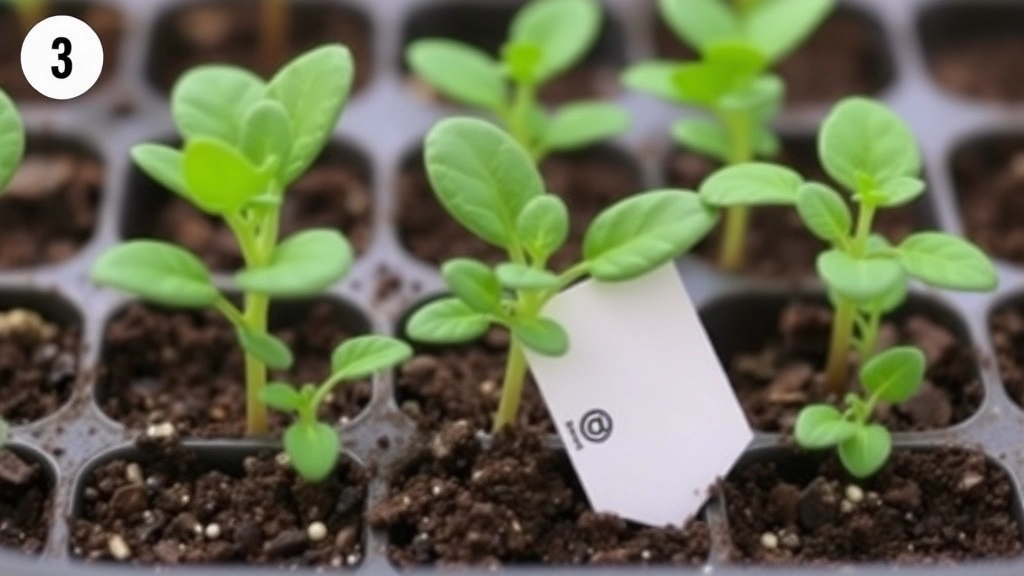
Germination Time
– Seeds typically take 2-3 weeks to germinate.
– Be patient and maintain the right conditions.
After Germination Care
– Once seedlings emerge, ensure they receive adequate light.
– Thin out weaker seedlings to allow stronger ones to thrive.
Preparing the Ideal Soil Mix for Propagation
So, you’re ready to propagate your lavender scallops, but have you thought about the soil?
The right soil mix is crucial for healthy root development.
- Well-Draining Soil: Lavender scallops thrive in soil that drains well. You don’t want water to sit around the roots. A mix of potting soil, sand, and perlite works wonders.
- pH Level: Aim for a slightly acidic to neutral pH (around 6.0 to 7.0). You can test your soil with a simple pH kit.
- Nutrient-Rich: While cuttings don’t need a lot of nutrients initially, a light mix of organic matter can help them get started. Think about adding compost or worm castings.
- Texture: A chunky texture helps with airflow around the roots. The more air, the better the roots can grow.
- Sterilization: If you’re reusing soil, make sure to sterilise it to avoid any unwanted pests or diseases. You can do this by baking it in the oven for about 30 minutes at 180°C.
Once you’ve got your soil mix sorted, it’s time to move on to the watering technique for your new cuttings.
Best Practices for Watering New Cuttings
When it comes to propagating plants, one of the most common concerns is how to effectively water new cuttings.
Why is Watering Crucial?
New cuttings, whether from Lavender Scallops or Kalanchoe, are particularly vulnerable. Proper watering is essential for their survival and growth.
Lighting Conditions for Successful Propagation

So, you’ve got your cuttings ready, but what about the light?
Lighting can make or break your propagation game.
Here’s what you need to know to keep your lavender scallops thriving:
- Bright, Indirect Light: Aim for a spot where your cuttings get plenty of bright, indirect sunlight. Direct sunlight can scorch those delicate leaves.
- Duration Matters: Ideally, your cuttings should soak up around 12-14 hours of light daily. A little extra light can speed up that root development.
- Monitor Temperature: Keep the environment warm, ideally between 20-24°C (68-75°F). Too cold, and your cuttings might just sulk.
- Rotate Regularly: If you notice one side leaning towards the light, give your pots a gentle twist every few days. This helps keep growth even and bushy.
- Supplement with Grow Lights: If natural light is lacking, consider using grow lights. They can mimic the sun and give your plants the boost they need.
Remember, every plant is unique. Pay attention to how your lavender scallops respond to different lighting conditions.
Tips to Ensure Proper Root Development
As we delve into the intricacies of propagating lavender scallops, it’s essential to focus on one of the most critical aspects: ensuring proper root development. Without a strong root system, your cuttings may struggle to thrive, so let’s explore some effective strategies.
- Choose Healthy Cuttings: Start with healthy, disease-free cuttings. The health of your initial plant material directly influences root development.
- Use Clean Tools: Always use sterilised scissors or knives when taking cuttings. This prevents the introduction of pathogens that could hinder root growth.
- Optimal Soil Moisture: Keep the soil consistently moist but not soggy. Overwatering can lead to rot, while underwatering can cause stress to the developing roots.
- Humidity Levels: Maintain high humidity around your cuttings. Using a plastic bag or a humidity dome can create a greenhouse effect, which aids in root development.
- Temperature Control: Ensure that your cuttings are in a warm environment. A temperature range of 20-25°C (68-77°F) is ideal for promoting root growth.
- Avoid Direct Sunlight: While light is essential, direct sunlight can be too intense for new cuttings. Place them in a bright, indirect light location to encourage healthy growth.
- Fertilisation: Hold off on fertilising until roots are established. Introducing nutrients too early can overwhelm the cuttings.
- Check for Roots: After a few weeks, gently tug on the cuttings. If you feel resistance, roots are forming. This is a positive sign of development.
By implementing these tips, you can significantly enhance the chances of successful root development in your lavender scallops. For more detailed guidance, you might find our step-by-step guide to propagating Kalanchoe Flapjack useful. Additionally, ensuring optimal bloom conditions can further support the overall health and growth of your plants.
Common Problems During Propagation and How to Avoid Them
So, you’re diving into propagation, and things aren’t going quite as planned, right?
Don’t worry, we’ve all been there.
Here are some common problems you might face during propagation and how to tackle them like a pro.
1. Wilting Cuttings
- What’s Happening? Your cuttings might be wilting because they’re stressed or lacking moisture.
- How to Fix It:
- Ensure you’re using a well-draining soil mix.
- Mist the cuttings regularly to keep humidity levels up.
2. Root Rot
- What’s Happening? Too much water can lead to root rot, a nightmare for any plant lover.
- How to Fix It:
- Check drainage holes in your pots.
- Allow the soil to dry out slightly between watering.
3. Pests and Diseases
- What’s Happening? New cuttings can attract pests or fall victim to diseases.
- How to Fix It:
- Keep an eye out for aphids or mealybugs.
- Use neem oil or insecticidal soap as a preventative measure.
4. Poor Light Conditions
- What’s Happening? Insufficient light can stunt growth or lead to leggy plants.
- How to Fix It:
- Place your cuttings in a bright spot but avoid direct sunlight.
- Consider using grow lights if natural light is lacking.
5. Slow Root Development
- What’s Happening? Sometimes, roots take their sweet time to develop.
- How to Fix It:
- Make sure your soil mix is appropriate.
- Maintain consistent moisture and warmth.
6. Fungal Issues
- What’s Happening? Fungal infections can arise in damp conditions.
- How to Fix It:
- Use sterilized tools when cutting.
- Ensure good air circulation around your plants.
Best Containers and Pots for Growing Cuttings
When it comes to propagating plants, the right container can make all the difference.
You might wonder:
- What type of pot should I use?
- How big does it need to be?
- Are there specific materials that work best?
Choosing the right container for your cuttings is crucial for their growth and development.
1. Size Matters
- Small Containers: Ideal for individual cuttings. They allow for better moisture retention and root establishment.
- Larger Pots: Suitable if you’re propagating multiple cuttings at once. Ensure each cutting has enough space to grow.
2. Material Choices
- Plastic Pots: Lightweight and retain moisture well. They are often a budget-friendly option.
- Terracotta Pots: Porous and allow for good airflow, which can help prevent root rot. However, they dry out faster.
- Biodegradable Pots: Eco-friendly and can be planted directly into the ground, reducing transplant shock.
3. Drainage is Key
- Ensure your pots have drainage holes. This prevents water from accumulating, which can lead to root rot.
- Consider adding a layer of gravel or perlite at the bottom for extra drainage.
4. Depth and Width
- A depth of at least 10 cm is ideal for most cuttings.
- The width should be sufficient to accommodate the growth of roots without crowding.
5. Cleanliness
- Always use clean pots to prevent disease. If reusing old containers, wash them thoroughly with soap and water.
By paying attention to these details, you can create an optimal environment for your cuttings to thrive. For more information on how to propagate Kalanchoe cuttings, check out our easy step-by-step guide. Additionally, if you’re dealing with any issues such as black spots on your plants, our tips on treating black spots on Kalanchoe plants can be very helpful.
When and How to Transplant Propagated Lavender Scallops
So, you’ve successfully propagated your Lavender Scallops, and now you’re wondering when to transplant them. It’s a common concern, and getting it right can make all the difference in their growth.
FAQs on Propagating Kalanchoe Lavender Scallops
What are the best methods to propagate Lavender Scallops?
There are two primary methods to propagate Lavender Scallops: using leaf cuttings and using plantlets. Both methods are effective and straightforward.
Why should I use leaf cuttings for propagation?
Using leaf cuttings is an excellent way to expand your collection economically. It’s also a rewarding project that allows you to engage closely with your plants.
How do I select the best leaves for propagation?
Look for plump, vibrant leaves. Avoid any leaves that are damaged or discolored to ensure a higher success rate.
What tools do I need for propagating Lavender Scallops?
You will need a sharp, clean knife or scissors and a clean container for your cuttings. Having a small pot filled with a well-draining soil mix is also essential.
How should I prepare leaf cuttings before planting?
After cutting the leaves, place them on a paper towel for a day or two to allow the cut ends to dry out and callous over. This reduces the risk of rot.
What is the ideal soil mix for propagating Lavender Scallops?
Lavender Scallops thrive in well-draining soil. A mix of potting soil, sand, and perlite is ideal. Aim for a slightly acidic to neutral pH (around 6.0 to 7.0) and consider adding compost or worm castings for nutrients.
What lighting conditions are best for successful propagation?
Provide bright, indirect light for your cuttings. They should receive around 12-14 hours of light daily. Maintain a warm environment, ideally between 20-24°C (68-75°F).
How do I identify and separate healthy plantlets for propagation?
Look for robust plantlets with developed roots, at least a few inches tall, and free from pests and diseases. Gently twist or cut the plantlet from the parent plant, ensuring some roots are included.
What are common problems during propagation and how can I avoid them?
Common issues include wilting cuttings, root rot, pests, poor light conditions, slow root development, and fungal issues. Ensure well-draining soil, proper watering, sufficient light, and good air circulation to mitigate these problems.
How can I prevent root rot during propagation?
Ensure proper drainage in your pots and allow the soil to dry out slightly between watering. Avoid overwatering to prevent root rot.
What should I do if my cuttings attract pests?
Regularly inspect your cuttings for pests like aphids or mealybugs. Use neem oil or insecticidal soap as a preventative measure to keep pests at bay.
How do I ensure even growth for my cuttings?
Rotate your pots every few days to ensure even light exposure. This helps keep growth balanced and bushy.
Can I use grow lights for propagation?
Yes, if natural light is lacking, grow lights can mimic the sun and provide the necessary light for your cuttings to thrive.
How do I handle fungal issues during propagation?
Use sterilized tools when cutting and ensure good air circulation around your plants to prevent fungal infections. Avoid overly damp conditions.
References
-
How To Propagate Lavender Plants
-
How to Grow Lavender from Cuttings
-
How to Propagate Lavender