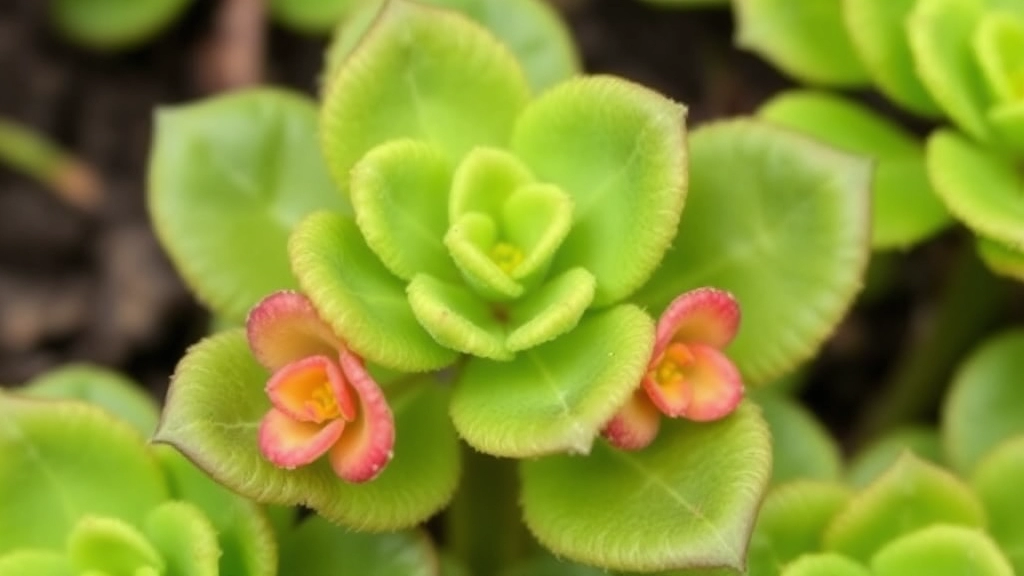
Kalanchoe Propagation from Leaves
Ever wondered, “Can you propagate Kalanchoe from leaves?” You’re in the right place. I’ve been there, curious about turning a single leaf into a thriving plant. Let’s dive into the basics of Kalanchoe propagation using leaves and get your green thumb working.
Steps to Propagate Kalanchoe from Leaves
- Twist a Healthy Leaf: First, gently twist a healthy leaf from the main plant.
- Place on Soil: Place it on well-draining soil and mist it lightly.
- Provide Indirect Sunlight: Keep it in indirect sunlight.
Within a few weeks, you’ll see roots forming. It’s simple, rewarding, and a fantastic way to expand your plant collection.
Choosing the Right Kalanchoe Leaves for Propagation
When it comes to propagating Kalanchoe, the first step is selecting the right leaves. You might be wondering, “Which leaves are best for propagation?” Choosing healthy, mature leaves is crucial for successful rooting.
Here are some key points to consider:
– **Health of the Leaf**: Look for leaves that are free from pests, disease, and damage. A healthy leaf will have a vibrant colour and firm texture.
– **Maturity**: Opt for mature leaves rather than young, tender ones. Mature leaves have a higher chance of developing roots effectively.
– **Size**: Larger leaves tend to store more nutrients, which can aid in the rooting process. Aim for leaves that are at least a few inches long.
– **Position on the Plant**: Leaves taken from the bottom or middle of the plant often root better than those from the top. This is because the lower leaves have had more time to mature.
– **Variety**: Different Kalanchoe varieties may have varying success rates in propagation. Familiarise yourself with the specific type you have, as some might be more forgiving than others.
For more detailed guidance, you can refer to the [step-by-step guide on Kalanchoe Mother of Thousands propagation](https://planthq.org/stepbystep-guide-kalanchoe-mother-of-thousands-propagation/) and explore [different Kalanchoe species for your garden](https://planthq.org/explore-different-kalanchoe-species-for-your-garden/).
Preparing the Leaves for Propagation
So, you’ve chosen your Kalanchoe leaves, and now you’re probably wondering, “What’s next?”
Preparing the leaves is a crucial step that can make or break your propagation journey.
Here’s how to get it right:
- Select Healthy Leaves:
- Look for plump, vibrant leaves without any signs of disease or damage.
- Avoid any that are yellowing or have spots.
- Clean Your Tools:
- Use a sharp, clean knife or scissors to cut the leaves.
- This helps prevent any infections that could hinder growth.
- Cut the Leaves:
- Aim for a clean cut, ideally at the base of the leaf.
- You can also propagate from leaf sections if you prefer.
- Let Them Callous:
- Place the leaves in a dry, shaded spot for a couple of days.
- This allows the cut edges to callous over, reducing the risk of rot when planted.
- Check for Pests:
- Inspect the leaves for any unwanted guests.
- If you spot any, give them a gentle wash to keep your propagation efforts safe.
Creating the Ideal Environment for Rooting
Once you’ve selected and prepared your Kalanchoe leaves for propagation, the next crucial step is to create the ideal environment for rooting.
Many people wonder: What conditions do Kalanchoe leaves need to thrive?
Light Conditions
- Place your propagation setup in a location with bright, indirect sunlight.
- Avoid direct sunlight, as it can scorch the leaves and hinder root development.
Temperature
- Kalanchoe prefers a warm environment.
- Aim for a temperature range of 20-25°C (68-77°F) for optimal growth.
Humidity
- While Kalanchoe is relatively tolerant of varying humidity levels, a slightly humid environment can encourage rooting.
- You might consider using a humidity dome or plastic bag to maintain moisture. Just ensure there’s some airflow to prevent mould.
Soil Type
- Use a well-draining potting mix, ideally one designed for succulents.
- A mix of potting soil, sand, and perlite works wonders for drainage.
Container Choice
- Choose shallow containers or trays to facilitate easy access to the leaves.
- Ensure they have drainage holes to prevent waterlogging.
By setting up these ideal conditions, you significantly increase your chances of successful rooting. For more detailed steps, you can refer to our step-by-step guide on growing Kalanchoe from leaf cuttings. Additionally, understanding the reasons why Kalanchoe leaves might turn red can help you troubleshoot and ensure healthy growth.
Planting the Kalanchoe Leaves
After preparing your Kalanchoe leaves, the next step is to plant them effectively. This stage is crucial for ensuring successful propagation.
Choosing the Right Medium
Select a well-draining potting mix. Kalanchoe thrives in a light, sandy substrate. You can use a commercial cactus mix or create your own by combining:
- Two parts potting soil
- One part perlite
- One part coarse sand
This blend promotes drainage, preventing root rot.
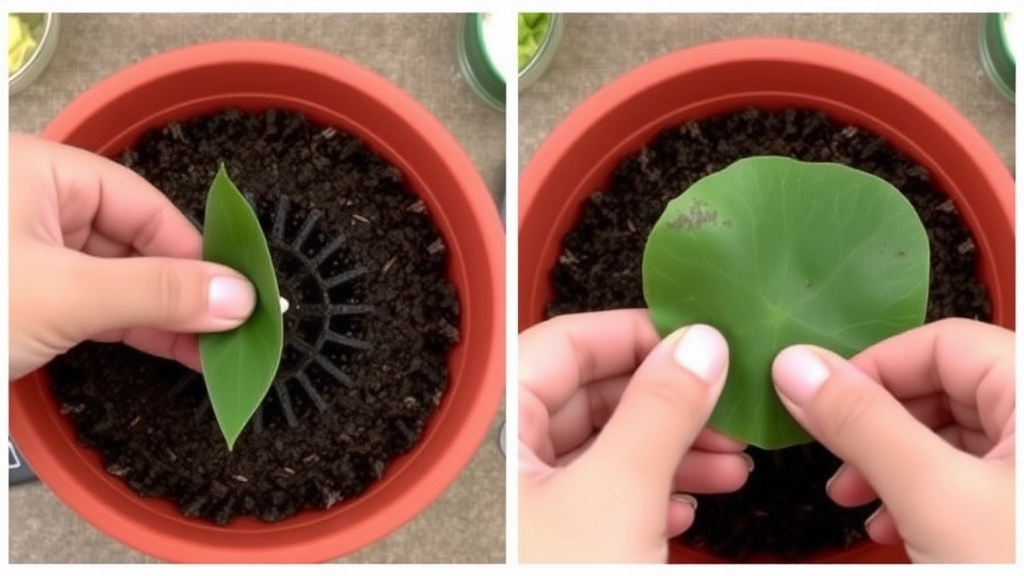
Planting Technique
- Positioning the Leaves:
- Place the prepared leaves flat on the surface of the soil.
- Ensure that the cut end is in contact with the soil.
- Lightly Pressing:
- Gently press the leaves down to ensure good contact with the soil.
- Avoid burying them too deep; a slight indentation is sufficient.
- Spacing:
- Leave space between each leaf to allow for air circulation and growth.
Watering After Planting
- Initial Watering:
- After planting, mist the soil lightly to settle it around the leaves.
- Avoid soaking; too much moisture can lead to decay.
- Ongoing Care:
- Water sparingly until you see signs of root growth.
- Allow the soil to dry out completely between waterings.
By following these steps, you set the stage for successful rooting.
Watering and Care During Rooting
Once you’ve prepared your Kalanchoe leaves for propagation, the next crucial step is ensuring they receive the right amount of water and care during the rooting process.
Common Concerns:
- How much should I water?
- What if my leaves start to rot?
- Am I providing enough light?
These concerns are valid, and addressing them can significantly impact your success in propagating Kalanchoe leaves.
Watering Tips:
- Minimal Watering: Kalanchoe leaves are succulents and retain moisture well. Water sparingly to prevent rot. A light misting or a few drops of water every few days is often sufficient.
- Check the Soil: Ensure the soil is dry to the touch before watering again. This helps avoid overwatering, which is a common issue.
- Humidity Levels: If your environment is particularly dry, consider placing a clear plastic bag over the leaves to create humidity. Just ensure it’s not too tight, allowing for some air circulation.
Light Requirements:
- Indirect Sunlight: Place your propagation setup in a location that receives bright, indirect sunlight. Direct sunlight can scorch the leaves, while too little light can hinder root development.
Monitoring Progress:
- Observe the Leaves: Keep an eye on your leaves. Healthy leaves should remain firm and plump. If they start to shrivel or turn mushy, adjust your watering routine immediately.
Caring for your Kalanchoe during rooting is about finding that balance. Too much water can lead to rot, while too little can slow down growth. For more detailed guidance, you can refer to our step-by-step guide on propagating Kalanchoe in water. Additionally, understanding why Kalanchoe plant leaves turn brown can help you troubleshoot common issues and ensure a healthy propagation process.
Transplanting Rooted Kalanchoe Leaves
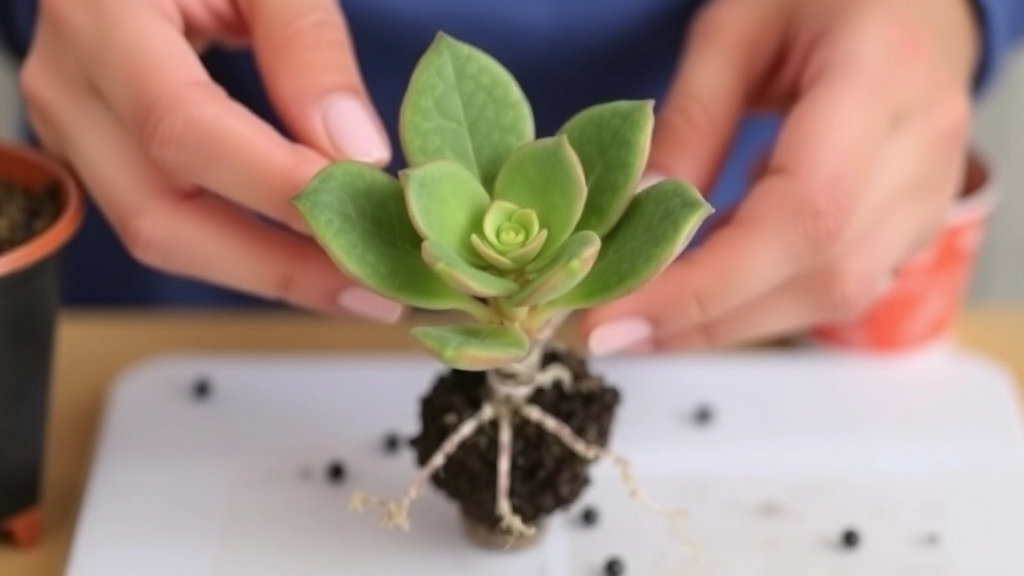
So, you’ve successfully rooted your Kalanchoe leaves—congratulations! But now comes the exciting part: transplanting them into their new home.
You might be wondering, “When is the right time to transplant?”
Here’s the scoop:
- Roots should be at least 2-3 inches long. This ensures they’re strong enough to handle the transition.
- Choose the right pot. A small pot with drainage holes is ideal. Kalanchoe prefers a snug fit to encourage growth.
- Use well-draining soil. A cactus or succulent mix works wonders. It keeps the roots happy and prevents rot.
When you’re ready to transplant, gently remove the rooted leaves from their current setup. Be careful not to damage those delicate roots.
- Fill your new pot with soil, leaving space for the roots.
- Place the rooted leaf in the centre and gently cover it with soil. Make sure the leaf is secure but not buried too deep.
- Lightly pat down the soil around the base. This helps eliminate air pockets.
After transplanting, it’s crucial to give your new Kalanchoe a little TLC.
- Water lightly. Just enough to moisten the soil without soaking it.
- Find a bright spot. A location with indirect sunlight is perfect for helping your plant adjust.
Common Issues and Troubleshooting
Even with the best preparation, challenges can arise during the propagation of Kalanchoe leaves. Understanding these common issues can help you navigate the process more smoothly.
1. Leaf Rot
One of the most frequent problems is leaf rot, which occurs when leaves are overwatered or sit in damp conditions for too long.
- Solution:
- Ensure proper drainage.
- Allow the soil to dry out between waterings.
2. Lack of Root Development
Sometimes, you might find that your Kalanchoe leaves are slow to develop roots or show no signs of growth at all.
- Solution:
- Check the environment; it should be warm and well-lit but not in direct sunlight.
- Ensure humidity levels are appropriate, as overly dry conditions can hinder root formation.
3. Pests and Diseases
Pests such as mealybugs or aphids can attack your propagating leaves, leading to stunted growth or decay.
- Solution:
- Regularly inspect your plants.
- Use insecticidal soap or neem oil to manage infestations.
4. Yellowing Leaves
If the leaves start to yellow, it may indicate overwatering or nutrient deficiencies.
- Solution:
- Adjust your watering schedule.
- Consider a diluted, balanced fertiliser once roots have established.
5. Wilting Leaves
Wilting can occur due to underwatering or excessive heat.
- Solution:
- Check the soil moisture.
- Move the plants to a cooler location if necessary.
For more detailed tips, you might find our complete care guide for Kalanchoe Chocolate Soldier useful. Additionally, if you are facing issues with leaf spots, our article on diagnosing and treating Kalanchoe white spots can provide valuable insights.
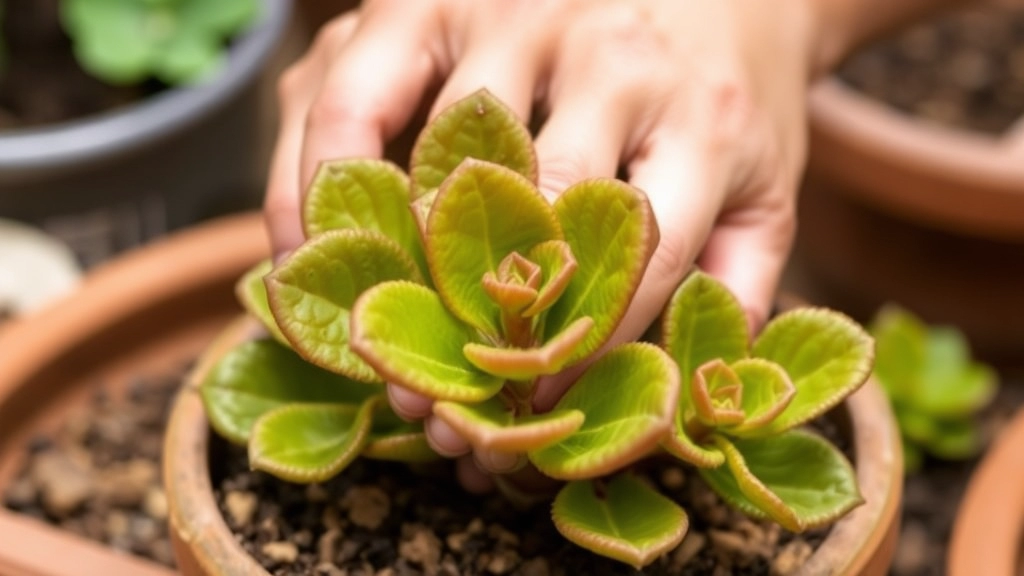
When propagating Kalanchoe leaves, it’s essential to provide the right care to ensure successful growth. For instance, always pick the plump, vibrant leaves for propagation. If they look sad or limp, they might not root well. Additionally, make sure to use clean tools to prevent any infections during the process.
Another crucial tip is to avoid overwatering your Kalanchoe leaves. It’s tempting to keep the soil moist, but too much water can lead to rot. Instead, let the soil dry out a bit between waterings. Kalanchoes also love bright, indirect sunlight, so position them where they can soak up the rays without getting scorched. For more detailed guidance on growing Kalanchoe from leaf cuttings, check out this [step-by-step guide](https://planthq.org/how-to-grow-kalanchoe-from-leaf-cuttings-stepbystep-guide/).
Temperature is another important factor to consider. Keep your leaves in a warm spot, as Kalanchoes prefer temperatures between 18-24°C (65-75°F). Using well-draining soil is also vital; a mix designed for succulents is ideal to prevent water from sitting around the roots. If you’re interested in learning more about specific care tips for fully grown Kalanchoe plants, this [care guide](https://planthq.org/care-tips-for-a-fully-grown-kalanchoe-plant/) provides comprehensive information.
FAQs About Propagating Kalanchoe from Leaves
Can you propagate Kalanchoe from leaves?
Yes, you can propagate Kalanchoe from leaves. The process involves selecting healthy leaves, preparing them properly, and planting them in a suitable medium.
What type of leaves should I select for propagation?
Select healthy, plump, and vibrant leaves without any signs of disease or damage. Avoid leaves that are yellowing or have spots.
How should I prepare the leaves for propagation?
Prepare the leaves by cleaning your tools, making a clean cut at the base of the leaf, allowing the cut edges to callous over, and checking for pests.
What kind of soil should I use for planting Kalanchoe leaves?
Use a well-draining potting mix. A blend of two parts potting soil, one part perlite, and one part coarse sand is ideal for promoting drainage and preventing root rot.
How do I plant the Kalanchoe leaves?
Place the prepared leaves flat on the soil surface with the cut end in contact with the soil. Lightly press them down to ensure good contact without burying them too deep. Ensure there is space between each leaf for air circulation and growth.
How should I water the leaves after planting?
Initially, mist the soil lightly to settle it around the leaves. Avoid soaking the soil. Water sparingly until you see signs of root growth and allow the soil to dry out completely between waterings.
When should I transplant rooted Kalanchoe leaves?
Transplant the leaves when the roots are at least 2-3 inches long. This ensures they are strong enough to handle the transition.
What size pot should I use for transplanting?
Use a small pot with drainage holes. Kalanchoe prefers a snug fit to encourage growth.
What should I do after transplanting?
After transplanting, water the soil lightly and place the pot in a bright spot with indirect sunlight. This helps the plant adjust to its new environment.
References
-
How to Propagate Kalanchoe Leaves
-
Preparing Leaves for Propagation: Best Practices
-
Effective Planting Techniques for Succulents