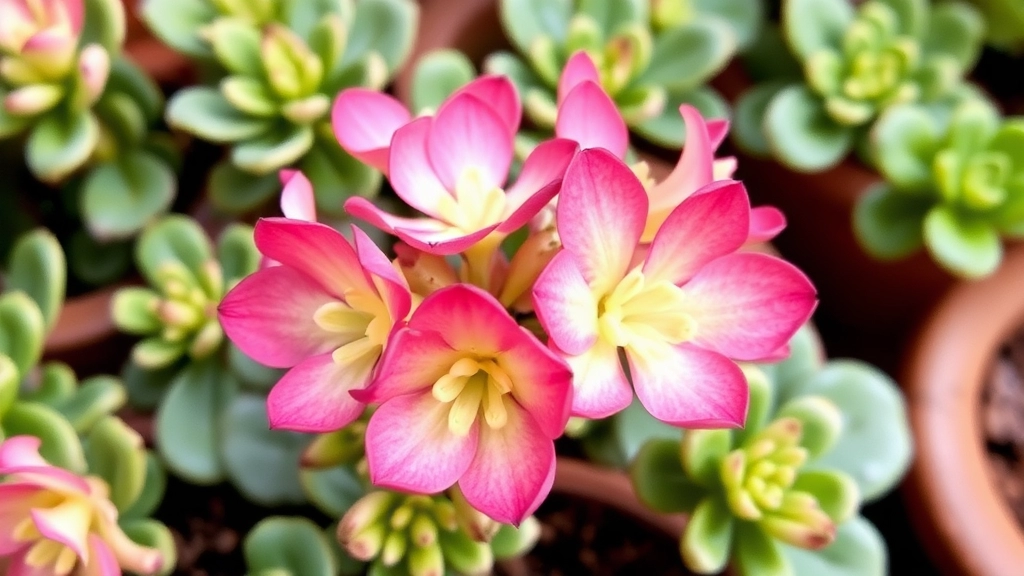
Propagating Kalanchoe Blossfeldiana
When it comes to propagating Kalanchoe blossfeldiana, cuttings are your best bet. This method is not only straightforward but also incredibly effective. First, you’ll need to know the best time to take your cuttings. Ideally, aim for the growing season, which is spring to early summer. This ensures your cuttings have the best chance to root and thrive.
Step-by-Step Process
Next, let’s dive into the step-by-step process. Begin by selecting healthy stems and using a clean, sharp knife to make your cuts. Allow the cuttings to dry for a day or two to form calluses. Once dried, plant them in well-draining soil and keep them in a warm, bright spot. With proper care, your Kalanchoe Blossfeldiana cuttings will soon take root and flourish.
Best Time to Take Kalanchoe Blossfeldiana Cuttings
When is the right time to take cuttings from your Kalanchoe Blossfeldiana?
This question often plagues gardeners eager to propagate their plants successfully.
The best time to take Kalanchoe cuttings is during the spring or early summer months.
During this period, the plant is actively growing, which increases the chances of successful rooting.
- Temperature: Aim for temperatures between 20°C to 25°C (68°F to 77°F).
- Light Conditions: Ensure the plant is receiving adequate indirect sunlight.
- Health of the Parent Plant: Only take cuttings from healthy, disease-free plants.
Taking cuttings during this optimal time ensures that your Kalanchoe is in its prime growth phase, making it easier for the cuttings to establish roots. For more details on how to care for your Kalanchoe, check out our Complete Care Guide for Kalanchoe Blossfeldiana. Additionally, if you encounter issues with lighting, our guide on Fixing Etiolated Kalanchoe Blossfeldiana can be very helpful.
Step-by-Step Guide to Preparing and Cutting Kalanchoe Stems
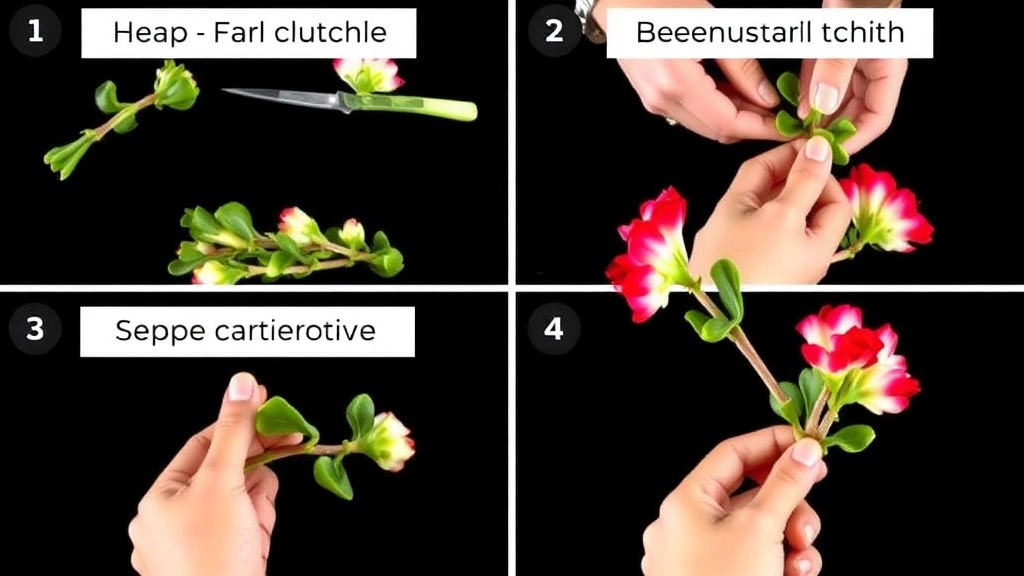
So, you’re ready to dive into propagating Kalanchoe Blossfeldiana. Exciting stuff! But before we get our hands dirty, let’s talk about preparing and cutting those stems like a pro.
Step 1: Gather Your Tools
First things first, you’ll need a few essentials:
- Sharp, Clean Scissors or Pruners: This helps prevent any damage to the plant and keeps things hygienic.
- Potting Soil: A good quality, well-draining mix is key.
- Small Pots or Containers: These will house your cuttings until they root.
Step 2: Choose the Right Stems
Look for healthy stems that are:
- About 3-4 inches long.
- Firm and plump, not shriveled or discolored.
- Ideally, take cuttings from the tips or sides of the plant.
Step 3: Make the Cut
Here’s where the magic happens:
- Snip the stem just below a leaf node. This is where new growth will emerge.
- Aim for a clean cut at a 45-degree angle. This increases the surface area for rooting.
Step 4: Remove Lower Leaves
To help your cuttings focus on rooting:
- Gently strip off the leaves from the bottom half of the cutting.
- Leave a couple of leaves at the top for photosynthesis.
Step 5: Allow to Callous
Now, let’s play the waiting game:
- Place your cuttings in a dry, shaded spot for a few hours or overnight.
- This allows the cut ends to callous over, reducing the risk of rot when planted.
Step 6: Optional – Use Rooting Hormone
If you’re feeling fancy:
- Dip the cut end in rooting hormone. This isn’t necessary, but it can speed up the rooting process.
And there you have it! You’re all set to plant your Kalanchoe cuttings.
How to Plant and Root Kalanchoe Cuttings Successfully
After preparing your Kalanchoe cuttings, the next crucial step is to plant and root them effectively. This can often be a source of concern for many gardeners, as ensuring successful rooting is key to thriving plants.
Common Mistakes to Avoid When Propagating Kalanchoe
As we delve deeper into the propagation process, it’s crucial to address some common pitfalls that can hinder your success with Kalanchoe Blossfeldiana cuttings. Recognising these mistakes can save you time and frustration, ensuring your propagation efforts yield healthy, thriving plants.
1. Using the Wrong Time for Cuttings
- Timing is everything: Taking cuttings during the wrong season can lead to poor results. Aim for spring or early summer when the plant is actively growing.
2. Not Preparing the Cuttings Properly
- Clean cuts: Ensure your cutting tools are sterilised. This helps prevent disease.
- Right length: Cuttings should be around 10-15 cm long. Too short and they may not root; too long and they can struggle.
3. Overwatering
- Moisture management: One of the biggest mistakes is overwatering the cuttings. Allow the soil to dry out between waterings to prevent rot.
4. Ignoring Light Conditions
- Light matters: Kalanchoe cuttings thrive in bright, indirect sunlight. Placing them in direct sunlight can scorch the leaves.
5. Using Inappropriate Soil
- Soil selection: A well-draining soil mix is essential. Avoid heavy soils that retain moisture, as this can lead to root rot.
6. Lack of Patience
- Give it time: Rooting can take several weeks. Don’t rush the process by digging up cuttings to check for roots too soon.
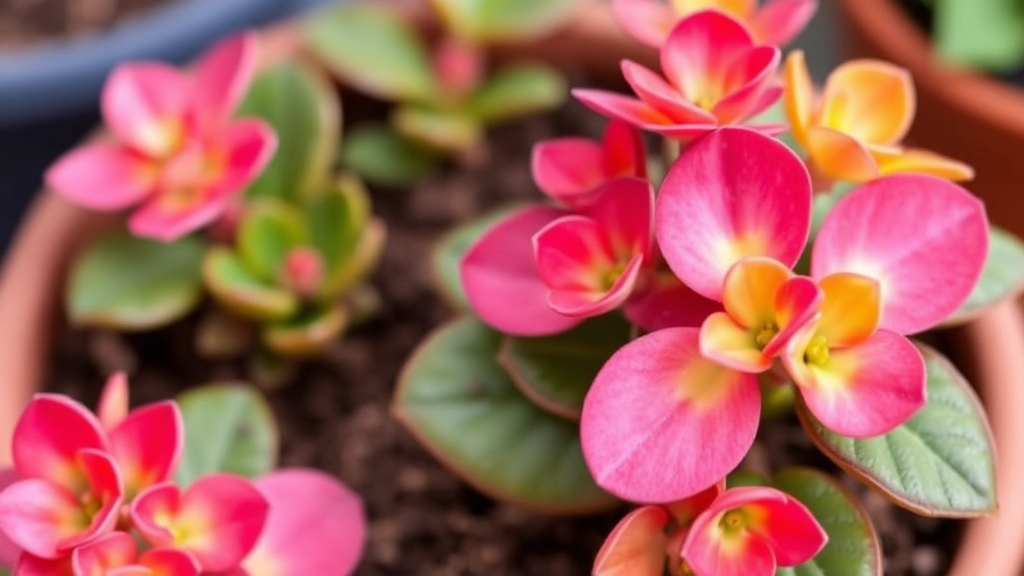
Aftercare Tips for Healthy Kalanchoe Growth
Once you’ve successfully propagated your Kalanchoe cuttings, the next step is ensuring they thrive in their new environment. Proper aftercare is crucial for promoting healthy growth and vibrant blooms.
FAQs on Kalanchoe Blossfeldiana Cuttings
What tools do I need to prepare Kalanchoe Blossfeldiana cuttings?
You will need sharp, clean scissors or pruners, potting soil, and small pots or containers to house your cuttings until they root.
How do I choose the right stems for cuttings?
Look for healthy stems that are about 3-4 inches long, firm and plump, not shriveled or discolored. Ideally, take cuttings from the tips or sides of the plant.
What is the proper way to cut the stems?
Snip the stem just below a leaf node at a 45-degree angle to increase the surface area for rooting. Ensure the cut is clean.
Why should I remove the lower leaves from the cuttings?
Removing the lower leaves helps the cuttings focus on rooting. Leave a couple of leaves at the top for photosynthesis.
What does it mean to allow the cut ends to callous?
Allowing the cut ends to callous means placing the cuttings in a dry, shaded spot for a few hours or overnight. This reduces the risk of rot when planted.
Is using rooting hormone necessary?
Using rooting hormone is optional. It can speed up the rooting process but is not essential for successful propagation.
When is the best time to take Kalanchoe cuttings?
The best time to take cuttings is in spring or early summer when the plant is actively growing.
How should I manage watering for Kalanchoe cuttings?
Moisture management is crucial. Allow the soil to dry out between waterings to prevent rot. Overwatering is a common mistake.
What light conditions are ideal for Kalanchoe cuttings?
Kalanchoe cuttings thrive in bright, indirect sunlight. Avoid placing them in direct sunlight, as it can scorch the leaves.
What type of soil should I use for Kalanchoe cuttings?
A well-draining soil mix is essential. Avoid heavy soils that retain moisture, as this can lead to root rot.
How long does it take for Kalanchoe cuttings to root?
Rooting can take several weeks. Patience is important; avoid digging up cuttings to check for roots too soon.
References
-
Gardening Know How: Kalanchoe Plant Propagation
-
The Spruce: How to Grow Kalanchoe Indoors
-
wikiHow: How to Propagate Kalanchoe