How to Grow Kalanchoe from a Leaf
If you’re looking to grow Kalanchoe from a leaf, you’re in the right place. It’s an easy and rewarding process that starts with selecting the right leaf. Ensure the leaf is healthy and free from any damage. This will give you the best chance of successful propagation.
Preparing the Leaf for Rooting
Once you’ve got your leaf, it’s time to prepare it for rooting. Cut the leaf cleanly, let it dry until a callus forms, and then plant it in well-draining soil. Keep the soil slightly moist and place the pot in a warm, bright spot.
Patience and Care
With a bit of patience and care, you’ll see roots forming in no time, leading to a thriving new Kalanchoe plant.
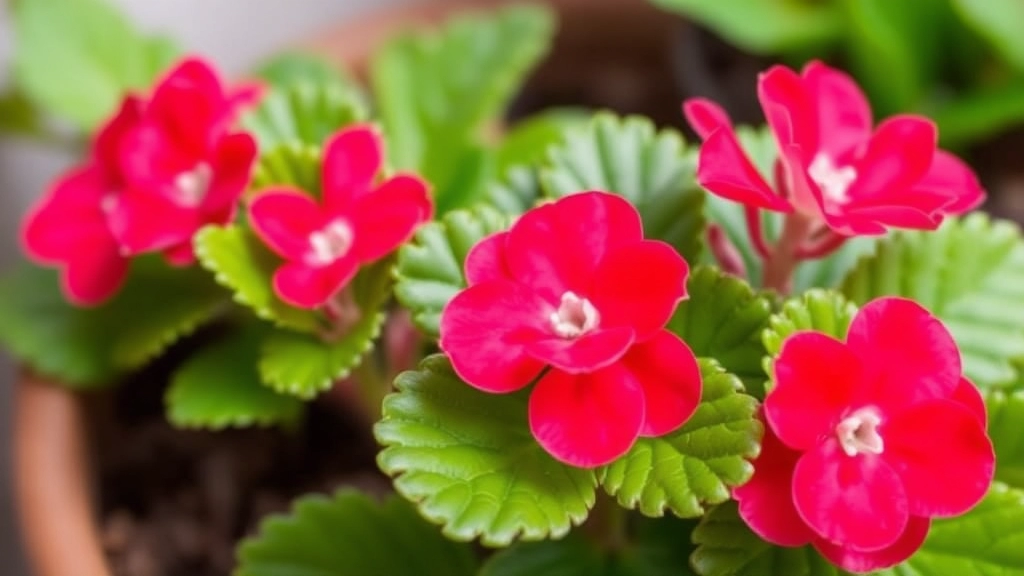
Selecting the Right Kalanchoe Leaf for Propagation
When it comes to propagating Kalanchoe, the first step is crucial: selecting the right leaf.
You might be asking yourself, “How do I know which leaf is best for propagation?”
Here are some key factors to consider:
- Health of the Leaf: Choose a leaf that is healthy and free from any signs of pests or disease. A robust leaf will provide the best chance for successful rooting.
- Maturity: Opt for mature leaves, preferably those that are fully developed and firm. Young or overly soft leaves may not root as effectively.
- Size: Larger leaves tend to have more stored energy, which can aid in the rooting process. Aim for leaves that are at least 3-4 inches long.
- Type of Kalanchoe: Different species may have varying propagation success rates. Popular varieties like Kalanchoe tomentosa or Kalanchoe blossfeldiana are often recommended for beginners.
Preparing Leaf Cuttings for Rooting
So, you’ve picked the perfect Kalanchoe leaf for propagation. What’s next? Preparing those leaf cuttings is crucial for successful rooting.
First off, let’s tackle the basics. You want to make clean cuts. Here’s how:
- Choose Healthy Leaves: Look for plump, vibrant leaves without any signs of disease or pests.
- Use Clean Tools: Grab a sharp, clean knife or scissors. Clean cuts reduce the risk of infection.
- Cut the Leaf: Slice the leaf into sections, ideally around 3-4 inches long. Each section should have a vein running through it. This is where the magic happens!
Now, here’s a little secret: the cut surface needs to be as smooth as possible. Rough edges can hinder the rooting process.
After cutting, let those leaf pieces sit for a few hours. Why? This allows the cut ends to callus over, which is a protective layer that helps prevent rot when you plant them.
- Tip: If you’re feeling fancy, you can dust the cut ends with rooting hormone. It’s not necessary, but it can give your cuttings a little boost.
Callusing the Leaf Cuttings Before Planting
After selecting the right Kalanchoe leaf for propagation, the next crucial step involves callusing the leaf cuttings before planting.
Why Callusing is Important
Callusing helps to prevent rot and encourages successful rooting. When a leaf cutting is exposed to air, it forms a protective layer over the cut surface, which is essential for the plant’s health.
Steps to Callus Your Kalanchoe Leaf Cuttings
- Allow Drying Time: Place the cuttings in a dry, shaded area for about 24 to 48 hours. This allows the cut end to form a callus.
- Avoid Direct Sunlight: Keep the cuttings out of direct sunlight during this period to prevent damage.
- Check for Moisture: Ensure that the environment is not too humid, as excess moisture can lead to rot instead of callusing.
Tips for Effective Callusing
- Use a clean, sharp knife or scissors to make your cuts. This reduces the risk of infection.
- If you notice any signs of decay during the drying process, discard the affected cuttings to avoid compromising healthy ones.
As you prepare your cuttings, remember that patience is key. For a detailed guide on propagating Kalanchoe, check out our Kalanchoe Leaf Propagation Step-by-Step Guide. Additionally, make sure you’re familiar with the best practices for planting Kalanchoe in a pot to ensure healthy growth.
Planting Kalanchoe Leaf Cuttings in Soil
After successfully preparing your Kalanchoe leaf cuttings and allowing them to callus, the next crucial step is planting them in soil.
You might be wondering: How do I ensure my cuttings take root effectively?
Here are the steps to follow for planting Kalanchoe leaf cuttings:
- Choose the Right Soil:
- Use a well-draining potting mix, preferably one designed for succulents or cacti.
- Avoid heavy soils that retain moisture, as Kalanchoe prefers drier conditions.
- Select Suitable Pots:
- Opt for small pots or seed trays with drainage holes.
- This helps prevent waterlogging and encourages healthy root development.
- Planting Depth:
- Make a small hole in the soil with your finger or a pencil.
- Insert the callused end of the leaf cutting about an inch deep into the soil.
- Spacing:
- If planting multiple cuttings, ensure they are spaced apart to allow airflow.
- This reduces the risk of rot and promotes healthy growth.
- Firm the Soil:
- Gently press the soil around the cutting to secure it in place.
- This helps eliminate air pockets that could hinder root development.
- Initial Watering:
- Water lightly after planting, ensuring the soil is moist but not soggy.
- Overwatering at this stage can lead to rot, so proceed with caution.
Ensuring Optimal Light, Temperature, and Humidity for Growth
After preparing your Kalanchoe leaf cuttings, the next crucial step is to provide them with the right environment for successful rooting.
The Importance of Light
Are you worried about whether your cuttings are getting enough light?
Kalanchoe plants thrive in bright, indirect sunlight.
- Location: Place your cuttings near a window that gets filtered sunlight.
- Duration: Aim for about 12-14 hours of light per day.
- Artificial Light: If natural light is insufficient, consider using grow lights.
Temperature Considerations
Temperature plays a vital role in the health of your cuttings.
Kalanchoe prefers a warm environment.
- Ideal Range: Maintain temperatures between 20°C to 25°C (68°F to 77°F).
- Avoid Extremes: Keep cuttings away from cold drafts or heat sources.
Humidity Levels
Humidity is another factor that can impact growth.
Kalanchoe enjoys moderate humidity.
- Ideal Conditions: Aim for humidity levels between 40% and 60%.
- Humidity Trays: If your home is dry, consider using a humidity tray with water and pebbles to increase moisture around the cuttings.
For more detailed care tips, you can check out our summer care tips for a healthy Kalanchoe plant or learn about why your Kalanchoe is not flowering.
Watering and Maintenance During Rooting Phase
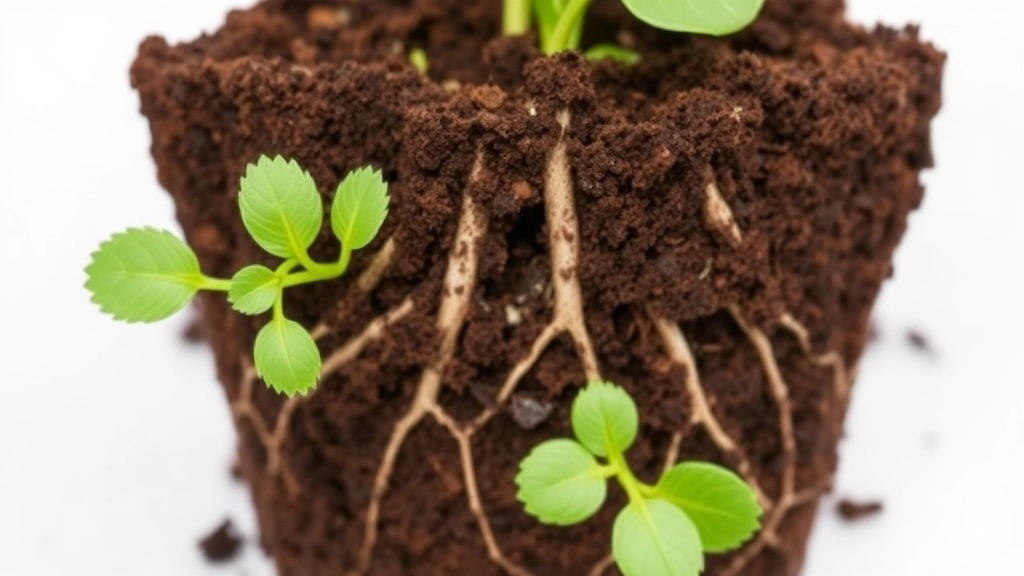
So, you’ve got your Kalanchoe leaf cuttings ready, and you’re probably wondering how to keep them thriving while they root.
Watering Tips:
- Mist, Don’t Drench: Instead of soaking the soil, lightly mist the cuttings. This keeps the environment humid without waterlogging the leaves.
- Check the Soil: Make sure the soil is slightly moist but not soggy. A good rule of thumb is to stick your finger in the soil; if it feels dry an inch down, it’s time to mist again.
- Use Clean Water: Always use room temperature, clean water. This helps avoid any nasty surprises like root rot.
Maintenance Musts:
- Watch for Pests: Keep an eye out for any unwanted guests. If you spot any pests, remove them gently with a damp cloth or a soft brush.
- Temperature Control: Keep your cuttings in a warm spot, ideally between 20°C to 24°C. Too cold, and they might stall; too hot, and they could dry out.
- Humidity Levels: If your home is dry, consider placing a clear plastic bag over the cuttings to create a mini greenhouse effect. Just remember to remove it occasionally for air circulation!
- Rotate Your Cuttings: Every few days, gently rotate your cuttings. This ensures they’re getting even light exposure, promoting balanced growth.
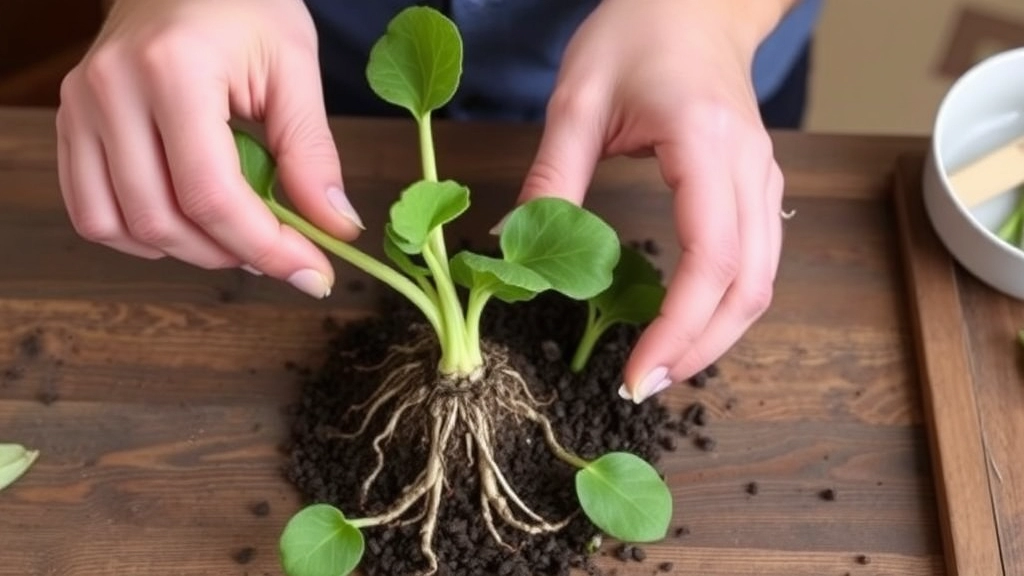
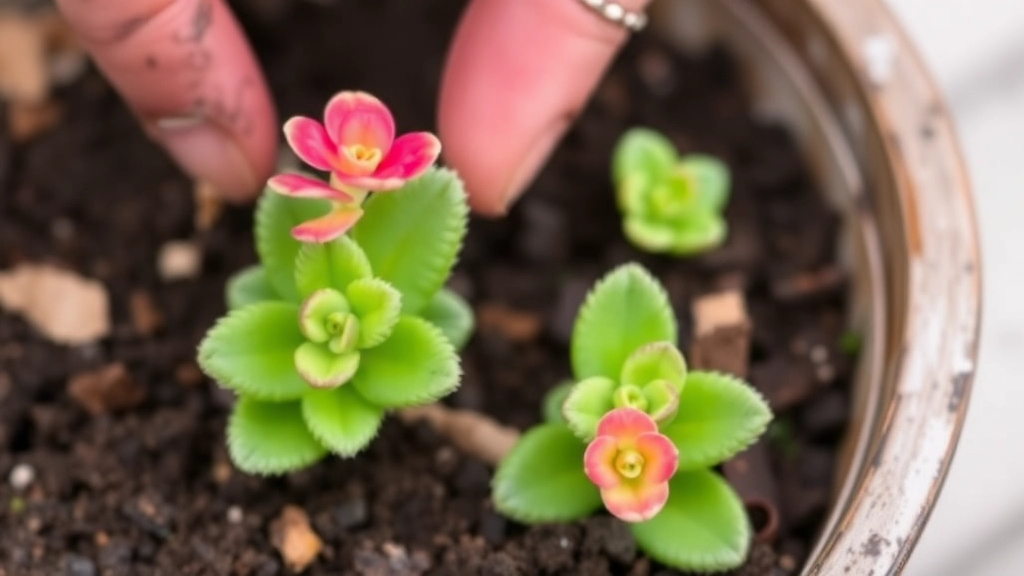
Transplanting and Caring for New Kalanchoe Plants
Once your Kalanchoe leaf cuttings have developed strong roots, it’s time to transplant them into their new homes. This step is crucial for ensuring that your plants thrive in their new environment.
Why Transplanting Matters
Transplanting your Kalanchoe helps them adjust to a more permanent setting, allowing for better growth and health. You might wonder, “How do I know when it’s time to transplant?” Look for these signs:
- Root Development: Roots should be at least a few inches long.
- Leaf Growth: New leaves should be sprouting from the cutting.
Steps for Transplanting
- Choose the Right Pot: Select a pot that has drainage holes. This prevents water from accumulating, which can lead to root rot.
- Soil Selection: Use a well-draining potting mix, ideally one formulated for succulents or cacti. This ensures that your Kalanchoe gets the right moisture balance.
- Transplanting Process:
- Gently remove the rooted cutting from its propagation container.
- Place it in the new pot, ensuring the roots are spread out and not cramped.
- Fill the pot with soil, leaving about an inch of space at the top.
- Lightly press down the soil to secure the plant.
Post-Transplant Care
After transplanting, your Kalanchoe will need some extra attention:
- Watering: Water the plant lightly to settle the soil. Avoid overwatering; let the top inch of soil dry out before the next watering.
- Light Conditions: Place your newly transplanted Kalanchoe in a spot with bright, indirect sunlight. Too much direct sun can scorch the leaves.
- Temperature and Humidity: Kalanchoe prefers temperatures between 18-24°C (65-75°F). Keep them in a well-ventilated area with moderate humidity.
Monitoring Growth
Keep an eye on your plants for the first few weeks. Look out for signs of distress, such as wilting or yellowing leaves. If you notice these, reassess your watering and light conditions.
For more detailed guidance on Kalanchoe care, check out our Complete Care Guide for Kalanchoe Blossfeldiana. Additionally, if you’re dealing with specific issues like dying leaves, our article on Why Are My Kalanchoe Leaves Dying? offers valuable solutions.
FAQs on Growing Kalanchoe from Leaf
How do I choose the best leaf for Kalanchoe propagation?
Choose healthy leaves that are plump and vibrant without any signs of disease or pests. This ensures the best chances for successful rooting.
Why is it important to use clean tools when cutting the leaf?
Using clean tools helps reduce the risk of infection. Clean cuts are essential for the health of the leaf cuttings.
How should I cut the Kalanchoe leaf for propagation?
Slice the leaf into sections approximately 3-4 inches long, making sure each section has a vein running through it. Smooth cut surfaces are crucial for effective rooting.
Why should I let the cut ends of the leaf callus over?
Allowing the cut ends to callus over forms a protective layer that helps prevent rot when you plant them in soil.
Is using rooting hormone necessary?
While not necessary, dusting the cut ends with rooting hormone can give your cuttings a little boost and improve the chances of successful rooting.
What type of soil should I use for planting Kalanchoe leaf cuttings?
Use a well-draining potting mix, preferably one designed for succulents or cacti. Avoid heavy soils that retain moisture.
What kind of pots should I use for planting the cuttings?
Opt for small pots or seed trays with drainage holes to prevent waterlogging and encourage healthy root development.
How deep should I plant the Kalanchoe leaf cuttings?
Insert the callused end of the leaf cutting about an inch deep into the soil.
How should I space the cuttings when planting multiple ones?
Ensure the cuttings are spaced apart to allow airflow, which reduces the risk of rot and promotes healthy growth.
How should I water the Kalanchoe leaf cuttings initially?
Water lightly after planting, ensuring the soil is moist but not soggy. Overwatering can lead to rot.
What are the best practices for watering during the rooting phase?
Lightly mist the cuttings instead of soaking the soil. Ensure the soil is slightly moist but not soggy, and use room temperature, clean water.
How can I maintain the cuttings to ensure successful rooting?
Watch for pests: Remove any pests gently with a damp cloth or soft brush.
Temperature control: Keep the cuttings in a warm spot, ideally between 20°C to 24°C.
Humidity levels: Consider placing a clear plastic bag over the cuttings to create a mini greenhouse effect, but remember to remove it occasionally for air circulation.
Rotate your cuttings: Gently rotate the cuttings every few days to ensure even light exposure and balanced growth.
References
-
How to Propagate Kalanchoe from Leaf Cuttings
-
Propagating Succulents from Leaves and Cuttings
-
Succulent Propagation: How to Root and Grow Cuttings