How to Grow Kalanchoe from Cuttings
Ever wondered how to grow Kalanchoe from cuttings? It’s simpler than you might think! By following a few straightforward steps, you can propagate these charming succulents right at home. First, you’ll need to select healthy stems for propagation. Ensure the stems are free from disease and have a few leaves attached. This sets the stage for successful growth.
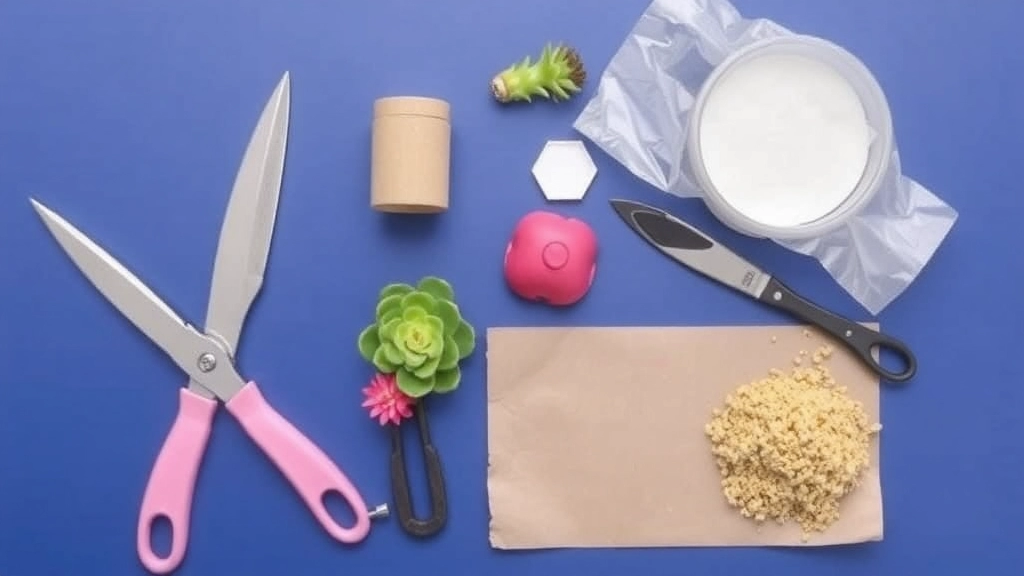
Next, gather your tools and materials. A clean, sharp knife or scissors, a well-draining potting mix, and suitable containers are essential. After taking your cuttings, let them callus for a few days to prevent rot. Once ready, plant the cuttings in your prepared mix, water lightly, and place them in a spot with bright, indirect light. With proper care, your Kalanchoe cuttings will thrive and grow into beautiful plants.
Selecting Healthy Kalanchoe Stems for Propagation
Have you ever wondered how to ensure your Kalanchoe cuttings thrive? Selecting healthy stems is a crucial first step in successful propagation.
When choosing stems for propagation, look for the following characteristics:
- Vibrant Colour: Healthy stems should exhibit a rich, green hue. Avoid any that appear yellowed or discoloured.
- Firm Texture: Gently squeeze the stems; they should feel firm and resilient, not soft or mushy.
- No Signs of Disease: Inspect for pests or disease, such as spots, wilting, or an unusual sheen. These can hinder growth and should be avoided.
- Optimal Age: Select stems that are semi-mature, which typically means they are neither too young nor too old. This balance encourages robust root development.
By prioritising these criteria, you set a strong foundation for your propagation journey.
Additionally, understanding the comprehensive care needs of Kalanchoe plants can further enhance your success in growing healthy and vibrant plants.
Preparing Tools and Materials for Kalanchoe Propagation
So, you’re ready to dive into propagating your Kalanchoe. But wait—do you have everything you need? Preparing the right tools and materials is key to making this process smooth and successful.
Essential Tools and Materials
- Sharp, Clean Scissors or Pruners
You want a clean cut. Dull tools can crush the stems and invite disease. - Small Pots or Seedling Trays
Choose containers with drainage holes. Kalanchoe loves to dry out between waterings. - Potting Mix
A well-draining mix is a must. Look for one designed for succulents or cacti. - Rooting Hormone (Optional)
This can give your cuttings a little boost, though Kalanchoe often roots just fine without it. - Plastic Bag or Cling Film
To create a mini greenhouse effect for your cuttings, helping them retain moisture. - Watering Can or Spray Bottle
For gentle watering—no drowning your new cuttings! - Labels
If you’re propagating different varieties, labels will help keep things organised.
Quick Tips
- Sanitise your tools before you start to prevent any unwanted pests or diseases.
- Gather everything in one place to make the process seamless.
Having the right tools and materials on hand will set you up for success as you move on to taking and preparing your stem cuttings.
Taking and Preparing the Stem Cuttings
Now that you’ve selected healthy Kalanchoe stems, it’s time to focus on taking and preparing the stem cuttings. This step is crucial for ensuring successful propagation.
What You Need to Know Before Cutting:
- Timing: The best time to take cuttings is during the growing season, typically in spring or early summer.
- Tools: Ensure you have clean, sharp scissors or pruning shears. Clean tools prevent disease transmission.
- Selection: Choose stems that are healthy, firm, and free from any signs of pests or disease.
Steps for Taking Cuttings:
- Choose the Right Stem:
- Look for stems that are at least 4-6 inches long.
- Opt for those with several leaves, as they will root better.
- Make the Cut:
- Cut just below a leaf node to encourage new growth.
- Aim for a clean cut to reduce damage.
- Remove Lower Leaves:
- Trim off the leaves from the bottom half of the cutting.
- This helps the cutting focus its energy on root growth rather than sustaining leaves.
- Let the Cuttings Dry:
- Place the cuttings in a cool, dry area for a few hours.
- This allows the cut ends to callus, reducing the risk of rot when planted.
Why Proper Preparation Matters:
Taking the time to prepare your cuttings correctly can significantly affect your success rate. For more detailed steps on propagation, check out our step-by-step guide to growing Kalanchoe from leaf cuttings. Additionally, if you’re interested in learning about different Kalanchoe varieties, our Kalanchoe succulent identification guide can be a useful resource.
Allowing the Cuttings to Callus Before Planting
After taking your Kalanchoe cuttings, you might wonder what the next step is. One crucial process that often gets overlooked is allowing the cuttings to callus.
Why Callusing Matters
Callusing is essential for the success of your propagation. When you allow the cut ends of the cuttings to dry out and form a protective layer, you significantly reduce the risk of rot once they are planted.
Steps to Callus Your Kalanchoe Cuttings
- Place Cuttings in a Dry Area:
- Choose a warm, dry spot away from direct sunlight.
- A well-ventilated area works best.
- Duration:
- Let the cuttings sit for 3 to 7 days.
- This timeframe allows a callus to form, protecting the cutting.
- Check for Callusing:
- Inspect the cut ends regularly.
- You should see a slight change in texture, indicating that a callus has formed.
- Avoid Excess Moisture:
- Ensure that the cuttings do not come into contact with water during this period.
- Moisture can lead to rot, negating your efforts.
Benefits of Callusing
- Reduces Rot Risk: A callus acts as a barrier against pathogens.
- Promotes Rooting: Healthy cuttings are more likely to develop strong roots when planted.
Choosing the Ideal Potting Mix and Containers
When it comes to successfully propagating Kalanchoe, the right potting mix and containers are essential for nurturing your cuttings. You might be wondering, “What type of soil should I use?” or “Do I need special containers?” Let’s explore these important choices together.
Ideal Potting Mix
Kalanchoe thrives in a well-draining potting mix. Here are some key points to consider:
- Cactus Mix: A commercial cactus mix is a great option. It provides excellent drainage and mimics the plant’s natural habitat.
- DIY Blend: If you prefer to make your own, combine:
- 50% potting soil
- 25% perlite
- 25% coarse sand
- pH Level: Aim for a slightly acidic to neutral pH, around 6.0 to 7.0. This range encourages healthy growth.
Choosing Containers
The right container can make a significant difference in your propagation success. Here are some factors to consider:
- Drainage Holes: Always select containers with drainage holes to prevent waterlogging, which can lead to rot.
- Size: Start with small containers. This helps manage moisture levels and encourages root growth.
- Material: Terracotta pots are a great choice as they allow for better airflow. Plastic pots work too, but ensure they have good drainage.
Example Scenario
Imagine you’ve just taken cuttings from your Kalanchoe. You place them in a small terracotta pot filled with your homemade potting mix. The drainage holes allow excess water to escape, preventing any issues. This setup creates an ideal environment for your cuttings to thrive.
For more detailed information on how to propagate Kalanchoe, check out our step-by-step guide to Kalanchoe Mother of Thousands propagation. Additionally, if you’re interested in learning about various Kalanchoe varieties, our Kalanchoe Mother of Thousands varieties care guide is a great resource.
VI. Planting the Cuttings and Initial Watering
So, you’ve got your Kalanchoe cuttings ready to go, and you’re probably wondering, “What’s next?”
Let’s dive into planting those cuttings and getting them settled in their new home.
1. Choosing the Right Container
Make sure you’ve got a container that has good drainage.
- Terracotta pots are a solid choice because they allow moisture to escape.
- Plastic pots work too, but ensure they have drainage holes.
2. Filling with Potting Mix
Use a well-draining potting mix.
- Look for a cactus or succulent mix, or make your own by mixing regular potting soil with sand or perlite.
- Fill your container about three-quarters full.
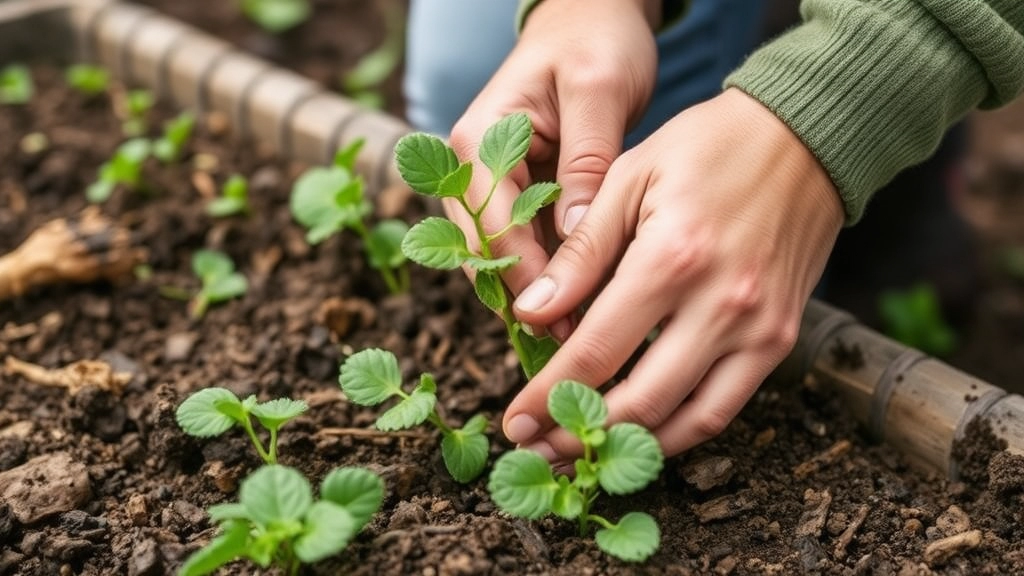
3. Planting the Cuttings
Now, it’s time to plant those cuttings.
- Make a small hole in the soil with your finger or a pencil.
- Place the cutting in the hole, ensuring it’s upright.
- Gently pack the soil around the base to secure it.
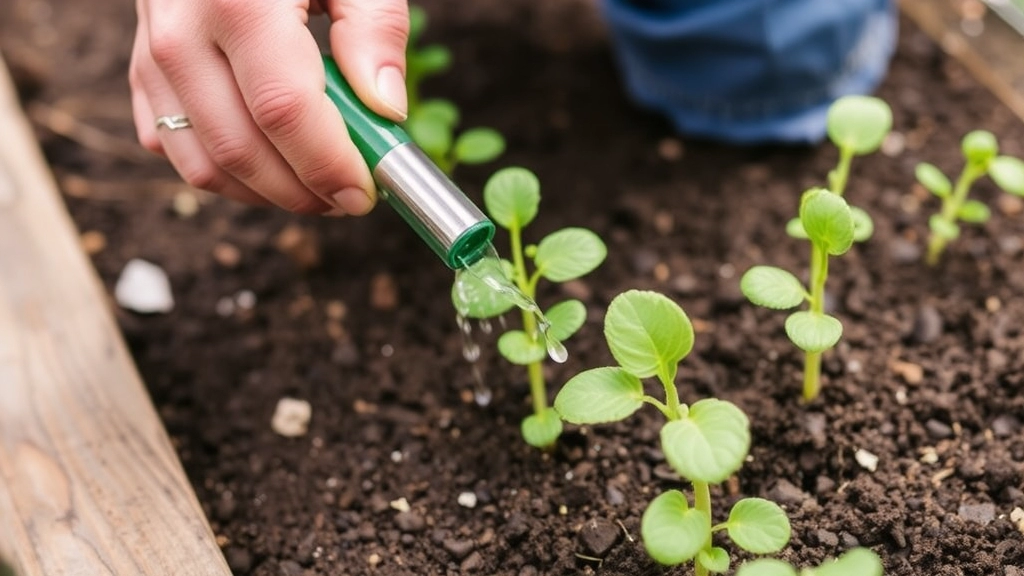
4. Initial Watering
After planting, give your cuttings a light watering.
- Use a spray bottle or a watering can with a fine spout to avoid over-saturating the soil.
- The soil should be moist but not soggy.
5. Settling In
Once planted, let them settle in for a bit.
- Avoid watering again until the top inch of soil feels dry.
- This helps prevent rot and encourages healthy root growth.
Providing Optimal Light and Temperature Conditions
After preparing your Kalanchoe cuttings, the next crucial step is ensuring they receive the right light and temperature. This stage is vital for the successful rooting of your cuttings.
Light Conditions
Kalanchoe plants thrive in bright, indirect sunlight. Here are some key points to consider:
- Ideal Location: Place the cuttings near a window where they can receive filtered light.
- Avoid Direct Sunlight: Too much direct sun can scorch the leaves, leading to stress or even death.
- Artificial Light: If natural light is limited, consider using grow lights to provide the necessary illumination.
Temperature Requirements
Kalanchoe cuttings prefer a warm environment. Keep these temperature guidelines in mind:
- Optimal Range: Aim for temperatures between 20°C to 25°C (68°F to 77°F).
- Nighttime Temperatures: Ensure that nighttime temperatures do not drop below 15°C (59°F).
- Avoid Drafts: Keep your cuttings away from cold drafts or sudden temperature changes, as this can hinder their growth.
By providing the right light and temperature conditions, you set the stage for robust root development. For more detailed care instructions, check out our Complete Care Guide for Kalanchoe Pink Butterflies Succulent and our Kalanchoe Flapjack Paddle Plant Care Guide.
Post-Propagation Care and Common Mistakes to Avoid
So, you’ve successfully taken your Kalanchoe cuttings and they’ve started to settle in. What’s next?
Caring for your new cuttings is crucial. You want to ensure they thrive, not just survive. Here are some key points to keep in mind:
- Watering:
- Give your cuttings a light misting instead of soaking them.
- Overwatering is a common mistake; let the soil dry out a bit before the next watering.
- Humidity:
- A little humidity can be helpful, but don’t go overboard.
- A clear plastic bag can create a mini greenhouse effect, but make sure it’s not too tight.
- Temperature:
- Keep them in a warm spot, ideally between 20-25°C.
- Avoid cold drafts or extreme heat.
- Fertilizing:
- Hold off on fertilising until you see some good root growth.
- A diluted succulent fertilizer can be introduced later.
Now, let’s talk about common pitfalls:
- Ignoring Light Needs:
- Kalanchoes love bright, indirect light.
- Too much direct sunlight can scorch those tender leaves.
- Rushing the Process:
- Patience is key!
- Don’t be tempted to check the roots too soon.
- Using the Wrong Soil:
- A well-draining mix is essential.
- Avoid regular potting soil which can retain too much moisture.
By keeping these points in mind, you’ll be setting your Kalanchoe cuttings up for success.
Tips for Encouraging Root Growth in Kalanchoe Cuttings
After successfully planting your Kalanchoe cuttings, the next crucial step is to encourage robust root growth. This phase can determine the overall health and vitality of your new plants. Here are some effective strategies to help your cuttings thrive:
- Humidity Matters: Kalanchoe cuttings benefit from higher humidity. Consider using a humidity dome or placing a clear plastic bag over the cuttings to create a mini greenhouse effect. Just ensure there’s adequate airflow to prevent mould.
- Temperature Control: Aim for a warm environment, ideally between 21-24°C (70-75°F). This temperature range promotes faster root development.
- Rooting Hormone: Applying a rooting hormone can enhance root growth. Dip the cut end of the cutting into the hormone before planting. This can significantly increase your chances of success.
- Avoid Overwatering: While it’s essential to keep the soil slightly moist, overwatering can lead to rot. Allow the top layer of soil to dry out between waterings.
- Patience is Key: Rooting can take time. Be patient and resist the urge to check the roots too frequently. Typically, roots will start to develop within a few weeks.
- Fertility Boost: Once your cuttings establish roots, consider using a diluted, balanced fertiliser to give them an extra boost. This can promote healthy growth.
- Light Conditions: Provide bright, indirect light. Direct sunlight can scorch the cuttings, while too little light can hinder root growth.
By following these tips, you can significantly enhance the root growth of your Kalanchoe cuttings, ensuring they flourish into healthy plants. For more detailed guidance, you might find our Kalanchoe leaf propagation step-by-step guide useful. Additionally, understanding the optimal sunlight for thriving Kalanchoe plants can further aid in their growth.
FAQs on Growing Kalanchoe from Cuttings
What tools and materials do I need to propagate Kalanchoe from cuttings?
Essential tools and materials include sharp, clean scissors or pruners, small pots or seedling trays with drainage holes, a well-draining potting mix, optional rooting hormone, plastic bags or cling film, a watering can or spray bottle, and labels for organization.
Why is it important to allow Kalanchoe cuttings to callus before planting?
Allowing cuttings to callus helps reduce the risk of rot by forming a protective layer over the cut ends. This process also promotes healthier rooting once the cuttings are planted.
How do I callus Kalanchoe cuttings?
Place the cuttings in a warm, dry, and well-ventilated area away from direct sunlight for 3 to 7 days. Ensure they do not come into contact with water during this period to prevent rot.
What type of container should I use for planting Kalanchoe cuttings?
Choose containers with good drainage, such as terracotta pots or plastic pots with drainage holes. Terracotta pots are particularly good because they allow moisture to escape.
What kind of potting mix is best for Kalanchoe cuttings?
A well-draining potting mix designed for succulents or cacti is ideal. You can also create your own mix by combining regular potting soil with sand or perlite.
How should I water Kalanchoe cuttings after planting?
Use a spray bottle or a watering can with a fine spout to give the cuttings a light watering. The soil should be moist but not soggy. Avoid watering again until the top inch of soil feels dry.
What are some common mistakes to avoid when caring for Kalanchoe cuttings?
Common mistakes include overwatering, ignoring light needs, rushing the rooting process, and using the wrong type of soil. Ensure the cuttings receive bright, indirect light and use a well-draining potting mix.
How often should I water my Kalanchoe cuttings?
Water the cuttings lightly and let the soil dry out a bit before the next watering. Overwatering can lead to rot, so it’s crucial to allow the soil to dry between waterings.
When can I start fertilizing my Kalanchoe cuttings?
Hold off on fertilizing until you see some good root growth. Once established, you can introduce a diluted succulent fertilizer.
What temperature is ideal for Kalanchoe cuttings to thrive?
Keep the cuttings in a warm spot, ideally between 20-25°C. Avoid exposing them to cold drafts or extreme heat.
References
-
The Spruce – How to Grow and Care for Kalanchoe
-
Gardening Know How – Kalanchoe Propagation: How To Propagate Kalanchoe Plants
-
House Plants Expert – Kalanchoe Plant Care and Growing Guide