Growing Kalanchoe in Water
Growing Kalanchoe in water can be a fun and easy way to propagate this popular succulent. If you’re like me and love experimenting with new gardening techniques, you’ll find this method both simple and rewarding. All you need is a healthy Kalanchoe plant, a glass of water, and a bit of patience. Let’s dive into the step-by-step process to get those roots growing.
Step-by-Step Process
-
Cutting the Plant:
First, carefully cut a healthy leaf or stem from your Kalanchoe plant. Make sure the cutting is clean and free of any disease.
-
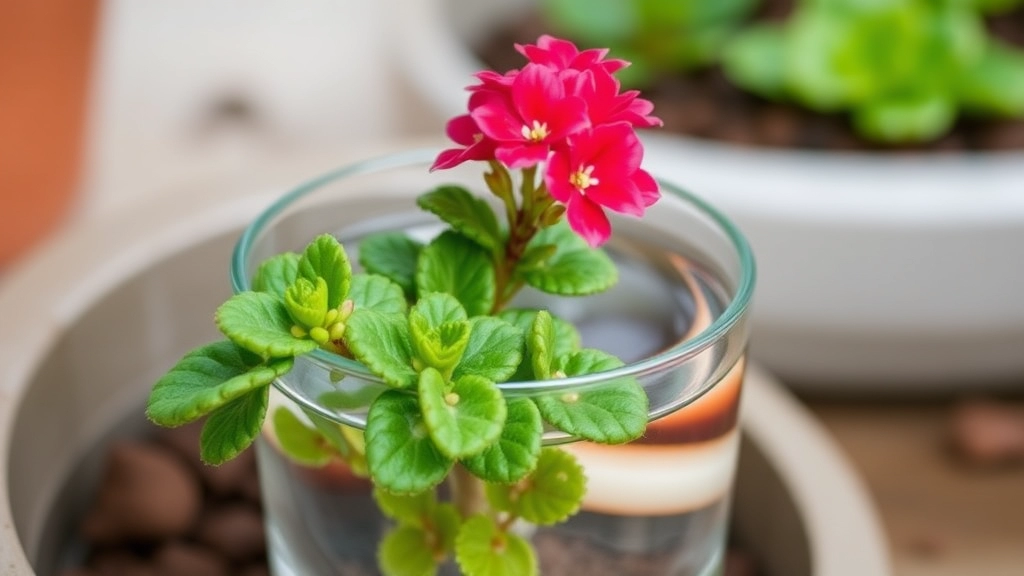
Placing in Water:
Next, place your cutting in a glass of water, ensuring that only the stem is submerged while the leaves stay above the waterline.
-
Water Maintenance:
Change the water every few days to keep it fresh, and within a few weeks, you’ll start to see roots forming.
-
Transplanting:
Once the roots are well-established, you can transfer your new Kalanchoe plant to soil or continue growing it in water.
Choosing the Right Kalanchoe Variety
When embarking on the journey of propagating Kalanchoe in water, one of the first questions you might face is: Which Kalanchoe variety should I choose?
Selecting the right variety is crucial for successful growth and vibrant blooms.
Here are some popular Kalanchoe varieties that thrive well in water propagation:
- Kalanchoe blossfeldiana: Known for its bright flowers and sturdy leaves, this variety is a favourite among many plant enthusiasts. For more detailed care tips, check out our Kalanchoe blossfeldiana care guide.
- Kalanchoe luciae: Often referred to as the “paddle plant,” its unique leaf shape and stunning colour make it a standout choice. Learn how to care for this variety in our Kalanchoe paddle plant care guide.
- Kalanchoe tomentosa: With its fuzzy leaves and charming appearance, this variety adds a touch of whimsy to any collection.
Considerations for Choosing a Variety:
- Growth Habit: Some varieties grow taller, while others remain compact. Assess your space and choose accordingly.
- Flowering Potential: If you’re after blooms, opt for varieties known for their vibrant flowers.
- Leaf Characteristics: Different varieties have varying leaf shapes and textures, which can influence your aesthetic preference.
Preparing the Water Container
So, you’ve decided to propagate your Kalanchoe in water—great choice!
But have you thought about the container?
Choosing the right water container is crucial for your plant’s success.
Here’s how to get it just right:
Pick the Right Container
- Material Matters: Glass containers are fantastic because you can see the roots as they develop. Plastic works too, but make sure it’s clean and clear.
- Size it Up: Your container should be big enough to hold the cuttings comfortably but not too large that it dilutes the nutrients.
Cleanliness is Key
- Sanitize: Before you start, give your container a good wash. Use soap and water, and rinse thoroughly. This helps prevent any bacteria or algae from messing with your Kalanchoe.
Check the Depth
- Water Level: Ensure your container is deep enough to submerge the cuttings’ stems, but not so deep that the leaves touch the water. This can lead to rot.
Drainage Options
- No Drainage Needed: Unlike soil, you won’t need drainage holes. Just ensure you change the water regularly to keep things fresh.
Personal Touch
- Style it Up: If you’re feeling creative, consider adding some decorative stones or pebbles at the bottom. They won’t just look good; they can also help anchor the cuttings.
Selecting Healthy Kalanchoe Cuttings
Choosing the right cuttings is crucial for successful propagation. Healthy cuttings lead to strong plants, ensuring your Kalanchoe thrives in water.
Key Factors to Consider:
- Visual Inspection:
- Look for vibrant, green leaves.
- Avoid any cuttings with yellowing or wilting leaves.
- Check for signs of pests or disease.
- Stem Condition:
- Select firm stems that are not soft or mushy.
- Ensure the cuttings are at least 4-6 inches long for better rooting.
- Time of Year:
- The best time to take cuttings is during the growing season, typically spring or early summer.
- This ensures optimal growth and rooting conditions.
- Cutting Technique:
- Use clean, sharp scissors or pruning shears to make a clean cut.
- Cut just below a leaf node, as this is where new roots will develop.
- Number of Cuttings:
- It’s wise to take several cuttings. Not every cutting will root successfully, so having backups increases your chances of success.
Selecting healthy Kalanchoe cuttings sets the foundation for a fruitful propagation journey. For more detailed steps, you can refer to our guide on how to propagate Kalanchoe Blossfeldiana cuttings. Additionally, understanding the optimal light for Kalanchoe can further enhance your plant’s growth and health.
Rooting Kalanchoe in Water
Once you’ve selected your healthy Kalanchoe cuttings, it’s time to focus on the rooting process.
Why Rooting in Water?
Rooting Kalanchoe in water is an engaging and straightforward method that allows you to observe the growth process. But how do you ensure your cuttings thrive?
Steps to Root Kalanchoe in Water:
- Prepare the Cuttings:
- Cut a healthy stem about 4-6 inches long.
- Ensure the cutting has at least 2-3 leaves.
- Remove any leaves that might be submerged in water to prevent rot.
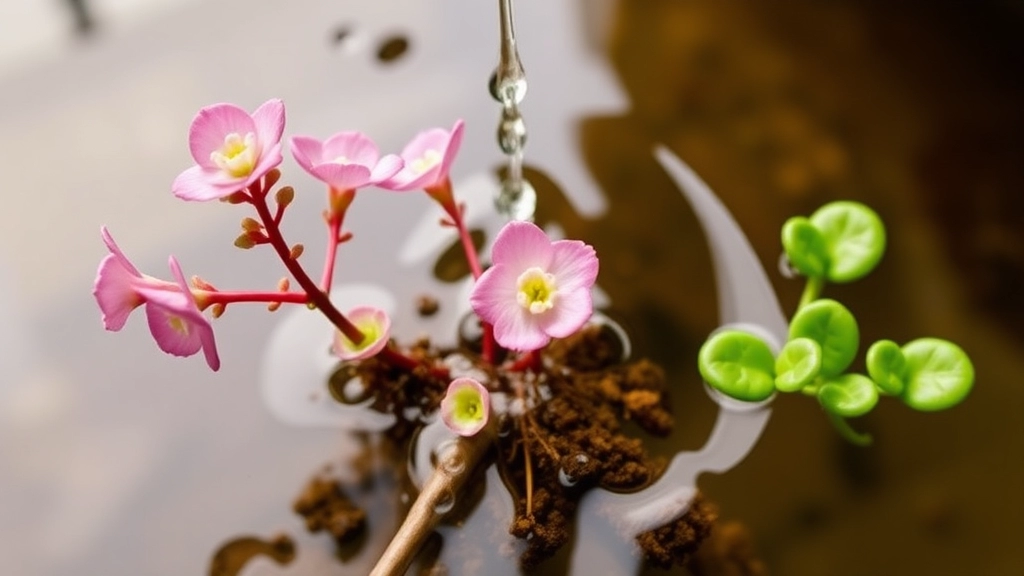
- Place in Water:
- Put the cuttings in a container filled with clean, room-temperature water.
- Ensure the cut ends are submerged, while the leaves remain above water.
- Positioning:
- Place the container in a bright, indirect light area.
- Avoid direct sunlight, as it can heat the water and damage the cuttings.
- Monitor Water Levels:
- Ensure the cut ends remain submerged.
- Add fresh water as needed, especially if it evaporates.
By following these steps, you’ll create a nurturing environment for your Kalanchoe cuttings to develop roots.
What to Expect:
Within a few weeks, you should start to see tiny roots forming. This is an exciting moment, as it indicates that your Kalanchoe is on its way to establishing itself.
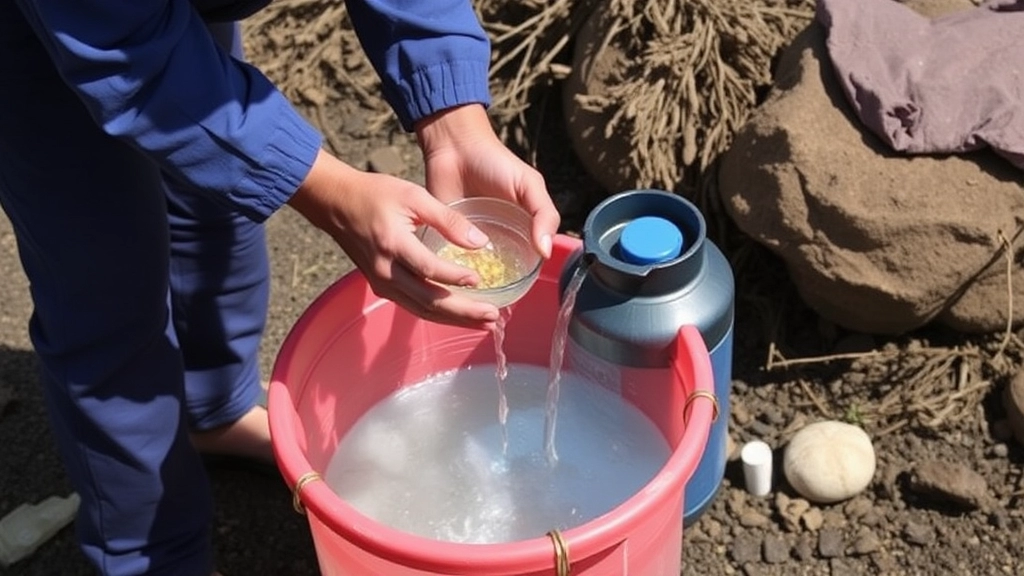
Changing the Water Regularly
One common concern for those rooting Kalanchoe in water is the maintenance of water quality.
Changing the water regularly is crucial for promoting healthy root development and preventing issues like rot or algae growth.
Here’s how to effectively manage your water:
– **Frequency**: Aim to change the water every week. This helps keep it fresh and oxygenated.
– **Visual Check**: If you notice any cloudiness or debris, change the water immediately, regardless of the schedule.
– **Water Quality**: Use filtered or distilled water to avoid harmful chemicals found in tap water, such as chlorine.
– **Temperature**: Ensure the water is at room temperature before adding it to the container. Extreme temperatures can shock the plant.
By following these simple steps, you’ll create a supportive environment for your [Kalanchoe cuttings](https://planthq.org/how-to-grow-kalanchoe-from-cuttings-stepbystep-guide/) to thrive. For more detailed care instructions, check out our [ultimate guide to growing Kalanchoe](https://planthq.org/ultimate-guide-to-growing-kalanchoe-pink-plant/).
Providing Adequate Light

So, you’ve got your Kalanchoe cuttings all set up in water. But wait—are they getting enough light? This is a common worry for many plant enthusiasts.
Light Requirements for Kalanchoe:
- Bright, Indirect Sunlight: Kalanchoe love light but not the harsh rays. A spot near a window with filtered sunlight is perfect.
- Avoid Direct Sunlight: Too much direct sun can scorch the leaves. If you notice browning, it might be time to move them a bit.
- Duration: Aim for about 6 hours of light daily. This keeps the cuttings happy and healthy.
Signs Your Kalanchoe Needs More Light:
- Leggy Growth: If your cuttings are stretching toward the light, they’re craving more.
- Pale Leaves: A lack of light can wash out those vibrant greens.
- Slow Growth: If you’re not seeing new roots or leaves, check the light situation.
I’ve found that rotating your cuttings every week helps them grow evenly. Just like us, Kalanchoe appreciate a change of scenery!
Providing the right amount of light can make a world of difference in your Kalanchoe’s growth.
As you nurture your Kalanchoe cuttings in water, one of the most exciting stages is watching the roots develop. You might wonder, “How do I know if my cuttings are thriving?” or “What signs should I look for?”
### Signs of Healthy Root Growth:
– **White, Firm Roots:** Healthy roots are usually white and firm. If they appear brown or mushy, that may indicate rot.
– **Lengthening Roots:** Over time, you should see roots growing longer. This is a clear sign of progress.
– **New Growth:** Look for new leaves or shoots emerging. This indicates the plant is ready to thrive.
### Tips for Monitoring:
– **Check Weekly:** Inspect your cuttings at least once a week. This helps you catch any issues early on.
– **Use Clear Containers:** A transparent container allows you to see root development without disturbing the cuttings.
– **Take Notes:** Document your observations. This helps you remember what works best for future cuttings.
For more detailed guidance, you might find our [step-by-step guide on how to propagate Kalanchoe Pink Butterflies](https://planthq.org/how-to-propagate-kalanchoe-pink-butterflies-stepbystep-guide/) very useful. Additionally, if you’re interested in the broader aspects of Kalanchoe care, our [complete guide to growing Kalanchoe Mother of Thousands](https://planthq.org/complete-guide-to-growing-kalanchoe-mother-of-thousands/) offers comprehensive insights.
Transplanting Kalanchoe to Soil
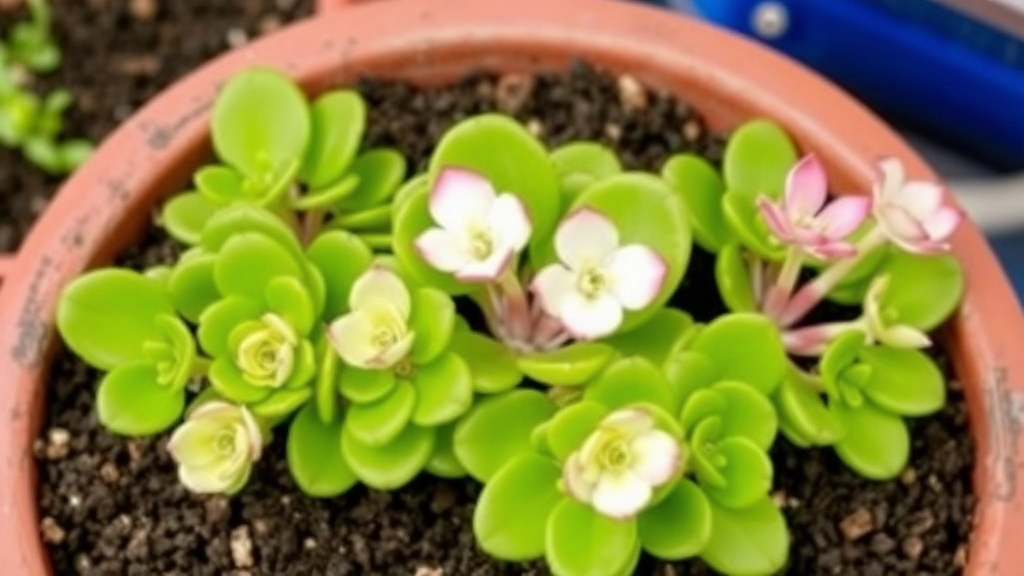
So, you’ve nurtured your Kalanchoe cuttings in water, and now they’re ready for their next big adventure—transplanting to soil!
This step can feel a bit daunting, but it’s all about giving your plant the best chance to thrive. Here’s how to make the transition smooth and successful.
When to Transplant
- Roots are a few inches long: Wait until your Kalanchoe roots are around 2-3 inches long.
- Healthy growth: If you notice new leaves sprouting, it’s a good sign they’re ready for soil.
Choosing the Right Soil
- Well-draining soil: Opt for a cactus or succulent mix.
- pH balance: Aim for a slightly acidic to neutral pH (6.0 to 7.0) for optimal growth.
Steps to Transplant
- Prepare your pot: Choose a pot with drainage holes. This helps prevent root rot.
- Fill with soil: Add your chosen soil mix, filling the pot about halfway.
- Make a hole: Create a small hole in the centre for your cutting.
- Place the cutting: Gently place your Kalanchoe cutting in the hole, ensuring the roots are fully covered.
- Pack the soil: Lightly pack the soil around the base to secure it.
- Water lightly: Give it a gentle drink, but don’t soak it.
Aftercare
- Location: Keep your newly potted Kalanchoe in a bright, indirect light spot.
- Watering: Let the top inch of soil dry out between waterings to prevent overwatering.
Common Problems and Solutions
As we delve deeper into the journey of propagating Kalanchoe in water, it’s essential to address the common problems you might encounter along the way.
1. Yellowing Leaves
- Cause: Overwatering or lack of nutrients.
- Solution: Ensure you’re changing the water regularly and consider adding a diluted liquid fertiliser once roots have developed.
2. Rotting Cuttings
- Cause: Prolonged exposure to stagnant water.
- Solution: Change the water frequently, ideally every week, and ensure that only the cut end is submerged.
3. Slow Root Development
- Cause: Insufficient light.
- Solution: Place your container in a bright, indirect light location. Avoid direct sunlight which can scorch the leaves.
4. Wilting Leaves
- Cause: Lack of water or too much heat.
- Solution: Check the water levels and ensure the environment is not too hot. A cooler spot can aid recovery.
5. Pests and Diseases
- Cause: Poor air circulation or humidity.
- Solution: Ensure good airflow around your plants and keep an eye out for any signs of pests. A gentle wash with soapy water can help eliminate minor infestations.
By being aware of these common issues, you can take proactive measures to ensure your Kalanchoe thrives in water. For more detailed advice on keeping your Kalanchoe healthy, check out our guide on treating powdery mildew and our tips for addressing black spots on leaves.
Advantages of Growing Kalanchoe in Water

You might be wondering why anyone would choose to grow Kalanchoe in water instead of soil.
Well, let me tell you, there are some pretty compelling perks to this method.
1. Simplicity
Growing Kalanchoe in water is straightforward.
You don’t need fancy tools or a green thumb.
Just a cutting, a container, and some water.
2. Visual Appeal
There’s something really captivating about watching roots develop in clear water.
It’s like having a mini science project right on your windowsill.
3. Pest Control
Water propagation can help you avoid soil-borne pests.
No more worrying about pesky bugs hiding in the dirt.
4. Faster Rooting
Kalanchoe tends to root quickly in water.
You can see progress in just a few weeks.
5. Less Maintenance
With water propagation, you don’t have to fuss over soil moisture levels.
Just change the water regularly, and you’re good to go.
6. Encourages Healthy Growth
Water-grown plants can sometimes be healthier.
They get to focus on root development without the stress of soil.
7. Ideal for Small Spaces
If you’re tight on space, water propagation is a great solution.
You can use small jars or vases that fit perfectly on your desk or shelf.
Tips for Successful Growth
Transitioning to water propagation can be a rewarding experience, but it does come with its own set of challenges.
Here are some practical tips to ensure your Kalanchoe thrives in water:
- Choose the Right Container: Use a clear glass or jar. This allows you to monitor root development and water clarity.
- Keep It Clean: Regularly clean your container to prevent algae and bacteria growth.
- Use Distilled Water: Tap water can contain chemicals that may harm your plant. Opt for distilled or rainwater for the best results.
- Limit Light Exposure: While Kalanchoe loves light, too much direct sunlight can stress the plant. Place it in a bright, indirect light area.
- Monitor Temperature: Keep your Kalanchoe in a warm location, ideally between 20-25°C, as extreme temperatures can hinder growth.
- Be Patient: Rooting can take time. Don’t rush the process; allow your plant to develop at its own pace.
- Avoid Overcrowding: If you’re propagating multiple cuttings, ensure they have enough space to grow without competing for resources.
By following these tips, you can optimise your Kalanchoe’s growth and enjoy a vibrant plant. For more detailed guidance, check out our step-by-step guide on propagating Kalanchoe in water and learn about common leaf problems and their solutions.
Frequently Asked Questions
As we dive into the world of Kalanchoe care, I know you might have a few burning questions.
Let’s tackle some of the most common queries I’ve come across.
1. Can I propagate Kalanchoe in soil instead of water?
Absolutely! While water propagation is popular, many folks prefer using soil. For a detailed guide, check out our step-by-step guide on growing Kalanchoe from cuttings.
Just remember to keep the soil moist but not soggy.
2. How long does it take for Kalanchoe cuttings to root in water?
Typically, you’re looking at about 2 to 4 weeks.
Patience is key here!
3. What if my Kalanchoe cuttings start to rot?
Rotting can happen if the water isn’t changed regularly or if the cuttings are submerged too deep.
Make sure to trim off any mushy bits and change the water.
4. How much light do Kalanchoe plants need?
Kalanchoe loves bright, indirect sunlight.
A windowsill is usually the perfect spot.
5. Can I use tap water for rooting Kalanchoe?
Yes, but let it sit for 24 hours to allow any chlorine to dissipate.
This way, your cuttings will have a better chance to thrive.
6. How often should I change the water?
Aim for every week.
This helps prevent bacteria buildup and keeps your cuttings healthy.
7. When should I transplant my rooted Kalanchoe to soil?
Once you see a good set of roots, about 2-3 inches long, it’s time to make the move.
Transplanting gives your Kalanchoe room to grow! For more tips, see our step-by-step guide on planting Kalanchoe.
8. Are there any pests I should watch out for?
Yes, keep an eye out for mealybugs and aphids.
A gentle wash with soapy water can help keep them at bay.
9. Can I grow Kalanchoe indoors?
For sure! Kalanchoe does well indoors as long as it gets enough light.
10. What’s the best way to care for my Kalanchoe after transplanting?
Water it lightly and keep it in a well-lit area.
Avoid overwatering, as this can lead to root rot.
FAQs: Growing Kalanchoe in Water
What type of container should I use for growing Kalanchoe in water?
It’s best to use a glass container so you can observe root development. Plastic containers can also work, but ensure they are clean and clear.
How do I prepare the container for Kalanchoe cuttings?
Sanitize the container with soap and water to prevent bacteria or algae. Ensure the container is deep enough to submerge the stems but not the leaves.
Is it necessary to have drainage holes in the container?
No, drainage holes are not needed for water propagation. However, make sure to change the water regularly to keep it fresh.
How do I prepare Kalanchoe cuttings for water propagation?
Cut a healthy stem about 4-6 inches long, ensure it has 2-3 leaves, and remove any leaves that would be submerged in water to prevent rot.
What kind of light do Kalanchoe cuttings need?
Place the cuttings in bright, indirect sunlight. Avoid direct sunlight as it can scorch the leaves and heat the water, damaging the cuttings.
How often should I change the water for my Kalanchoe cuttings?
Change the water regularly to prevent stagnation and ensure the cut ends remain submerged. Add fresh water as needed, especially if it evaporates.
When is the right time to transplant Kalanchoe cuttings to soil?
Transplant when the roots are around 2-3 inches long and you notice new leaves sprouting, indicating healthy growth.
What type of soil is best for transplanting Kalanchoe?
Use well-draining soil, such as a cactus or succulent mix. Aim for a slightly acidic to neutral pH (6.0 to 7.0) for optimal growth.
What are the advantages of growing Kalanchoe in water?
Growing Kalanchoe in water is simple, visually appealing, and helps avoid soil-borne pests. It also encourages faster rooting and healthy growth, requires less maintenance, and is ideal for small spaces.
How can I tell if my Kalanchoe cuttings need more light?
Signs include leggy growth, pale leaves, and slow root or leaf development. Rotating your cuttings weekly can help them grow evenly.
References
-
The Spruce – Kalanchoe Plant Profile
-
Gardening Know How – Kalanchoe Plant Propagation
-
Houseplant411 – Kalanchoe Plant Care Tips