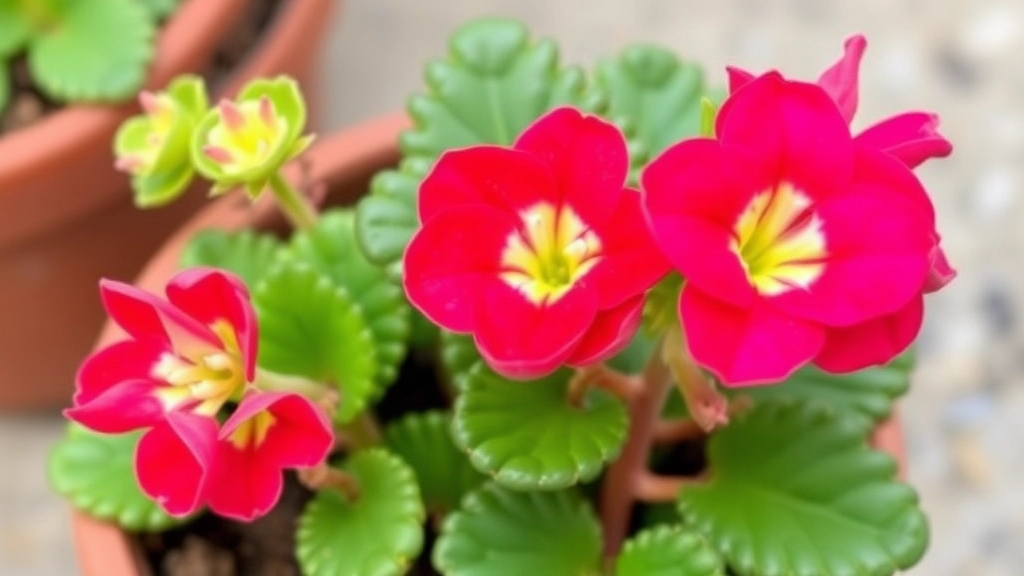
Growing Kalanchoe from Seed
Growing Kalanchoe from seed can be a rewarding experience for any plant enthusiast. It’s a straightforward process that brings a sense of accomplishment as you watch your tiny seeds transform into vibrant, blooming plants. Whether you’re a seasoned gardener or a newbie, I’ll guide you through the essential steps to get your Kalanchoe seeds off to a great start.
Materials Needed
- Kalanchoe seeds
- Seed tray
- Well-draining soil
- Spray bottle for watering
Steps to Grow Kalanchoe
- Begin by filling your seed tray with soil and lightly misting it with water.
- Sprinkle the seeds evenly over the surface, pressing them gently into the soil without covering them completely.
- Place the tray in a warm, bright spot, but avoid direct sunlight.
- Keep the soil consistently moist.
In a few weeks, you’ll see the first signs of growth. Happy planting!
When embarking on the journey of growing Kalanchoe, one of the most pressing concerns is selecting the right seeds.
Have you ever wondered why some plants thrive while others struggle? The answer often lies in the quality of the seeds you choose.
## Understanding Kalanchoe Varieties
Kalanchoe is a diverse genus with numerous varieties, each offering unique characteristics.
– **Kalanchoe blossfeldiana**: Known for its vibrant flowers, ideal for indoor displays.
– **Kalanchoe tomentosa**: Features fuzzy leaves and is perfect for a more exotic touch.
– **Kalanchoe luciae**: Also known as the ‘Paddle Plant’, it has striking, flat leaves.
When selecting seeds, consider your growing environment and aesthetic preferences.
## Sourcing Quality Seeds
Where you source your seeds can significantly impact your success.
– **Reputable Nurseries**: Always opt for established nurseries or online retailers with positive reviews.
– **Organic Seeds**: If possible, choose organic seeds to ensure a healthier start for your plants.
Ensure that the seeds are fresh and stored properly. Old or improperly stored seeds may have reduced germination rates.
## Checking Seed Viability
Before making a purchase, check the seed viability.
– **Germination Rate**: Look for seeds with a high germination rate, ideally above 80%.
– **Expiration Date**: Always check the expiration date on seed packets.
By selecting quality seeds, you set the foundation for a successful growing experience. For more detailed guidance, you can refer to our [complete care guide for Kalanchoe blossfeldiana](https://planthq.org/complete-care-guide-for-kalanchoe-blossfeldiana-succulent/) or learn about [how to grow and care for Kalanchoe tomentosa](https://planthq.org/how-to-grow-and-care-for-succulent-kalanchoe-tomentosa/).
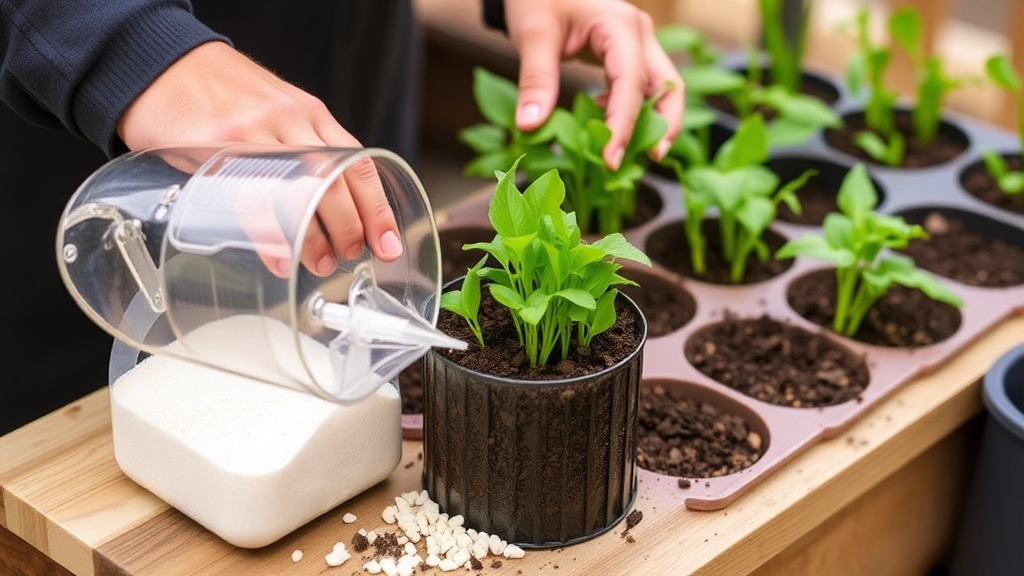
Preparing the Seed Starting Mix
So, you’ve got your Kalanchoe seeds—now what?
One of the most crucial steps in your seed-starting journey is preparing the right seed starting mix.
You want a mix that’s light, airy, and drains well.
Here’s how to whip up the perfect blend:
What You Need:
- Seed-Starting Soil: Look for a quality seed starting mix. It’s specially formulated to provide the right balance of nutrients and drainage.
- Perlite or Vermiculite: These help with aeration and drainage. Just a handful mixed in can make a world of difference.
- Coconut Coir or Peat Moss: This retains moisture without getting soggy. A great addition for keeping your seeds happy.
Steps to Prepare Your Mix:
- Combine Ingredients: Mix equal parts of seed starting soil, perlite, and coconut coir.
- Moisten the Mix: Lightly dampen the mix before filling your containers. You want it moist but not soggy.
- Check Drainage: After moistening, squeeze a handful. If water drips out, it’s too wet. If it crumbles, it’s just right.
- Fill Containers: Gently fill your chosen containers with the mix, leaving a little space at the top.
Pro Tips:
- Avoid Garden Soil: It’s too heavy and can harbor pests and diseases.
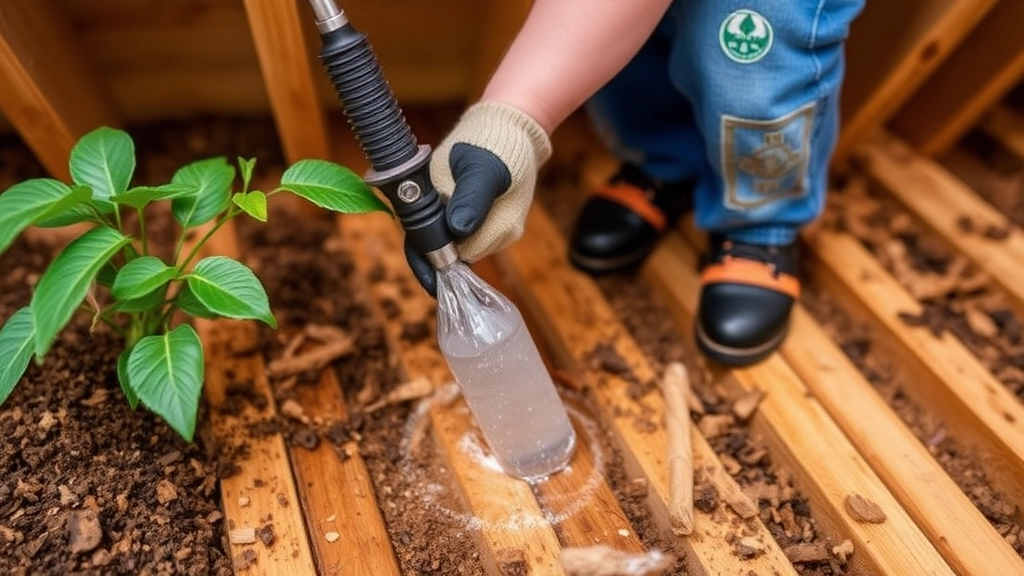
- Sterilize Your Mix: If you’re worried about pathogens, you can bake your mix at a low temperature for about 30 minutes.
When starting Kalanchoe seeds, selecting the right containers is crucial for successful germination and healthy growth. You might be wondering, “What type of container is best for my Kalanchoe seeds?” Let’s explore the options.
**Container Types**
– **Seed Trays:**
– Perfect for starting multiple seeds at once.
– Ensure they have drainage holes to prevent waterlogging.
– **Peat Pots:**
– Biodegradable and can be planted directly into the ground.
– Great for reducing transplant shock.
– **Plastic Pots:**
– Lightweight and reusable.
– Choose pots with good drainage.
– **Cell Packs:**
– Ideal for individual seedlings.
– Easy to manage and transplant later.
**Size Matters**
– **Small Containers:**
– Start with smaller pots (around 3-4 inches) to avoid overwatering.
– **Larger Containers:**
– Once seedlings are established, consider transferring them to larger pots for more space.
**Considerations for Choosing Containers**
– **Drainage:** Ensure all containers have adequate drainage to prevent root rot.
– **Material:** Opt for breathable materials like terracotta or plastic that allow for moisture regulation.
– **Cleanliness:** Use clean containers to avoid disease. If reusing pots, disinfect them beforehand.
For more detailed guidance on growing Kalanchoe from seeds, you can check out our [complete guide to growing Kalanchoe Pink Butterflies](https://planthq.org/complete-guide-to-growing-kalanchoe-pink-butterflies/). Additionally, if you are interested in the best soil types for your Kalanchoe, our [best soil for Kalanchoe Blossfeldiana care tips](https://planthq.org/best-soil-for-kalanchoe-blossfeldiana-care-tips/) can be very helpful.
Sowing Kalanchoe Seeds

After preparing your seed starting mix and selecting the right containers, it’s time to sow your Kalanchoe seeds. This step is crucial for ensuring healthy germination and growth.
Steps for Sowing Kalanchoe Seeds:
- Moisten the Soil:
- Lightly dampen the seed starting mix before sowing.
- Avoid soaking it, as excess water can lead to rot.
- Sowing the Seeds:
- Sprinkle the seeds evenly over the surface of the moistened mix.
- Kalanchoe seeds are tiny, so take care not to overcrowd them.
- Covering the Seeds:
- Lightly press the seeds into the soil.
- A thin layer of soil (about 1-2 mm) can be added on top, but many gardeners prefer to leave them uncovered since Kalanchoe seeds require light to germinate.
- Labeling:
- Don’t forget to label your containers with the seed variety and the date of sowing.
- This helps track growth and care.
- Watering:
- Use a fine mist spray to water the seeds gently after sowing.
- Ensure the soil remains moist but not soggy.
Sowing Kalanchoe seeds can be a rewarding experience, as you watch them transform from tiny seeds into vibrant plants.
Providing Optimal Light Conditions
When it comes to growing Kalanchoe from seeds, light conditions play a pivotal role in ensuring successful germination and healthy growth.
Are you worried about whether your seedlings are getting enough light?
Kalanchoe plants thrive in bright, indirect sunlight. Here’s what you need to know:
Maintaining Proper Moisture Levels
So, you’ve sown your Kalanchoe seeds and are feeling pretty good about it. But how do you keep that momentum going? One of the biggest challenges is maintaining the right moisture levels. Too much water, and you risk rot; too little, and your seeds might just give up on you.
Here’s how to strike that perfect balance:
- Check the Soil: Always start by feeling the surface of your seed starting mix. If it feels dry to the touch, it’s time to water. If it’s still damp, hold off for a bit.
- Water Wisely: Use a spray bottle or a watering can with a fine spout to gently moisten the soil. Aim for a light misting rather than a heavy soaking. This helps avoid displacing the seeds.
- Humidity Matters: Kalanchoe seeds thrive in a humid environment. Cover your containers with a clear plastic lid or plastic wrap to create a mini greenhouse effect. Just don’t forget to vent it occasionally to prevent mould.
- Monitor Regularly: Keep an eye on your seedlings daily. If you notice the soil drying out quickly, you might need to adjust your watering schedule.
- Avoid Overwatering: This is a common pitfall. If the leaves start to yellow or the stems appear mushy, you might be giving them too much love in the form of water.
By keeping these tips in mind, you’ll set your Kalanchoe seedlings up for success.
When it comes to germinating Kalanchoe seeds, one of the most common concerns is ensuring the right temperature.
### What Temperature Do Kalanchoe Seeds Need?
Kalanchoe seeds thrive in warm conditions. The ideal temperature range for germination is between **20°C to 25°C (68°F to 77°F)**.
### Why Temperature Matters:
– **Optimal Growth:** Seeds need warmth to activate their growth processes.
– **Faster Germination:** Higher temperatures within the ideal range can speed up germination, allowing you to see results sooner.
– **Preventing Issues:** Too low temperatures can lead to poor germination rates and weak seedlings.
### Tips for Maintaining the Right Temperature:
– **Use a Heat Mat:** If your home is cooler, consider using a heat mat designed for seed starting. This will help maintain a consistent temperature.
– **Choose the Right Location:** Place your seed trays in a warm spot, like on top of a refrigerator or near a sunny window.
– **Monitor with a Thermometer:** Keep an eye on the temperature to ensure it stays within the ideal range.
For a more comprehensive understanding of **how to propagate Kalanchoe in water**, you can check out our step-by-step guide. Additionally, if you’re dealing with specific varieties, our **complete care guide for Kalanchoe Blossfeldiana** offers detailed tips to help your plants thrive.
Transplanting Seedlings to Larger Pots
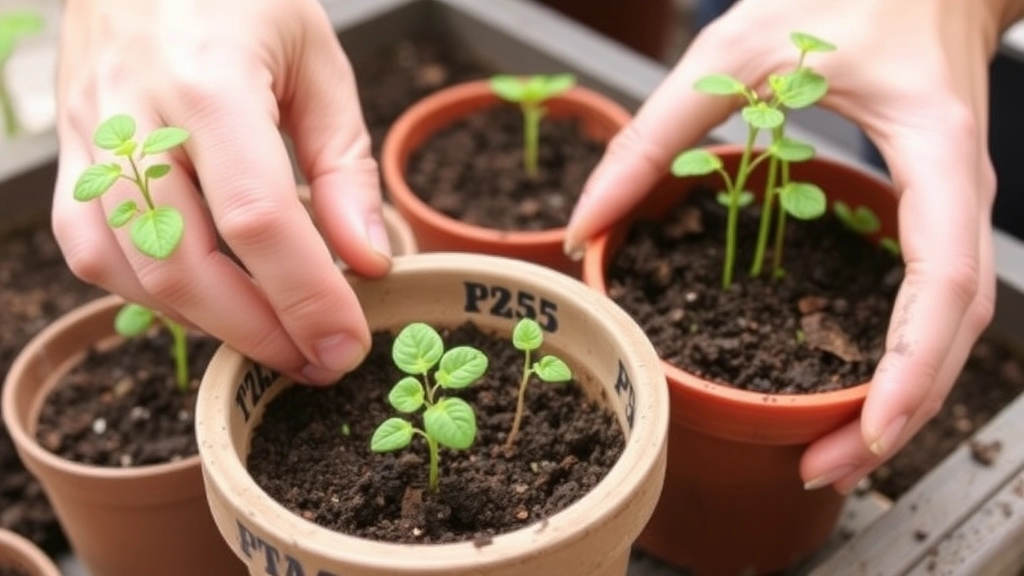
So, you’ve nurtured your Kalanchoe seedlings, and they’re finally ready to take the next big step—transplanting them into larger pots. But when is the right time, and how do you go about it?
Timing is Everything
You’ll know it’s time to transplant when your seedlings have a few sets of true leaves and are about 2-4 inches tall. This usually happens about 4-6 weeks after germination. If they’re looking a bit cramped in their current space, it’s definitely time for a change.
What You’ll Need
- Larger pots: Choose pots that are at least 4-6 inches in diameter.
- Quality potting mix: A well-draining mix is key for Kalanchoe.
- Water: Keep it handy for post-transplant hydration.
Steps to Transplant
- Prepare the New Pots: Fill them with your potting mix, leaving some space at the top.
- Water the Seedlings: A little moisture helps ease the transition.
- Gently Remove Seedlings: Use a small tool or your fingers to lift them out, being careful not to damage the roots.
- Place in New Pots: Make a small hole in the mix and position the seedling, then cover the roots gently with soil.
- Water Again: Give them a good drink after transplanting to settle the soil.
Aftercare Tips
- Location: Keep them in a bright spot but out of direct sunlight for a few days.
- Monitor Moisture: Ensure the soil stays slightly moist but not soggy.
Transplanting can feel a bit daunting, but it’s a crucial step in helping your Kalanchoe thrive. With the right care, they’ll flourish in their new homes.
Common Problems and Solutions
As we navigate the journey of growing Kalanchoe from seeds, challenges may arise that can hinder our success.
What are the common issues faced when growing Kalanchoe from seeds?
-
Poor Germination Rates
- Solution: Ensure you are using fresh seeds and a well-draining seed starting mix.
- Tip: Soak seeds in water for a few hours before sowing to enhance germination.
-
Damping Off
- Solution: This fungal disease can kill seedlings. To prevent it, avoid overwatering and provide good air circulation.
- Tip: Use sterilised containers and soil to minimise the risk.
-
Leggy Seedlings
- Solution: If seedlings are stretching towards the light, they are not receiving enough brightness.
- Tip: Move them closer to a light source or consider using grow lights.
-
Leaf Discoloration
- Solution: Yellowing leaves may indicate overwatering or nutrient deficiencies.
- Tip: Adjust your watering schedule and consider a diluted fertiliser once seedlings are a few weeks old.
-
Pests
- Solution: Watch for aphids and mealybugs, which can damage young plants.
- Tip: Regularly inspect your plants and use insecticidal soap if needed.
By addressing these common problems with practical solutions, you can foster a thriving environment for your Kalanchoe seedlings. For more detailed tips, you might find it useful to read about pruning and care tips for leggy Kalanchoe and the causes and solutions for Kalanchoe leaf discoloration.
Tips for Healthy Growth and Blooming
So, you’ve sown those Kalanchoe seeds and watched them sprout. Now, how do you keep them thriving and blooming beautifully?
Here’s what I’ve learned along the way:
- Light, Light, Light:
- Kalanchoe loves the sun!
- Aim for about 6 hours of bright, indirect sunlight daily.
- If you notice your plants stretching towards the light, they might need a brighter spot.
- Water Wisely:
- Too much water can lead to root rot.
- Allow the top inch of the soil to dry out before watering again.
- Remember, Kalanchoe is a succulent; they prefer to be on the drier side.
- Fertilise:
- Use a balanced, water-soluble fertiliser every 4-6 weeks during the growing season.
- This gives your plants the nutrients they need to bloom.
- Prune Regularly:
- Snip off dead or wilted leaves to encourage new growth.
- This keeps your plant healthy and looking its best.
- Watch for Pests:
- Keep an eye out for pests like aphids or mealybugs.
- A simple rinse with water can often do the trick.
- Temperature Check:
- Kalanchoe thrives in warm conditions, ideally between 20-25°C.
- Avoid cold drafts and sudden temperature changes.
By following these tips, you’ll not only keep your Kalanchoe healthy but also encourage those stunning blooms that make it so popular. For more detailed guidance, check out this Ultimate Guide to Flowering Kalanchoe Care Tips. Additionally, if you’re interested in propagating your plant, you might find this Step-by-Step Guide to Florist Kalanchoe Propagation very helpful.
FAQs on Growing Kalanchoe From Seed
What is the best seed starting mix for Kalanchoe?
The ideal seed starting mix for Kalanchoe should be light, airy, and well-draining. A mix of equal parts seed starting soil, perlite, and coconut coir or peat moss is recommended.
Can I use garden soil for starting Kalanchoe seeds?
No, garden soil is too heavy and can harbor pests and diseases. It’s best to use a specialized seed starting mix.
Do I need to sterilize the seed starting mix?
Sterilizing the mix is optional but can be beneficial to prevent pathogens. You can bake the mix at a low temperature for about 30 minutes.
How do I sow Kalanchoe seeds?
Lightly moisten the seed starting mix, sprinkle the seeds evenly over the surface, and gently press them into the soil. Kalanchoe seeds require light to germinate, so they can be left uncovered or lightly covered with a thin layer of soil.
What is the best way to water Kalanchoe seeds?
Use a fine mist spray to water the seeds gently. Ensure the soil remains moist but not soggy, as excess water can lead to rot.
How do I maintain proper moisture levels for Kalanchoe seeds?
Check the soil regularly by feeling the surface. If it’s dry, water it lightly. Use a spray bottle or a watering can with a fine spout to avoid displacing the seeds. Cover the containers with a clear plastic lid or wrap to create a humid environment and vent occasionally to prevent mold.
When should I transplant Kalanchoe seedlings?
Transplant the seedlings when they have a few sets of true leaves and are about 2-4 inches tall, usually around 4-6 weeks after germination. If they appear cramped, it’s time to move them to larger pots.
What size pots should I use for transplanting Kalanchoe seedlings?
Choose pots that are at least 4-6 inches in diameter. Ensure they have good drainage to prevent waterlogging.
How do I transplant Kalanchoe seedlings?
Fill the new pots with quality potting mix, water the seedlings, gently remove them from their current containers, and place them in the new pots. Cover the roots with soil and water them again to settle the soil.
What aftercare is needed after transplanting Kalanchoe seedlings?
Keep the transplanted seedlings in a bright spot but out of direct sunlight for a few days. Monitor the moisture levels to ensure the soil stays slightly moist but not soggy.
References
-
Gardening Know How – Growing Kalanchoe from Seed
-
The Spruce – How to Grow Kalanchoe Indoors
-
WikiHow – How to Grow Kalanchoe