Mastering Kalanchoe Chocolate Soldier Propagation
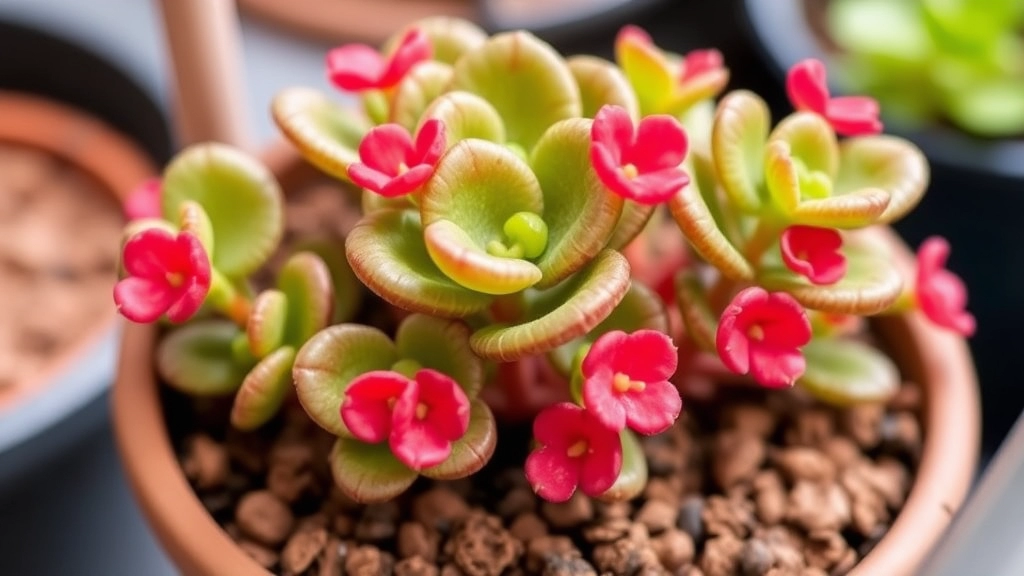
Looking to master Kalanchoe Chocolate Soldier propagation? You’re in the right place! This guide will walk you through the essential steps to propagate this charming succulent, Kalanchoe tomentosa, also known as the Chocolate Soldier. Whether you’re a seasoned gardener or a newbie, these tips will help you successfully grow new plants from leaf or stem cuttings.
Timing for Propagation
First, let’s talk about timing. The best time to propagate your Chocolate Soldier is during the growing season, typically spring or early summer. Choose healthy leaves or stems for cuttings and allow them to callus properly before planting.
Creating a Thriving Succulent Collection
With the right soil mix and optimal care conditions, you’ll be well on your way to creating a thriving succulent collection. Ready to get started? Let’s dive in!
Best Time to Propagate Chocolate Soldier
When is the best time to propagate Chocolate Soldier plants? This is a common concern among plant enthusiasts eager to expand their collection. The ideal timing can significantly influence the success of your propagation efforts.
Optimal Seasons for Propagation
- Spring and Early Summer
The best time to take cuttings is during the warm months, particularly in spring and early summer. During this period, the plant is actively growing, which increases the chances of successful rooting. For more detailed tips, you can refer to this Chocolate Soldier Kalanchoe Care Guide. - Avoiding Extreme Temperatures
Propagating during extreme heat or cold can stress the cuttings, leading to poor results. Aim for a moderate climate where temperatures range between 15°C to 24°C (60°F to 75°F). For a comprehensive guide on propagation, check out this Step-by-Step Guide to Kalanchoe Propagation.
Signs of Healthy Growth
- Look for healthy, vibrant stems or leaves.
- Avoid cuttings from stressed or diseased plants, as these are less likely to thrive.
Choosing the Right Stem or Leaf for Cuttings
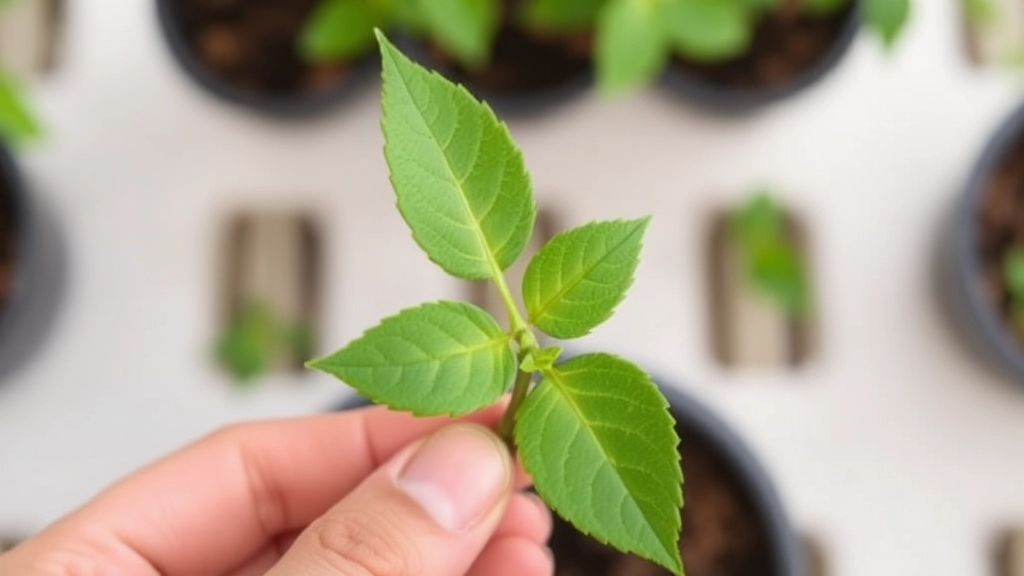
So, you’ve decided to propagate your Chocolate Soldier.
But wait, how do you choose the right stem or leaf for cuttings?
This is a crucial step, and getting it right can make all the difference in your propagation success.
What to Look For
- Healthy Growth: Choose stems or leaves that are vibrant and healthy. Look for a rich green colour and avoid any that appear yellowed or wilted.
- Length Matters: For stems, aim for cuttings about 4 to 6 inches long. This gives enough length for rooting while still being manageable.
- Leaf Selection: If you’re opting for leaves, select mature ones. Young leaves may not have enough energy to root successfully.
- Node Presence: Always look for nodes (the little bumps on the stem). This is where new roots will emerge, so having a few nodes is a big plus.
Tips for Success
- Timing: The best time to take cuttings is during the growing season, typically in spring or early summer. This ensures that your cuttings are taken when the plant is most vigorous.
- Avoid Flowers: If your Chocolate Soldier is flowering, it’s best to skip those stems. Focus on non-flowering parts for better results.
- Clean Tools: Always use clean, sharp scissors or pruning shears. This reduces the risk of infection and helps your cuttings thrive.
How to Prepare and Callus the Cuttings
After selecting the right stem or leaf for your Chocolate Soldier cuttings, the next crucial step is preparation. Many gardeners often wonder how to ensure their cuttings have the best chance of rooting successfully. Proper preparation and callusing can make all the difference.
Steps to Prepare Cuttings
- Clean Your Tools:
- Always start with sterilised tools.
- Use sharp scissors or pruning shears to avoid damaging the plant.
- Cutting Selection:
- Choose healthy stems that are at least 4 to 6 inches long.
- Look for firm, green stems without any signs of disease or pests.
- Trim the Cuttings:
- Make a clean cut just below a node (the point where leaves attach).
- Remove any leaves from the lower half of the cutting to prevent rot.
Callusing the Cuttings
Callusing is a vital process that helps prevent rot and promotes root growth. Here’s how to do it:
- Let Them Dry:
- Place the cuttings in a dry, shaded area for 24 to 48 hours.
- This allows the cut ends to form a protective callus.
- Use the Right Environment:
- Ensure the area is well-ventilated to aid the drying process.
- Avoid direct sunlight, as this can cause the cuttings to desiccate too quickly.
By taking these steps, you’re setting the stage for successful rooting. For more detailed guidance, check out our complete guide on propagating Kalanchoe Chocolate Soldier. Additionally, if you’re interested in propagation from leaves, our step-by-step guide offers valuable insights.
Step-by-Step Guide for Rooting in Soil
After selecting the right cuttings for propagation, the next crucial step is to root them in soil. This process can seem daunting, but with the right approach, it can be straightforward and rewarding.
1. Gather Your Materials
- Potting Mix: Use a well-draining potting mix to prevent waterlogging.
- Containers: Small pots or trays with drainage holes are ideal.
- Water: Ensure you have clean, room-temperature water.
2. Prepare the Cuttings
- Trim the Cuttings: Cut the stems to about 4-6 inches long, ensuring each has at least one node.
- Remove Lower Leaves: Strip off the lower leaves to prevent them from rotting in the soil.
3. Plant the Cuttings
- Make Holes: Use a pencil or your finger to create holes in the soil.
- Insert Cuttings: Place each cutting into the holes, ensuring the nodes are buried in the soil.
- Firm the Soil: Gently press the soil around the cuttings for stability.
4. Watering
- Initial Watering: Water the soil lightly to settle it around the cuttings.
- Check Moisture: The soil should be moist but not soggy. Overwatering can lead to root rot.
5. Create a Humid Environment
- Covering: You can use a plastic bag or a humidity dome to maintain moisture.
- Ventilation: Ensure to open it occasionally to prevent mould growth.
6. Place in Appropriate Light
- Indirect Light: Position the cuttings in a spot with bright, indirect sunlight. Direct sunlight can scorch them.
7. Monitor Progress
- Check Regularly: Keep an eye on moisture levels and the overall health of the cuttings.
Propagating Using Water: Alternative Methods
If you’re looking for a straightforward and engaging way to propagate your Chocolate Soldier plant, water propagation might just be the answer. Many gardeners wonder if they can skip soil altogether and still achieve successful growth. The good news? You can!
Why Choose Water Propagation?
Water propagation offers several advantages:
- Visual Progress: Watching roots develop in clear water can be incredibly satisfying.
- Less Mess: No need to deal with soil until you’re ready to transplant.
- Easier Monitoring: You can easily check for issues like rot without digging around.
Steps for Water Propagation
- Select Healthy Cuttings: Choose a stem that is healthy and free of pests or diseases. Aim for a cutting that is about 4-6 inches long.
- Prepare the Cutting: Trim the bottom of the stem at a 45-degree angle. Remove any leaves that might sit below the waterline to prevent rot.
- Choose Your Container: Use a clear glass or jar to allow light in and monitor root growth.
- Fill with Water: Add enough water to submerge the cut end of the stem, ensuring no leaves are submerged.
- Place in Indirect Light: Find a spot that receives bright, indirect sunlight. Too much direct sunlight can cause algae growth.
- Change Water Regularly: To prevent stagnation and rot, change the water every few days.
Monitoring Root Development
Keep an eye on your cutting. In a few weeks, you should start to see roots developing.
- Healthy Roots: Look for white, firm roots.
- Signs of Trouble: If the water becomes cloudy or smells foul, it could indicate rot. In this case, change the water immediately and trim any affected areas.
Once your roots are at least 2-3 inches long, it’s time to think about transplanting. For more detailed tips on how to care for your plant after propagation, check out our post-flowering care tips for Kalanchoe. Additionally, if you’re interested in learning about other propagation methods, our guide on using Kalanchoe Pinnata offers some unique insights.
Caring for New Cuttings: Light and Moisture Requirements
Once you’ve successfully taken your cuttings, the next step is ensuring they thrive in their new environment.
You might be wondering, “How much light do my new Chocolate Soldier cuttings need?” or “Am I overwatering them?”
Light Requirements
- Bright, Indirect Light: Your cuttings love light, but too much direct sun can scorch those delicate leaves. Aim for a spot where they get bright, indirect light.
- Avoid Draughts: Keep them away from drafty windows or air conditioning vents. They prefer a stable environment without temperature fluctuations.
Moisture Needs
- Keep the Soil Moist: It’s crucial to keep the soil slightly moist but not soggy. Overwatering can lead to root rot, which is a common concern for new cuttings.
- Humidity is Key: Chocolate Soldier cuttings thrive in humidity. If your home is dry, consider misting them regularly or placing a humidity dome over them. Just ensure there’s good airflow to prevent mould.
Tips for Monitoring
- Check the Soil: Stick your finger about an inch into the soil. If it feels dry, it’s time to water.
- Watch for Wilting: If the leaves start to droop, they might be thirsty.
- Daily Checks: Make it a habit to check your cuttings daily. This way, you can catch any issues early on.
Common Problems and How to Avoid Root Rot
When propagating Chocolate Soldier cuttings, one of the most pressing concerns is root rot. This often leads to frustration for many gardeners, as it can quickly jeopardise your hard work.
What Causes Root Rot?
Root rot is primarily caused by overwatering and poor drainage. When the soil remains too wet, it creates an environment where harmful fungi thrive, leading to the decay of roots.
Signs of Root Rot:
- Yellowing Leaves: A clear indicator that something’s off.
- Wilting: Despite adequate watering, your cuttings may appear droopy.
- Foul Odour: A rotten smell coming from the soil is a major red flag.
How to Avoid Root Rot:
- Choose the Right Soil:
- Use a well-draining potting mix.
- Consider adding perlite or sand to improve drainage.
- Water Wisely:
- Allow the top inch of soil to dry out before watering again.
- Always check the moisture level with your finger.
- Proper Potting:
- Ensure pots have drainage holes.
- Avoid using pots that retain too much moisture.
- Air Circulation:
- Place cuttings in a location with good air circulation.
- Avoid overcrowding to promote airflow around the plants.
- Monitor Humidity:
- While Chocolate Soldier enjoys humidity, excessive moisture can lead to rot.
- Use a humidity meter to keep track.
By taking these preventive measures, you can significantly reduce the risk of root rot and ensure your cuttings thrive. For more tips on healthy plant growth and propagation techniques, explore our detailed guides.
When and How to Transplant Rooted Cuttings
So, you’ve successfully rooted your Chocolate Soldier cuttings—congratulations! Now, it’s time to think about when and how to transplant them into their new home. This step can feel a bit daunting, but don’t worry; I’m here to guide you through it.
When to Transplant
Timing is everything. You want to make sure your cuttings are ready for their next adventure. Here’s what to look for:
- Roots Visibility: If you can see healthy roots poking out of the bottom of the pot or container, it’s a good sign they’re ready.
- Size Matters: Ideally, your cuttings should be around 4-6 inches tall. If they’re too small, they may struggle to adapt.
- Healthy Growth: Look for new leaves sprouting. This means your cuttings are thriving and ready for a bigger space.
How to Transplant
Now, let’s dive into the actual transplanting process:
- Choose the Right Pot: Pick a pot that’s slightly bigger than the one your cutting is currently in. Make sure it has drainage holes to prevent waterlogging.
- Prepare the Soil: Use a well-draining potting mix. You can mix in some perlite or sand for extra drainage.
- Gently Remove the Cutting: Carefully take your rooted cutting out of its current pot. Be gentle to avoid damaging the roots.
- Place in New Pot: Make a hole in the new soil and place the cutting in. Cover the roots with soil, but don’t bury the stem too deeply.
- Water Thoroughly: Give it a good drink to settle the soil around the roots. Ensure excess water can drain away.
- Location, Location, Location: Place your newly transplanted cutting in a spot with bright, indirect light. Avoid direct sunlight at first, as it can stress the plant.
Transplanting can be a bit of a nervous moment, but with these steps, your Chocolate Soldier should settle in nicely.
After successfully rooting your Chocolate Soldier cuttings, the next critical step is ensuring they receive the right nutrients to thrive.
New plants often require additional nutrients to support their growth, especially after the stress of propagation. But what should you use, and when is the right time to fertilize?
Opt for a balanced, water-soluble fertilizer with equal parts nitrogen (N), phosphorus (P), and potassium (K), such as a 10-10-10 formulation. If you prefer organic methods, consider using fish emulsion or seaweed extract. These options provide essential nutrients without harsh chemicals.
Avoid fertilizing immediately after transplanting. Wait about 4-6 weeks to allow the cuttings to establish roots. During the active growing season (spring and summer), fertilize every 4-6 weeks. In autumn and winter, reduce or completely stop fertilization, as plants generally require fewer nutrients during this period.
Always dilute the fertilizer to half the recommended strength for young plants to prevent root burn. Apply fertilizer when the soil is moist to help the nutrients absorb effectively.
For more detailed information on caring for Kalanchoe plants, check out our [Kalanchoe Chocolate Soldier Plant Care Guide](https://planthq.org/kalanchoe-chocolate-soldier-plant-care-guide-tips-tricks/) and additional tips on [How to Care for Kalanchoe Succulent](https://planthq.org/how-to-care-for-kalanchoe-succulent-ultimate-guide/).
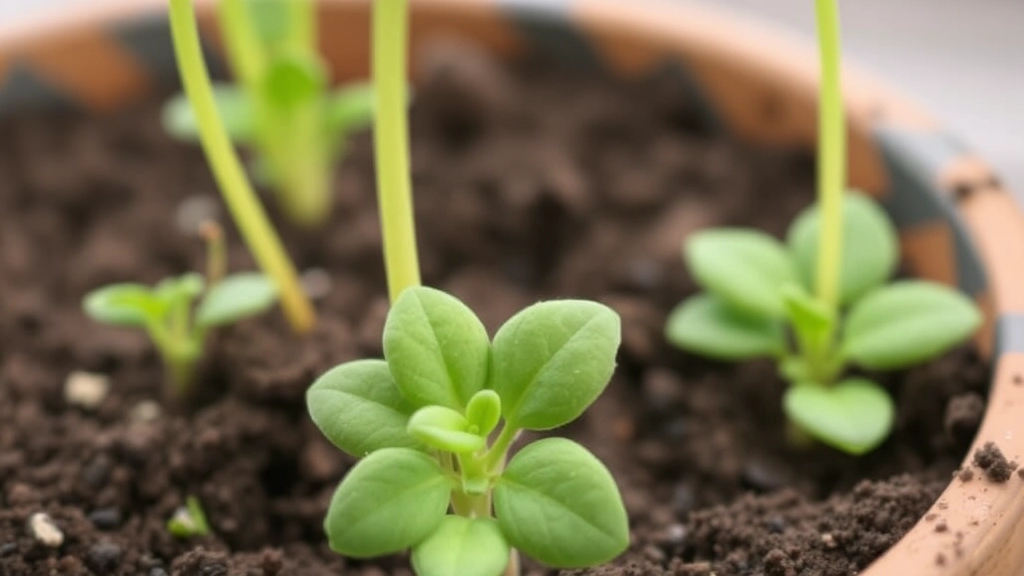
Propagation by Offsets: A Simple Alternative

So, you’re looking for an easier way to propagate your Chocolate Soldier?
Offsets might just be the answer you’ve been searching for.
These little plantlets, or “pups,” grow right from the base of the parent plant.
Why Choose Offsets?
- Simplicity: No need to fuss with cuttings or rooting hormones.
- Speed: Offsets usually root faster than traditional cuttings.
- Success Rate: Higher chances of survival since they’re already established.
How to Spot Offsets
Look for small shoots emerging from the soil around the main plant.
They’ll often have their own roots, making them perfect for propagation.
Steps to Propagate Offsets
- Select the Right Offset: Choose a healthy pup that’s at least a few inches tall.
- Gently Separate: Carefully dig around the base and wiggle the offset free.
- Trim Excess Roots: If the roots are long, trim them back a bit to encourage new growth.
- Plant in Fresh Soil: Place the offset in a small pot with well-draining soil, burying it just enough to cover the roots.
- Water Lightly: Give it a little drink, but don’t soak it.
Aftercare for Offsets
- Light: Place in bright, indirect sunlight.
- Moisture: Keep the soil slightly moist but not soggy.
Enhancing Root Growth with Rooting Hormone
When propagating Chocolate Soldier cuttings, you might wonder how to boost their chances of successful rooting. One effective method is to use rooting hormone. This can make a significant difference in the speed and health of root development.
Why Use Rooting Hormone?
Rooting hormone contains auxins, which are plant hormones that stimulate root growth. Here’s why you should consider using it:
- Faster Rooting: Cuttings treated with rooting hormone often root quicker than those without.
- Stronger Roots: Hormone-treated plants tend to develop a more robust root system.
- Higher Success Rate: Using rooting hormone can increase the likelihood of successful propagation.
How to Apply Rooting Hormone
Using rooting hormone is straightforward. Here’s a step-by-step guide:
- Choose Your Hormone: You can find rooting hormone in powder, gel, or liquid form. Powder is the most common and easiest to use.
- Prepare the Cutting: Ensure your cutting is healthy and has a clean cut at the base.
- Dip or Dust:
- For powder: Dip the cut end of your cutting into the powder, ensuring it’s well-coated.
- For gel/liquid: Swirl the cut end in the solution, allowing any excess to drip off.
- Plant Immediately: After applying the hormone, plant the cutting in your chosen medium without delay.
Tips for Best Results
- Use Fresh Hormone: Ensure your rooting hormone is fresh for optimal effectiveness.
- Avoid Overuse: Too much hormone can harm the cutting, so use it sparingly.
- Follow Instructions: Always adhere to the manufacturer’s guidelines for the best results.
For more specific care tips, you might find our comprehensive guide on Kalanchoe Panda Plant care useful. Additionally, if you’re interested in knowing how to propagate Kalanchoe plants effectively, check out our step-by-step guide to Kalanchoe stem propagation.
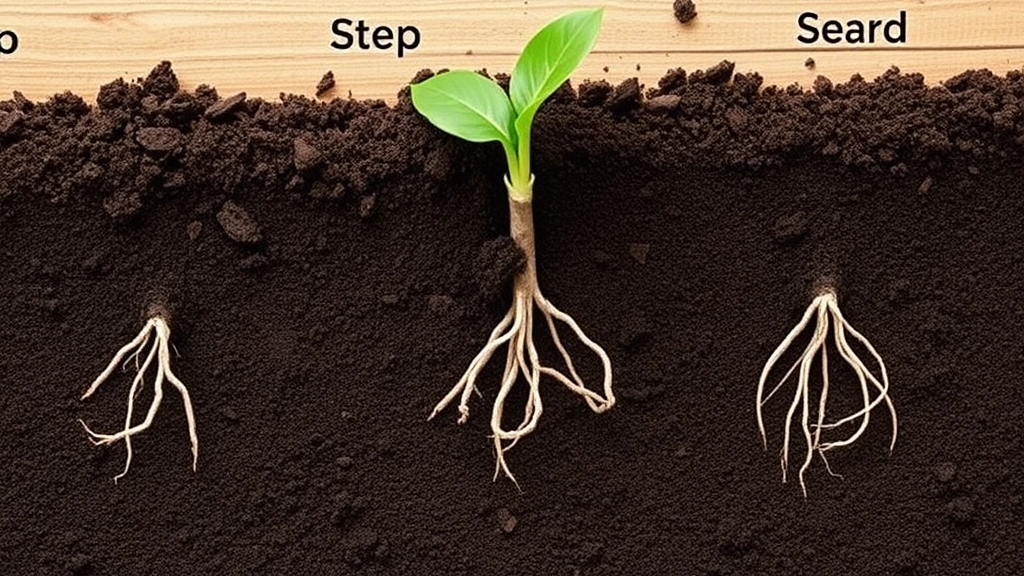
How Long It Takes for Chocolate Soldier Cuttings to Root
So, you’ve taken the plunge and propagated your Chocolate Soldier cuttings. Now you’re probably wondering: how long will it take for those cuttings to actually root?
Well, the waiting game can be a bit nerve-wracking, but here’s the scoop:
- Typical Timeframe: Most Chocolate Soldier cuttings will start to root within 2 to 4 weeks.
- Factors at Play: The exact time can vary based on a few factors:
- Temperature: Warmer conditions speed up the rooting process. Aim for around 20-24°C (68-75°F).
- Humidity: Keeping humidity levels high can also help. A simple plastic bag over the cuttings can do wonders!
- Light: Indirect light is best. Too much direct sun can stress the cuttings.
Tips to Keep in Mind
- Patience is Key: It’s normal to feel anxious, but resist the urge to dig up the cuttings to check on them. This can disrupt the rooting process.
- Check for Signs: After a couple of weeks, you can gently tug on the cuttings. If you feel resistance, they’re likely rooting well.
Once you see those roots developing, it’s a sign that your efforts are paying off. For more detailed guidance, you can refer to our comprehensive Kalanchoe Tomentosa Chocolate Care Guide. Additionally, if you’re interested in other propagation methods, check out our Step-by-Step Guide to Propagating Kalanchoe Tomentosa.
FAQs on Kalanchoe Chocolate Soldier Propagation
What is the best time to take cuttings for propagation?
The best time to take cuttings is during the growing season, typically in spring or early summer. This ensures that your cuttings are taken when the plant is most vigorous.
How do I choose the right stem or leaf for cuttings?
Choose stems or leaves that are vibrant and healthy, with a rich green color. For stems, aim for cuttings about 4 to 6 inches long. For leaves, select mature ones. Ensure the stems have nodes, as this is where new roots will emerge.
What materials do I need for rooting cuttings in soil?
You will need a well-draining potting mix, small pots or trays with drainage holes, and clean, room-temperature water.
How do I prepare the cuttings for planting?
Trim the stems to about 4-6 inches long, ensuring each has at least one node. Remove the lower leaves to prevent them from rotting in the soil.
What are the light requirements for new cuttings?
New cuttings need bright, indirect light. Avoid direct sunlight as it can scorch the delicate leaves. Also, keep them away from drafty windows or air conditioning vents.
How should I water my new cuttings?
Keep the soil slightly moist but not soggy. Overwatering can lead to root rot. It’s crucial to monitor the moisture levels regularly.
When can I transplant rooted cuttings?
Transplant rooted cuttings when you see healthy roots poking out of the bottom of the pot, and the cuttings are around 4-6 inches tall with new leaves sprouting.
How do I transplant rooted cuttings?
Choose a slightly bigger pot with drainage holes. Use a well-draining potting mix. Gently remove the cutting from its current pot, place it in the new pot, cover the roots with soil, and water thoroughly. Place the pot in a spot with bright, indirect light.
What are offsets, and why should I use them for propagation?
Offsets, or “pups,” are small plantlets that grow from the base of the parent plant. They are simpler to propagate, root faster, and have a higher success rate since they are already established.
How do I propagate using offsets?
Select a healthy offset that’s at least a few inches tall. Gently separate it from the parent plant, trim excess roots if necessary, and plant it in a small pot with well-draining soil. Water lightly and place it in bright, indirect sunlight.
References
-
How To Propagate Kalanchoe Plants
-
How to Propagate Succulents from Cuttings
-
How to Propagate Succulents: From Leaves and Cuttings