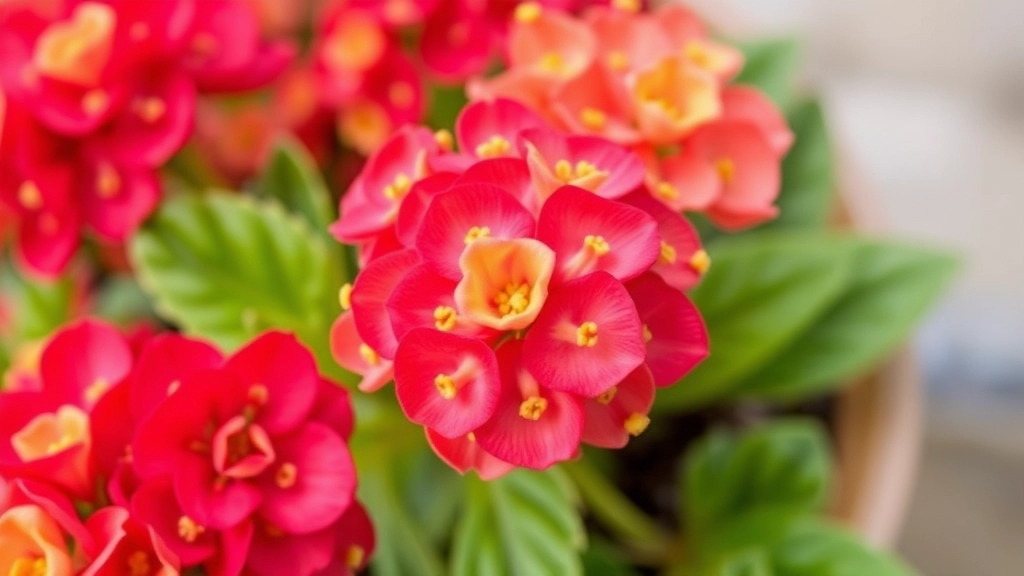
Harvesting Kalanchoe Seeds
Ever wondered how to harvest Kalanchoe seeds from flowers? You’re in the right place. I’ve got some practical tips to help you get started. First, it’s crucial to identify when the seeds are ready for collection. Look for flowers that have fully bloomed and begun to dry out. This is a sign that the seeds are mature and ready to be harvested.
Tools You’ll Need
Next, you’ll need the right tools. A small pair of scissors and a paper bag will do the trick. Carefully snip the dried flowers and place them in the bag. After that, gently shake the bag to release the seeds. Store them in a cool, dry place until you’re ready to plant.
Stay Tuned
Stay tuned for more on sowing and germinating those seeds.
How to Harvest Kalanchoe Seeds from Flowers
Harvesting Kalanchoe seeds can seem daunting, but with the right approach, it becomes a straightforward process. Many gardeners worry about the best time and method for collecting these seeds to ensure a successful planting season.
Understanding the Flower Lifecycle
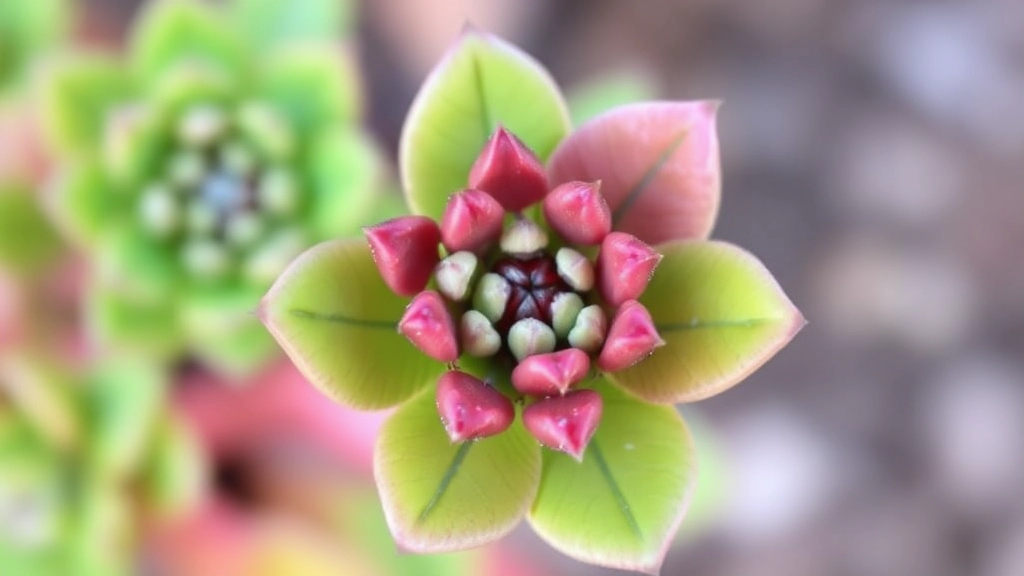
Kalanchoe plants produce beautiful flowers, which eventually give way to seed pods. Recognising when these pods are ready for harvesting is crucial.
Signs of Readiness
- Dry Seed Pods: Wait until the pods have turned brown and dry.
- Cracking: If you notice the pods starting to crack open, it’s time to act.
- Timing: Generally, this occurs a few weeks after flowering.
Steps to Harvest Seeds
- Gather Tools: You’ll need scissors or pruning shears, a small container for the seeds, and gloves if desired.
- Select the Right Time: Early morning or late afternoon is ideal when the temperature is cooler.
- Cut the Pods: Use your scissors to cut the pods from the plant. Be gentle to avoid damaging the plant.
- Collect Seeds: Place the pods in your container. Once home, gently open the pods to release the seeds.
- Separate Seeds: Use a fine mesh sieve to separate the seeds from any debris.
By following these steps, you ensure that you collect viable Kalanchoe seeds for future planting. For more detailed information on caring for your Kalanchoe plants, you might find our Kalanchoe Flower Buds Blooming Tips and Complete Guide to Growing and Caring for Pink Kalanchoe Plants helpful.
Identifying When Kalanchoe Seeds are Ready for Collection
So, you’ve nurtured your Kalanchoe plants, and now you’re itching to collect those seeds. But when exactly is the right time? It can be a bit tricky, but I’ve got you covered.
Signs Your Kalanchoe Seeds Are Ready
- Flower Fading: Once the flowers start wilting and turning brown, it’s a sign that the seeds are maturing.
- Seed Pod Changes: Look for seed pods that have turned from green to a brown or tan colour. This is a clear indicator that they’re ready to harvest.
- Dryness: The pods should feel dry to the touch. If they’re still soft or moist, give them a little more time.
- Cracking Open: If you notice that the pods are beginning to split, it’s a sure sign that the seeds are ripe and ready for collection.
Timing is Key
- Seasonal Awareness: Kalanchoe typically flowers in the spring or summer. Keep an eye on the timeline; you’ll want to collect seeds shortly after they’ve dried up but before they scatter.
- Daily Checks: Make it a habit to check your plants daily during this time. You don’t want to miss the perfect moment!
The Collection Process
Once you’ve identified that your seeds are ready, it’s time to gather them.
- Gentle Handling: Use a pair of scissors or garden shears to snip the seed pods carefully.
- Container Ready: Have a small container or envelope on hand to catch the seeds as they fall. Trust me, it saves you a lot of cleanup later!
- Labeling: Don’t forget to label your container with the date and type of Kalanchoe. You’ll thank yourself later when you’re ready to sow.
Tools and Techniques for Harvesting Kalanchoe Seeds
Harvesting Kalanchoe seeds can feel daunting, but with the right tools and techniques, it becomes a straightforward process.
Essential Tools for Harvesting
- Pruning Shears: A sharp pair of pruning shears is vital for clean cuts without damaging the flowers.
- Small Containers or Envelopes: Use these to collect and store the seeds after harvesting.
- Gloves: Wearing gloves can protect your hands from any sap or irritants, especially if you’re sensitive.
- Tweezers: Helpful for picking up small seeds without losing them.
- Labels: For keeping track of different seed varieties or harvest dates.
Techniques for Harvesting Seeds
- Timing is Key: Wait until the flower heads have dried and turned brown. This indicates that the seeds are mature and ready for collection.
- Cutting the Flower Heads: Use your pruning shears to carefully cut the flower heads, ensuring you leave a small stem attached for easier handling.
- Collecting Seeds: Gently shake the dried flower heads over your container or envelope. The seeds should fall out easily.
- Separating Seeds from Chaff: If necessary, you can sift through the collected material to separate the seeds from any remaining plant debris.
- Labeling: Don’t forget to label your containers with the date and type of Kalanchoe, as this will help you keep track of your seeds.
For more detailed guidance on growing Kalanchoe from seeds, check out our comprehensive article on how to grow Kalanchoe Blossfeldiana from seeds. Additionally, if you’re interested in learning about the health benefits of different Kalanchoe varieties, read our article on the medicinal uses and health benefits of Kalanchoe Brasiliensis.
Best Practices for Storing Kalanchoe Seeds
After successfully harvesting your Kalanchoe seeds, the next crucial step is ensuring they remain viable for future planting. Proper storage is essential for maintaining seed health and maximizing germination rates.
Why Seed Storage Matters
Have you ever wondered why some seeds thrive while others fail to sprout? The answer often lies in how they are stored. Kalanchoe seeds can be sensitive to moisture, light, and temperature. By following best practices in seed storage, you can preserve their vitality.
Key Storage Tips:
- Choose the Right Container:
- Use airtight containers, such as glass jars or plastic bags.
- Avoid cardboard boxes, as they can absorb moisture.
- Maintain a Cool Temperature:
- Store seeds in a cool, dark place.
- Ideal temperatures are between 5°C and 15°C (41°F to 59°F).
- Control Humidity Levels:
- Ensure the storage area is dry.
- Consider using silica gel packets in your containers to absorb excess moisture.
- Label Your Seeds:
- Clearly mark each container with the seed type and harvest date.
- This helps track age and ensures you plant fresh seeds.
- Avoid Sunlight Exposure:
- Keep seeds away from direct sunlight, as it can degrade their quality.
- A cupboard or drawer works well for this purpose.
Additional Considerations:
- Check for Pests:
- Regularly inspect your storage area for signs of pests or mold.
- If you notice any issues, address them immediately to protect your seeds.
By adhering to these best practices, you can significantly extend the shelf life of your Kalanchoe seeds, ensuring they remain ready for planting when the time comes.
Ideal Conditions for Sowing Kalanchoe Seeds
When it comes to successfully sowing Kalanchoe seeds, understanding the ideal conditions is crucial. Many gardeners often wonder about the best environment for these seeds to thrive.
Step-by-Step Guide to Germinating Kalanchoe Seeds
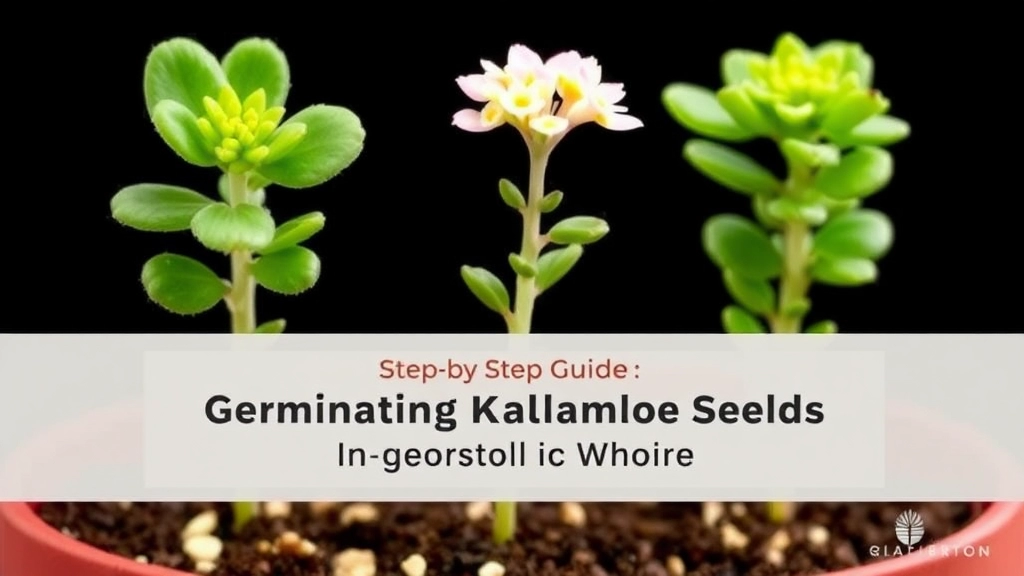
So, you’ve harvested those Kalanchoe seeds and are eager to see new plants sprout. But how do you get started with germination? Let’s break it down into simple steps that’ll have you feeling like a pro in no time.
1. Gather Your Supplies
Before anything else, make sure you have everything you need:
- Seed trays or pots: Small containers work best.
- Seed-starting mix: A light, well-draining soil is key.
- Watering can or spray bottle: For gentle watering.
- Plastic wrap or a humidity dome: To keep moisture in.
2. Prepare the Soil
Fill your trays or pots with the seed-starting mix.
- Leave about half an inch of space at the top.
- Lightly moisten the soil, but don’t soak it. You want it damp, not dripping.
3. Sowing the Seeds
Now comes the fun part!
- Scatter the Kalanchoe seeds evenly over the soil surface.
- Don’t bury them: Kalanchoe seeds need light to germinate, so just press them gently into the soil.
4. Create a Humid Environment
Cover the trays with plastic wrap or a humidity dome.
- This helps keep the moisture in, creating a mini greenhouse effect.
- Check daily to ensure the soil remains damp but not soggy.
5. Find the Right Spot
Place your trays in a warm, bright location but out of direct sunlight.
- Aim for a temperature around 20-25°C (68-77°F) for optimal germination.
6. Be Patient
Germination can take anywhere from 2 to 4 weeks.
- Keep an eye on the moisture level and remove the cover once you see the first sprouts.
7. Light Up the Seedlings
Once your seeds have germinated, it’s time to give them plenty of light.
- If natural light is limited, consider using grow lights for about 12-16 hours a day.
8. Thin Out the Seedlings
As your Kalanchoe seedlings grow, you may need to thin them out.
- If they’re too crowded, snip the weaker ones at the base to give the stronger ones room to thrive.
Caring for Kalanchoe Seedlings During Early Growth
Once you have successfully germinated your Kalanchoe seeds, the next crucial step is to ensure your seedlings thrive during their early growth phase.
Many new gardeners worry about how to provide the right conditions for their young plants.
Here’s what you need to know to care for your Kalanchoe seedlings effectively:
Transplanting and Growing Mature Kalanchoe Plants
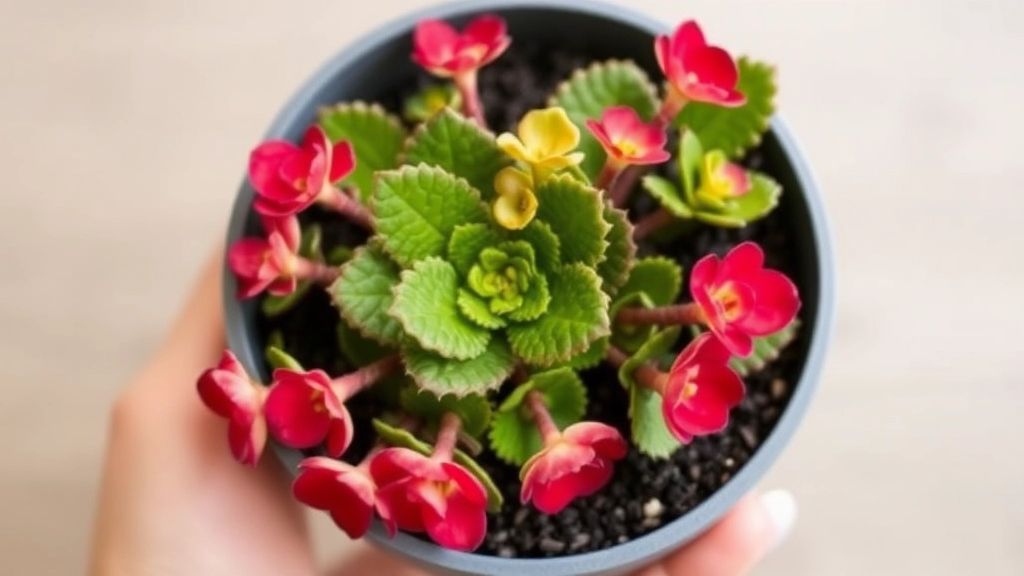
So, you’ve nurtured those little Kalanchoe seedlings, and now it’s time to take the next big step: transplanting them into larger pots or your garden. It can be a bit nerve-wracking, but don’t worry; I’ve got your back!
When to Transplant
You’ll know it’s time to transplant your Kalanchoe when:
- Seedlings are 3-4 inches tall: This is usually a good height for handling.
- Roots are visible: If you see roots peeking out of the drainage holes, it’s a sign they need more space.
- Two to three sets of true leaves: This indicates they’re strong enough to handle the transition.
Choosing the Right Pot
- Size Matters: Pick a pot that’s about 2 inches larger in diameter than the current one.
- Drainage is Key: Ensure your pot has drainage holes to prevent root rot.
- Material Preference: Terracotta is great for Kalanchoe as it allows the soil to dry out more quickly.
Transplanting Steps
- Prepare the New Pot: Fill it with well-draining soil, like cactus mix or a blend of potting soil and perlite.
- Remove Seedlings Carefully: Gently squeeze the sides of the current pot to loosen the roots. Use a spoon or your fingers to lift them out, being careful not to damage the roots.
- Place in New Pot: Make a small hole in the new soil, place the seedling in, and cover the roots with soil. Don’t bury them too deep; the top of the root ball should be level with the soil surface.
- Water Lightly: Give them a gentle drink to settle the soil around the roots. Avoid soaking them; Kalanchoes prefer drier conditions.
Aftercare Tips
- Location: Keep them in a bright spot but out of direct sunlight for the first week.
- Watering: Let the soil dry out between waterings. Kalanchoes hate soggy roots!
- Fertilizing: Wait about a month before feeding them with a diluted cactus fertilizer.
Transplanting Kalanchoe can feel like a big deal, but it’s also super rewarding. Watching them grow into mature plants is a joy!
Common Issues and Solutions in Growing Kalanchoe from Seeds
As you embark on the journey of growing Kalanchoe from seeds, you may encounter various challenges. Understanding these common issues can help you navigate the process more smoothly.
Poor Germination Rates
One of the most frustrating problems can be low germination rates.
- Check Seed Freshness: Ensure your seeds are fresh; older seeds may have reduced viability.
- Optimal Conditions: Maintain the right temperature (around 20-25°C) and humidity levels.
- Proper Sowing Depth: Sow seeds on the surface of the soil rather than burying them too deep.
Leggy Seedlings
Leggy seedlings are often a sign of insufficient light.
- Increase Light Exposure: Place seedlings in a bright location or use grow lights.
- Rotate Seedlings: Ensure even light distribution by rotating your trays regularly.
Overwatering
Overwatering can lead to root rot, which is detrimental to young Kalanchoe plants.
- Well-draining Soil: Use a potting mix specifically designed for succulents.
- Water Sparingly: Allow the top inch of soil to dry out before watering again.
Pests and Diseases
Pests like aphids or diseases such as powdery mildew can affect your plants.
- Regular Inspections: Check your plants regularly for signs of pests.
- Natural Remedies: Use neem oil or insecticidal soap to manage infestations.
Nutrient Deficiency
Kalanchoe plants require certain nutrients for optimal growth.
FAQs on Kalanchoe Seeds from Flowers
When is the best time to collect Kalanchoe seeds?
The best time to collect Kalanchoe seeds is when the flowers start wilting and turning brown, and the seed pods have turned from green to a brown or tan colour. The pods should also feel dry to the touch and may begin to crack open, indicating that the seeds are ripe and ready for collection.
How can I ensure I don’t miss the perfect moment to collect Kalanchoe seeds?
Make it a habit to check your Kalanchoe plants daily during the flowering season, typically in spring or summer. Collect seeds shortly after the pods have dried up but before they scatter.
What is the proper way to collect Kalanchoe seeds?
Use a pair of scissors or garden shears to snip the seed pods carefully. Have a small container or envelope on hand to catch the seeds as they fall. Don’t forget to label your container with the date and type of Kalanchoe.
How should I store Kalanchoe seeds to ensure they remain viable?
Store Kalanchoe seeds in airtight containers, such as glass jars or plastic bags, in a cool, dark place with temperatures between 5°C and 15°C (41°F to 59°F). Ensure the storage area is dry, and consider using silica gel packets to absorb excess moisture. Label your containers with the seed type and harvest date, and keep them away from direct sunlight.
What supplies do I need to germinate Kalanchoe seeds?
You will need seed trays or small pots, a light, well-draining seed-starting mix, a watering can or spray bottle, and plastic wrap or a humidity dome to keep moisture in.
How do I sow Kalanchoe seeds?
Fill your trays or pots with seed-starting mix, leaving about half an inch of space at the top. Lightly moisten the soil, scatter the Kalanchoe seeds evenly over the soil surface, and press them gently into the soil without burying them, as they need light to germinate.
What is the ideal environment for germinating Kalanchoe seeds?
Cover the trays with plastic wrap or a humidity dome to keep moisture in and place them in a warm, bright location out of direct sunlight. Aim for a temperature around 20-25°C (68-77°F) for optimal germination. Check daily to ensure the soil remains damp but not soggy.
How long does it take for Kalanchoe seeds to germinate?
Germination can take anywhere from 2 to 4 weeks. Keep an eye on the moisture level and remove the cover once you see the first sprouts.
When should I transplant Kalanchoe seedlings?
Transplant your Kalanchoe seedlings when they are 3-4 inches tall, have roots visible through the drainage holes, and have two to three sets of true leaves.
What type of pot and soil should I use for transplanting Kalanchoe seedlings?
Choose a pot that’s about 2 inches larger in diameter than the current one and ensure it has drainage holes to prevent root rot. Use well-draining soil, such as cactus mix or a blend of potting soil and perlite.
What are the aftercare tips for transplanted Kalanchoe seedlings?
Keep the transplanted seedlings in a bright spot but out of direct sunlight for the first week. Let the soil dry out between waterings, as Kalanchoes prefer drier conditions. Wait about a month before feeding them with a diluted cactus fertilizer.
References
-
How to Collect Kalanchoe Seeds
-
Growing Kalanchoe from Seed
-
How to Grow Kalanchoe