Kalanchoe Daigremontiana Propagation
If you’re keen on Kalanchoe Daigremontiana propagation, you’re in the right place. Known as the “Mother of Thousands,” this plant is a favourite among succulent enthusiasts due to its unique ability to produce plantlets along its leaf edges. These small plantlets can easily be propagated to grow new plants, making it an exciting project for any gardener.
Getting Started
To start, timing is crucial. The best time for propagation is during the plant’s active growth phase. Begin by preparing the mother plant, ensuring it’s healthy and well-watered.
Propagation Steps
- Carefully remove the plantlets from the leaf edges.
- Plant them in a suitable soil mix.
- Ensure proper moisture and air circulation.
- Provide the right light and temperature conditions for optimal growth.
With these steps, you’ll be on your way to successfully propagating your Kalanchoe Daigremontiana.
Choosing the Right Time for Propagation
When is the best time to propagate your plants?
This question often weighs heavily on the minds of plant enthusiasts. Timing can make all the difference in the success of your propagation efforts.
Key Factors to Consider:
- Seasonal Changes:
- Spring is generally the prime time for propagation.
- Plants are coming out of dormancy, showing new growth which can lead to higher success rates.
- Plant Type:
- Some plants have specific growth cycles.
- Research your plant’s natural habits to identify the optimal time. For example, understanding the step-by-step guide to Kalanchoe leaf propagation can help you achieve better results.
- Weather Conditions:
- Avoid extreme temperatures.
- Mild temperatures promote better rooting conditions.
- Plant Health:
- Ensure your mother plant is healthy before taking cuttings.
- A stressed or diseased plant will yield poor results. Learn how to fix drooping Kalanchoe leaves to maintain plant health.
Preparing the Mother Plant for Propagation
So, you’re ready to dive into propagation, but have you thought about how to prep your mother plant?
This step is crucial because a healthy mother plant means healthy plantlets.
- Choose the Right Time: Spring or early summer is ideal. The plant is actively growing, making it easier to take cuttings.
- Inspect for Health: Look for any signs of pests or diseases. A sick plant can pass on issues to your new cuttings.
- Prune Wisely: Trim away any dead or yellowing leaves. This encourages new growth and gives you the best cuttings.
- Watering: Give your mother plant a good drink a day before you take cuttings. A hydrated plant is more resilient during the process.
- Fertilise Lightly: A light feed a week before propagation can give your plant a nutrient boost, but don’t overdo it. Too much fertiliser can stress it out.
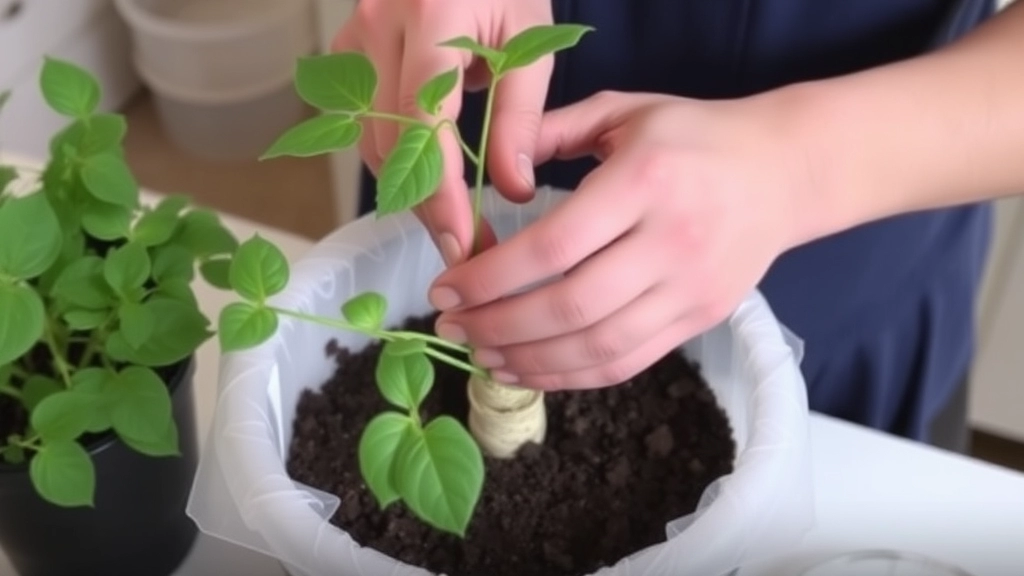
Once you’ve chosen the right time for propagation, it’s essential to focus on the next crucial step: removing and preparing the plantlets. This stage can often be daunting for many, as it involves careful handling to ensure the best chance of success.
When you remove plantlets, you need to ensure that they are healthy and ready for their new environment. A hasty or careless approach can lead to damage, affecting their growth potential.
Steps for Removing Plantlets:
1. **Choose the Right Time:**
– Look for plantlets that are well-developed and have a healthy appearance.
– Ideally, they should have roots that are at least a few inches long.
2. **Use Clean Tools:**
– Sterilize your cutting tools to prevent any disease transmission.
– A sharp knife or scissors will provide a clean cut, reducing stress on the plant.
3. **Gently Remove the Plantlet:**
– Carefully detach the plantlet from the mother plant, ensuring you take some roots with it.
– Avoid pulling or yanking, as this can damage both the plantlet and the mother plant.
4. **Inspect the Plantlet:**
– Look for any signs of damage or disease.
– Trim away any unhealthy leaves or roots to promote better growth.
5. **Prepare for Potting:**
– Place the plantlet in a damp paper towel to keep it hydrated while you prepare its new home.
– If necessary, let the cut end dry for a few hours to form a protective callus.
By following these steps, you’ll set your plantlets up for a successful transition to their new pots. This preparation is vital for their growth and overall health. For more detailed guidance, you can refer to our [step-by-step guide on Kalanchoe propagation](https://planthq.org/stepbystep-guide-kalanchoe-propagation-from-leaves/) and also check out how to [plant Kalanchoe in a pot](https://planthq.org/how-to-plant-kalanchoe-in-a-pot-stepbystep-guide/).
Best Soil Mix for Plantlet Growth
When propagating plantlets, one of the most common concerns is choosing the right soil mix.
What type of soil will best support healthy growth?
The answer lies in understanding the needs of your specific plant species.
Essential Components of a Quality Soil Mix
For optimal plantlet growth, consider the following components:
- Peat Moss: Retains moisture while providing aeration.
- Perlite: Enhances drainage and prevents soil compaction.
- Vermiculite: Improves moisture retention and nutrient availability.
- Compost: Adds essential nutrients and beneficial microorganisms.
Recommended Soil Mix Ratios
A well-balanced soil mix can be achieved with these ratios:
- 40% Peat Moss
- 30% Perlite
- 20% Vermiculite
- 10% Compost
This combination ensures that your plantlets have the right environment to thrive.
Importance of pH Levels
Don’t overlook pH levels, as they play a crucial role in nutrient absorption.
Aim for a pH between 6.0 and 7.0 for most plant species.
You can easily test your soil with a pH meter or testing kit.
Customizing for Specific Plants
Different plants may have unique requirements.
For instance, succulents and cacti prefer a more gritty mix, while tropical plants thrive in a richer, moisture-retaining blend.
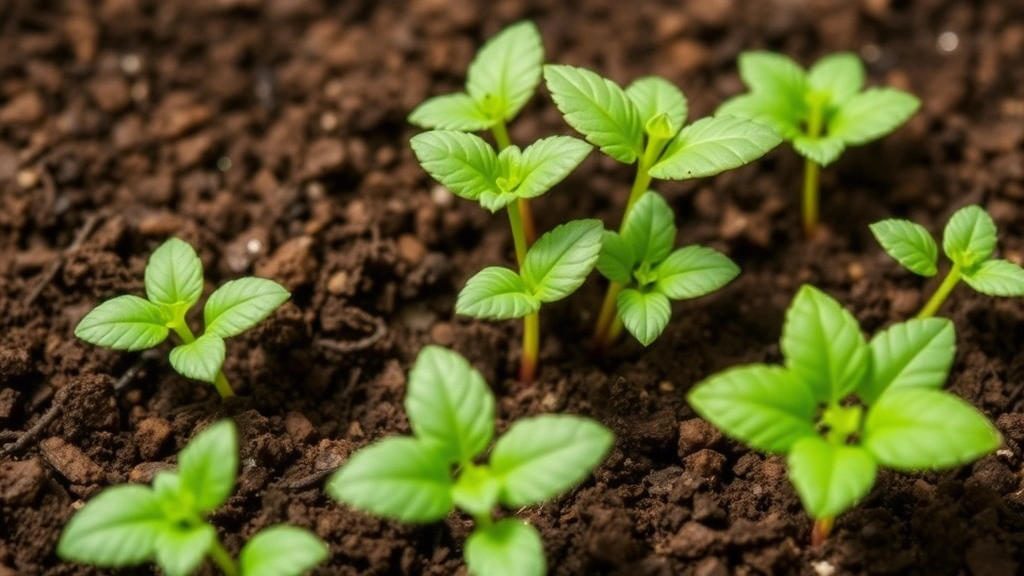
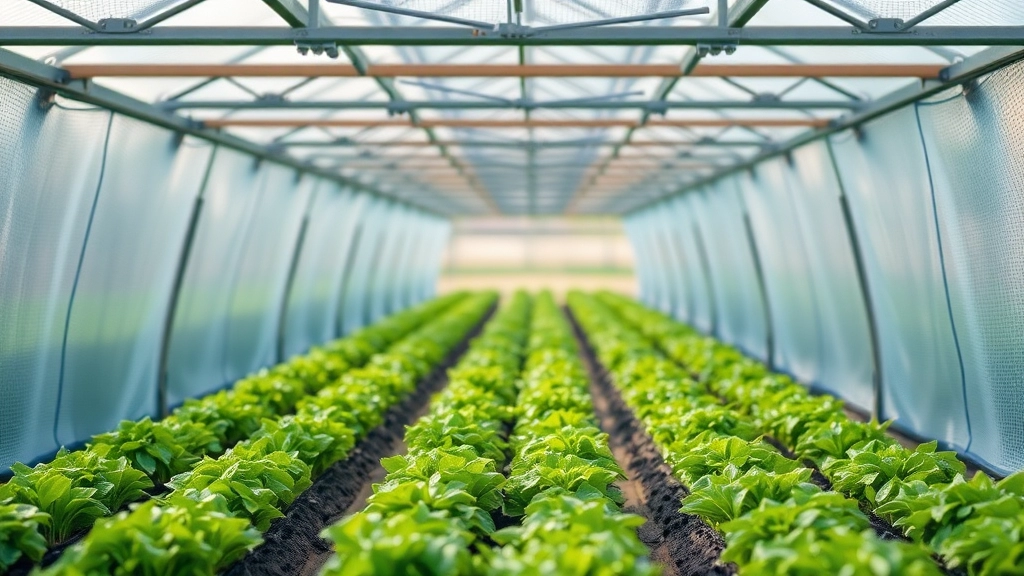
Ensuring Proper Moisture and Air Circulation
After preparing your plantlets for propagation, the next critical step is ensuring they receive the right moisture and air circulation.
Are you worried about overwatering or underwatering your new plantlets?
Maintaining the right balance is essential for their health and growth. Here’s how to achieve that:
- Watering Schedule:
- Water your plantlets when the top inch of soil feels dry. For more detailed tips, check out our optimal watering tips.
- Avoid letting the soil become soggy, as this can lead to root rot.
- Humidity Levels:
- Aim for a humidity level of 50-70%.
- Consider using a humidity dome or misting your plantlets to maintain moisture.
- Air Circulation:
- Ensure good air movement around your plantlets to prevent fungal diseases. Learn more about caring for different Kalanchoe species.
- A small fan can help, but avoid placing it directly on the plants.
- Drainage:
- Use pots with drainage holes to allow excess water to escape.
- A well-draining soil mix will also help prevent waterlogging.
Proper moisture and air circulation are vital for the successful establishment of your plantlets.
Light and Temperature Requirements for Optimal Growth
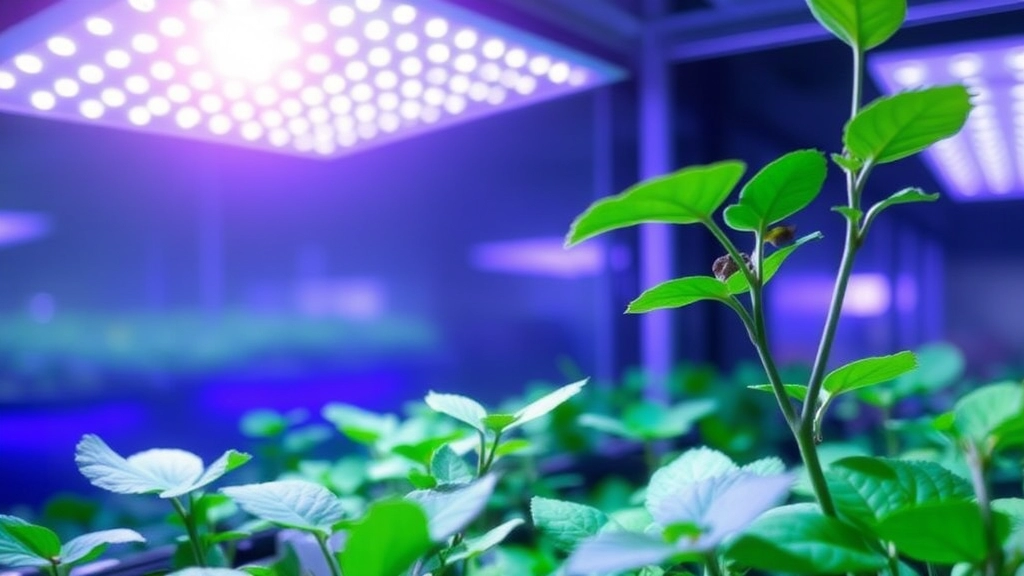
So, you’ve got your plantlets ready, and now you’re wondering how to give them the best shot at thriving.
Light Requirements:
- Bright, Indirect Light: Most plantlets love bright, indirect sunlight. Think of a cozy spot near a window where they can soak up the light without getting scorched.
- Avoid Direct Sunlight: Too much direct sun can lead to leaf burn. If you notice crispy edges, it’s time to move them a bit further from the window.
- Supplement with Grow Lights: If natural light is lacking, consider using grow lights. They mimic sunlight and can keep your plantlets happy.
Temperature Needs:
- Ideal Range: Most plantlets thrive in a temperature range of 18°C to 24°C.
- Avoid Drafts: Keep them away from chilly drafts or hot air from radiators. Sudden temperature changes can stress them out.
- Nighttime Drop: A slight drop in temperature at night is perfectly fine and can even encourage growth.
Quick Tips for Success:
- Rotate Your Plantlets: This helps them grow evenly and prevents them from leaning towards the light.
- Monitor Temperature: A simple thermometer can be your best friend.
- Be Mindful of Seasons: In winter, you might need to adjust their position to ensure they get enough light.
Managing Overcrowding and Potting Solutions
As your plantlets begin to thrive, you may notice signs of overcrowding, which can hinder their growth and overall health.
Why Overcrowding Matters
Overcrowding can lead to competition for resources such as light, water, and nutrients. This can stunt growth and make your plantlets more susceptible to diseases.
Signs of Overcrowding
- Stunted Growth: Plants appear smaller than expected.
- Yellowing Leaves: A sign of nutrient deficiency.
- Root Bound: Roots are circling the pot and may be emerging from drainage holes.
Potting Solutions
To ensure your plantlets have the space they need, consider the following potting strategies:
- Choose the Right Pot Size: Select pots that are 1-2 inches larger in diameter than the current pot for each plantlet.
- Repotting Frequency: Repot every 1-2 years or when you notice roots growing out of the drainage holes.
- Spacing: When planting multiple plantlets in one pot, ensure they are spaced at least 2-3 inches apart to allow for growth.
- Use Quality Pots: Opt for pots with good drainage holes to prevent waterlogging.
- Consider Dividing: If plantlets are too crowded, gently separate them and pot them individually.
Creating a Healthy Environment
Managing overcrowding not only involves repotting but also ensuring that your plantlets receive adequate light and air circulation. For more detailed advice on keeping your plants healthy, check out our Kalanchoe Panda Plant Care Guide and our Essential Kalanchoe Care Tips for Summer Success.
Common Propagation Issues and How to Fix Them
So, you’ve got your plantlets ready, but things aren’t going as smoothly as you’d hoped.
What’s going wrong?
1. Root Rot
- Symptoms: Yellowing leaves, mushy stems.
- Fix:
- Ensure proper drainage.
- Use a well-aerated soil mix.
- Avoid overwatering—let the soil dry out between waterings.
2. Wilting Plantlets
- Symptoms: Droopy leaves, stunted growth.
- Fix:
- Check moisture levels—too dry or too wet?
- Provide adequate humidity, especially for tropical plants.
3. Pests and Diseases
- Symptoms: Spots on leaves, webbing, or visible insects.
- Fix:
- Inspect regularly.
- Use neem oil or insecticidal soap for treatment.
- Quarantine affected plants to prevent spread.
4. Leggy Growth
- Symptoms: Stretched, weak stems.
- Fix:
- Increase light exposure.
- Rotate plants to ensure even growth.
5. Slow Growth
- Symptoms: No new leaves or roots.
- Fix:
- Reassess your soil mix—nutrient deficiency?
- Ensure the right temperature and light conditions.
6. Overcrowding
- Symptoms: Stunted growth, yellowing leaves.
- Fix:
- Thin out your plantlets.
- Repot into larger containers to give roots room to grow.
These issues can be frustrating, but with a little patience and care, you can get your plantlets back on track.
Toxicity Precautions for Pets and Children
When propagating plants, it’s essential to consider the safety of your household, particularly if you have pets or young children. Many common houseplants can be toxic if ingested, leading to health concerns that can be easily avoided with some foresight.
Understanding Plant Toxicity
Before bringing new plants into your home, it’s crucial to research their toxicity levels. Here are some common plants that may pose risks:
- Philodendron: Can cause irritation and swelling if ingested.
- Pothos: Known for its beautiful foliage but can lead to gastrointestinal distress.
- Dieffenbachia (Dumb Cane): Can cause severe mouth and throat irritation.
Safety Precautions
To ensure a safe environment, consider implementing the following strategies:
- Research Before Purchase: Always check if a plant is safe for pets and children before buying it.
- Placement Matters: Keep potentially toxic plants out of reach. Elevated shelves or hanging planters can help.
- Educate Family Members: Teach children about the importance of not touching or eating unfamiliar plants.
- Use Labels: Clearly label plants that are toxic to remind family members to exercise caution.
Alternatives to Toxic Plants
If you’re concerned about toxicity, consider opting for non-toxic alternatives. Some safe options include:
- Spider Plant: Safe for both pets and children.
- Boston Fern: A lush addition that poses no risk.
- Bamboo Palm: Adds a tropical feel without the toxicity.
By taking these precautions, you can enjoy your plant propagation journey without worrying about the safety of your loved ones. If you’re interested in learning more about safe plant options, check out our Mother of Thousands care guide for a pet-friendly succulent. Additionally, for those looking into Kalanchoe varieties, our Kalanchoe toxicity guide provides essential safety tips.
FAQs on Kalanchoe Daigremontiana Propagation
What is the best time to propagate Kalanchoe Daigremontiana?
Spring or early summer is ideal for propagating Kalanchoe Daigremontiana. The plant is actively growing during these seasons, which makes it easier to take cuttings.
How should I prepare the mother plant before propagation?
To prepare the mother plant, ensure it is healthy and free from pests or diseases. Prune any dead or yellowing leaves, water the plant a day before taking cuttings, and provide a light feed a week prior to propagation.
What soil mix is best for growing Kalanchoe Daigremontiana plantlets?
A well-balanced soil mix with 40% peat moss, 30% perlite, 20% vermiculite, and 10% compost is recommended. This combination retains moisture, enhances drainage, and provides essential nutrients.
What pH level should the soil be for optimal growth?
Aim for a pH level between 6.0 and 7.0 for most plant species, including Kalanchoe Daigremontiana, to ensure proper nutrient absorption.
What light conditions do Kalanchoe Daigremontiana plantlets need?
Plantlets thrive in bright, indirect light. Avoid direct sunlight to prevent leaf burn, and consider using grow lights if natural light is insufficient.
What temperature range is ideal for Kalanchoe Daigremontiana plantlets?
The ideal temperature range is between 18°C to 24°C. Avoid exposing the plantlets to drafts or sudden temperature changes.
How can I prevent root rot in my plantlets?
Ensure proper drainage, use a well-aerated soil mix, and avoid overwatering. Let the soil dry out between waterings to prevent root rot.
What should I do if my plantlets are wilting?
Check the moisture levels in the soil and adjust accordingly. Ensure adequate humidity, especially for tropical plants, to prevent wilting.
How can I deal with pests and diseases?
Inspect your plantlets regularly for signs of pests or diseases. Use neem oil or insecticidal soap for treatment and quarantine affected plants to prevent the spread.
Why are my plantlets growing leggy?
Leggy growth is often due to insufficient light. Increase light exposure and rotate the plants to ensure even growth.
What should I do if my plantlets are growing slowly?
Reassess your soil mix for nutrient deficiencies and ensure the plantlets are kept in the right temperature and light conditions to promote growth.
How can I address overcrowding in my plantlets?
Thin out your plantlets and repot them into larger containers to give the roots more room to grow and prevent stunted growth.
References
-
How to Propagate Plants
-
The Spruce: How to Propagate Plants
-
Royal Horticultural Society: Plant Propagation